 Yarisworld
Some one should install it into the vent thingie!!!!!! haha i think that'd look pretty nice
DIY: TACH INSTALLATION INSTRUCTIONS
216 posts · 192,823 views · page 2 of 5
Replies continued
I seriously considered it. It is perfect.
However, I noticed that the windows on the driver side were fogging up the other day while driving in the rain, even with the vent pointed that way. I can't imagine how bad it would be without an air vent.
However, I noticed that the windows on the driver side were fogging up the other day while driving in the rain, even with the vent pointed that way. I can't imagine how bad it would be without an air vent.
true. o so very true. I noticed that the windows tend to fog up relatively fast compared to other cars.
how about in the compartment? :P just in case u wanted to go sleeper :P
where did you hook up the illumination wire and HOW did you do
im new to the hole wiring thing and a step by step diy for just hook the two wires would be cool
im new to the hole wiring thing and a step by step diy for just hook the two wires would be cool
Originally Posted by KSIbucky ↑where did you hook up the illumination wire and HOW did you do
im new to the hole wiring thing and a step by step diy for just hook the two wires would be cool
Attach the tachometer "Illumination" (yellow wire) to the other add a fuse circuit. Install this add a circuit at terminal 8 or 9 (the red 10amp circuit across from #24 location). This will ensure that the tachometer "remembers" what color it was last on after you shut the car off.
how do you find a terminal # and how do you add a number go to page 11Originally Posted by joey1320 ↑Attach the tachometer "Illumination" (yellow wire) to the other add a fuse circuit. Install this add a circuit at terminal 8 or 9 (the red 10amp circuit across from #24 location). This will ensure that the tachometer "remembers" what color it was last on after you shut the car off.
Thanks for the DIY!
just installed my glowshift 7 color tach.
gotta love wire testers :)
posting pics after i make the wires invisible.
woot woot👍
just installed my glowshift 7 color tach.
gotta love wire testers :)
posting pics after i make the wires invisible.
woot woot👍
I installed my Speedhut gauge this weekend with the help of this DIY. However, my gauge has two Illumination wires and two grounds. I guess one for the gauge and one for the shift LED. The LED's light up fine and so does the needle, but the backlight is very very dim. Any advice?
Bumpity Help Me!
i just got my speedhut guage in the mail today 😁 im installing it tomorrow. ill let you know what i find 👍Originally Posted by Ran Kizama ↑Bumpity Help Me!
glowshift coming next week, will post install pics also. I want mine on the other side of the steering wheel if possible though, that's where I'm used to looking on my other cars.
you know i was just thinking that and i had a thread posted for it under cosmetics and in the a-pillar guages thread
Yes, post pic. I'm interested in the speedhut tach.
one small question.. how do you guys attached the green tach wire? I know where it goes, but how is the best way to attach it? cut the blue-green wire from the ECU, then attaching all 3 ends together?
thanks!
thanks!
best way is to soldier it/ shrink wrap together, but they also sell 3-way t-type crimp connectors that will work good too. whatever you prefer. just dont twist it and elec. tape it 🙁
well.. i followed the instructions and the tach is not working.. one stupid question, the fuse (#24) i took from the box i need to attach it to the "add a fuse".. right? (i did it), is any special direction the fuse goes?
another question.. for the ground I needed to add some wire... but the wire is thicker that the tach black wire... that is a problem?
I tried everything... and nothing, the needle doesnt move, and no ilumination also.. Im using the glowshift. Any has this problem?
another question.. for the ground I needed to add some wire... but the wire is thicker that the tach black wire... that is a problem?
I tried everything... and nothing, the needle doesnt move, and no ilumination also.. Im using the glowshift. Any has this problem?
I've sent one glowshift back already, but yours is probably not the unit. Shouldn't be a problem with your ground wire size.
Have you hooked up 12v to the tach to make sure it lights up?
Do you have a way of testing a wire to see if there's juice in it?
Have you hooked up 12v to the tach to make sure it lights up?
Do you have a way of testing a wire to see if there's juice in it?
Red wire in #24.. with the 7.5 amp.
Yellow wire in #9 with the 10 amp.
* what happen if i do a wire jump in the "add a fuse" instead of puting the fuse?
i guess i will need to buy a tester to see what is going on..
Yellow wire in #9 with the 10 amp.
* what happen if i do a wire jump in the "add a fuse" instead of puting the fuse?
i guess i will need to buy a tester to see what is going on..
finally! is working! My mistakes, I didn't put the fuse in the slot B of the "add a fuse".. and then, I had to turn 180 the "add a fuse"..
It looks great!!!! I will post pictures later..
It looks great!!!! I will post pictures later..
well.. the radio now is not working.. ggrrr.. i need to read the other thread about the radio.. :/
Those Grote add-a-fuse things are $22 each here at NAPA. I'd need two and I didn't pay that much for the tach. Anybody know of any place to buy them for a reasonable amount?
Still gotta mount and wire the Tach yet (Glowshift white-faced 7-color 3 3/4" one). The instructions say "Red wire to Battery, Black to ground, Green to tach wire and white to lighting" But my tach has 3 long wires in a harness (Red,Black,Green) and 3 short (6" long) wires, Red, Black, and Yellow. Trying to find out where they all go, but Glowshift isn't answering their email. Why in heck would the short lighting wires need a separate hot and ground, and if they do, why not just tie them into the long red and black? Anyone got a clue? Please PM me.
US Model 2007 Yaris Meteorite Metallic
Fogs, Tach, Altezza black tail lights, side graphics, tinted windows, shorty antenna, sport shifter, short-throw shifter, hood gas strut, pedal covers, woodgrained dash, outside temp gauge, cruise control, chrome spoke hubcaps, rear spoiler, clear grill bra/rockshield, mud flaps, TRD muffler, K&N and re-routed air intake, retracting windshield sunshade, sirius radio, GPS, trailer hitch, Rocky Mountain Radar detector.
US Model 2007 Yaris Meteorite Metallic
Fogs, Tach, Altezza black tail lights, side graphics, tinted windows, shorty antenna, sport shifter, short-throw shifter, hood gas strut, pedal covers, woodgrained dash, outside temp gauge, cruise control, chrome spoke hubcaps, rear spoiler, clear grill bra/rockshield, mud flaps, TRD muffler, K&N and re-routed air intake, retracting windshield sunshade, sirius radio, GPS, trailer hitch, Rocky Mountain Radar detector.
Drifto do you have a side view picture of your speedhut gauge. Thx.
ill try to post it up tomorrowOriginally Posted by rwseattle ↑Drifto do you have a side view picture of your speedhut gauge. Thx.
Finally put the tach in. First I want to thank everyone for their imputs and help. Man oh man that was a big help. The installation was a piece of cake but do not use the owner's manual to reference the fuse slot numbers. Use the diagram on the fuse panel door/panel. If you go with the numbers as reference from the owner's manual the neighborhood kids will be learning a whole new language by the time you are done. #24 in the book is totally different than on the panel. Good thing for wireless internet, I took the laptop outside and kept referring back to this thread for details, photos and imput.
I used a Sun Super II Tach 3 3/8" WhiteFace. Looks good and should be easy to see in any light. As for the Add-A-Fuse. Don't pay big cash for the Grote's. AutoZone has the LittleFuse brand for $6.00 and it comes with spare fuses. Green and black package. Can't miss them.
I mounted it on the little air-vent hump on the driver's side just inboard of the A-pillar. I used a stainless steel self-tapping screw (figured with temp.changes and condensation could be a rust-bleed issue). I stayed far enough back to keep the screw from interfering with the twist action of the vent. (need that vent to defog the inside of the window).
Maybe an hour total time of install. Make it two with parts gathering and rereads of the instructions and the YarisWorld thread.
I used the #8 slot on the fuse panel and the light works just fine. The ground was perfect, thanks for the suggestion there. I ended up twisting and bending the metal tach mount a bit inboard to bring it into a favorable view for me. Mounted straight away on the hump made it appear that the tach was too much of a line of site at my left shoulder. Now I have it perfect in my peripheral.
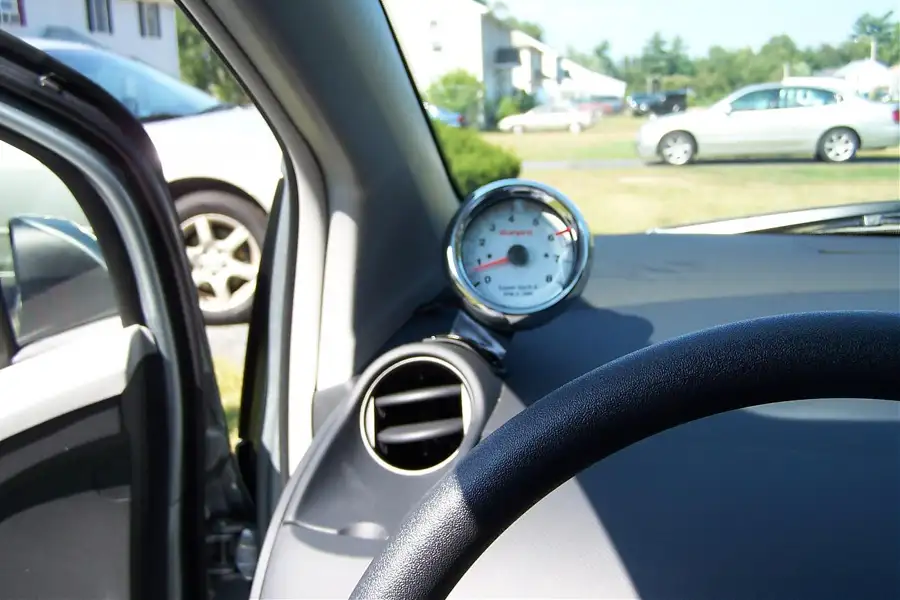
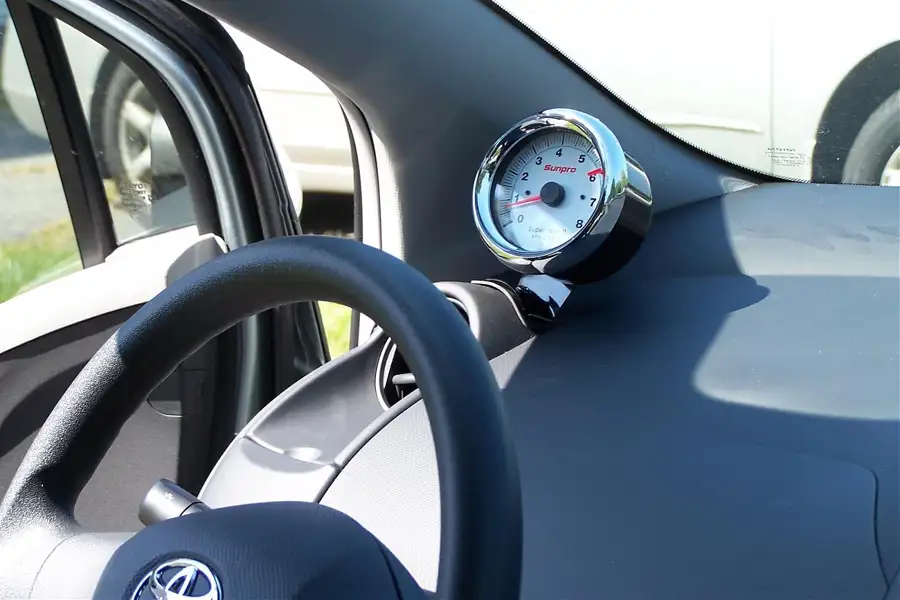
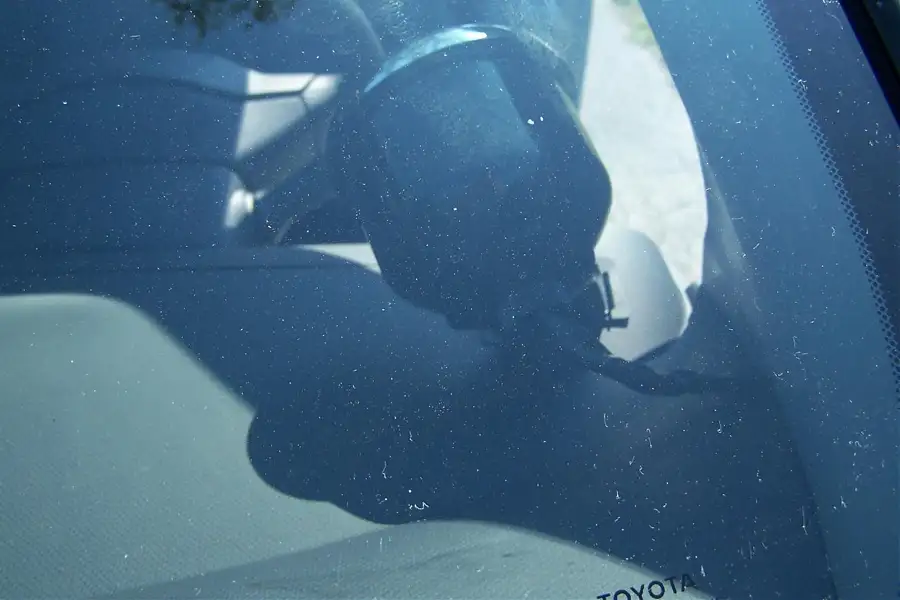
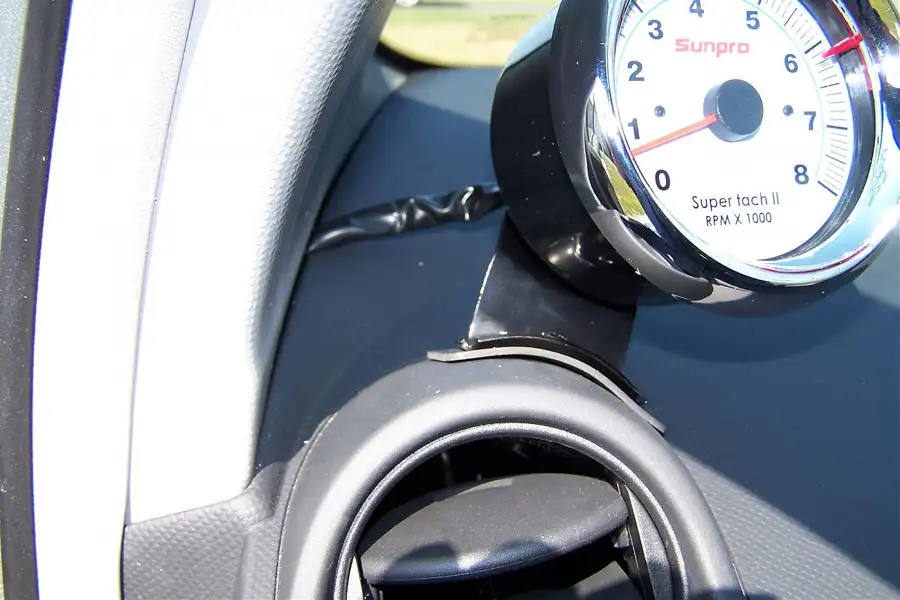
I ran the wires between the pillar panel and the dash. I used a rat-tail file and filed a nice half circle to allow the wires to route without pinching them. As someone here had mentioned, take your time popping off the panels. The clips will break if you have goriila fingers.
I used a Sun Super II Tach 3 3/8" WhiteFace. Looks good and should be easy to see in any light. As for the Add-A-Fuse. Don't pay big cash for the Grote's. AutoZone has the LittleFuse brand for $6.00 and it comes with spare fuses. Green and black package. Can't miss them.
I mounted it on the little air-vent hump on the driver's side just inboard of the A-pillar. I used a stainless steel self-tapping screw (figured with temp.changes and condensation could be a rust-bleed issue). I stayed far enough back to keep the screw from interfering with the twist action of the vent. (need that vent to defog the inside of the window).
Maybe an hour total time of install. Make it two with parts gathering and rereads of the instructions and the YarisWorld thread.
I used the #8 slot on the fuse panel and the light works just fine. The ground was perfect, thanks for the suggestion there. I ended up twisting and bending the metal tach mount a bit inboard to bring it into a favorable view for me. Mounted straight away on the hump made it appear that the tach was too much of a line of site at my left shoulder. Now I have it perfect in my peripheral.
I ran the wires between the pillar panel and the dash. I used a rat-tail file and filed a nice half circle to allow the wires to route without pinching them. As someone here had mentioned, take your time popping off the panels. The clips will break if you have goriila fingers.
great job.
pictures coming either today or tomorrow
here it is your going to have to wait for in the day sorry
the car under want to race me
um ya this car also broke a record in utah
the car under want to race me
um ya this car also broke a record in utah
I don't usually need a tach for just driving around town, but I want one in the mountains to avoid over-revving on long steep downgrades. Gas engines don't have much compression braking ability compared to the Cummins diesel in my truck, so it's pretty easy to exceed redline in second or third gear on a 7% downgrade in a 5-speed Yaris or Scion.
I like the look of the AutoMeter model 2306 - it's a 2.5" pedestal mount, 6000rpm tach. I want to install one, but I have not been able to determine if it is compatible with the Yaris tach signal. I have tried emailing the manufacturer for tech support but no response after 10 days. Datcon also makes 4000 and 6000 rpm tachs with the plain black housing style that I want, but again I have not been able to determine if they are compatible.
I like the look of the AutoMeter model 2306 - it's a 2.5" pedestal mount, 6000rpm tach. I want to install one, but I have not been able to determine if it is compatible with the Yaris tach signal. I have tried emailing the manufacturer for tech support but no response after 10 days. Datcon also makes 4000 and 6000 rpm tachs with the plain black housing style that I want, but again I have not been able to determine if they are compatible.
does anyone have or know of any more detailed install instructions?
same sunpro II
with photos
THanks!!
same sunpro II
with photos
THanks!!
Sorry, this might be a bit unrelated, but can the instrument panel from a Yaris sedan be swapped into a Liftback?
I would start a new thread on this one I think soOriginally Posted by GrassrootsMS ↑Sorry, this might be a bit unrelated, but can the instrument panel from a Yaris sedan be swapped into a Liftback?
I recently installed a Sunpro Powerline Tach (CP2010/2012 type) and installed it on the steering wheel column. I also put in a blue LED to match my blue A/C controls. I am very happy with it, but these tachs are getting hard to find. Found mine on clearance for $20 at Pep Boys.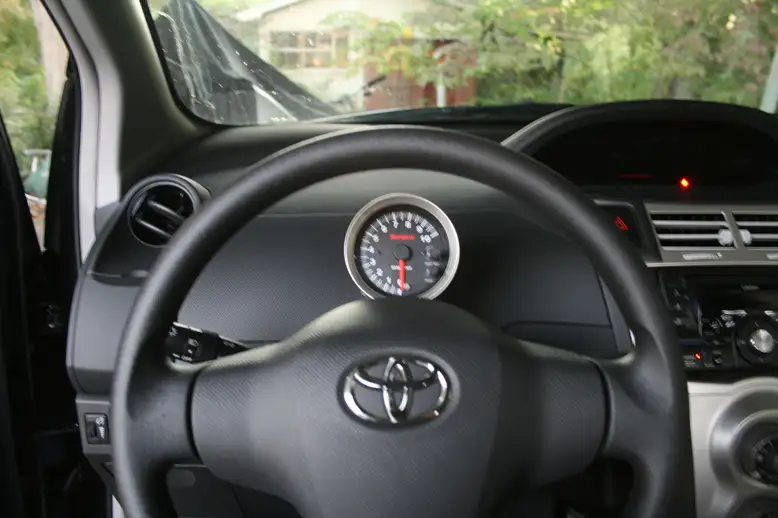
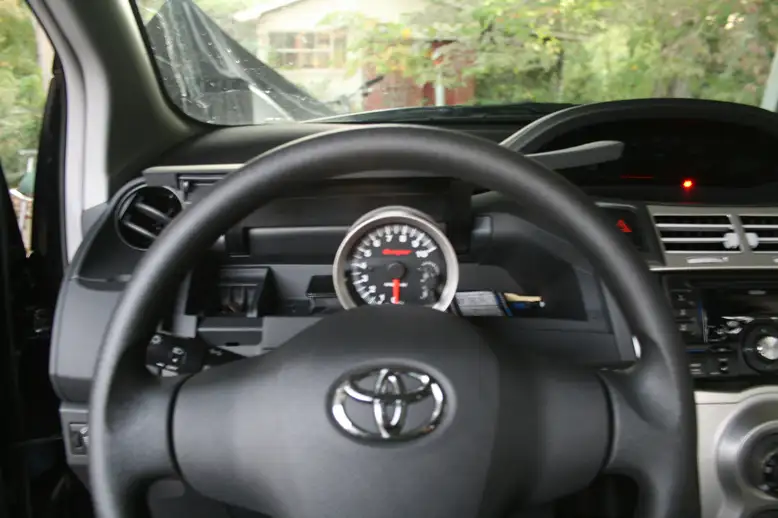
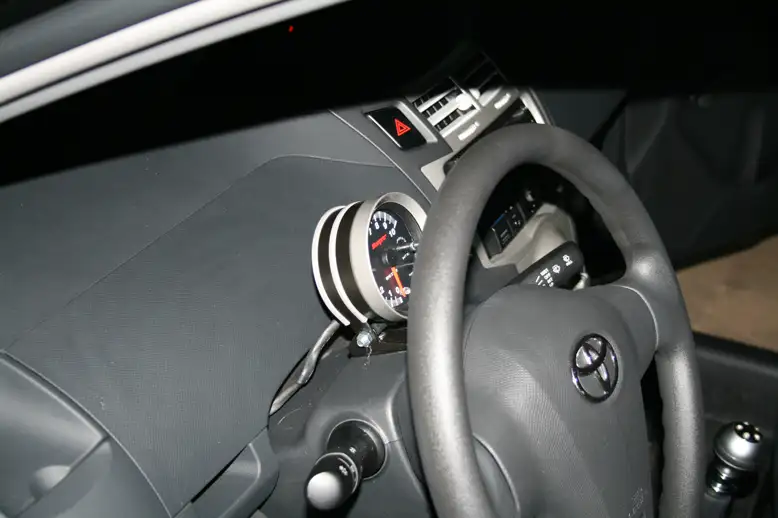
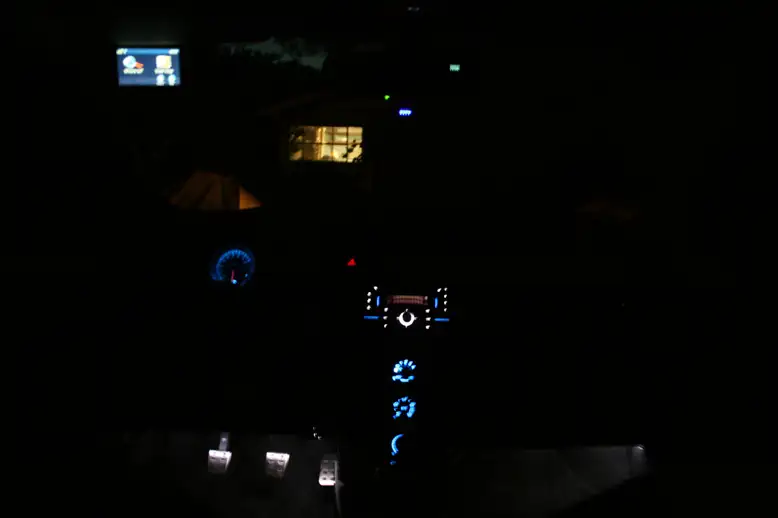

thats a nice looking sunpro. can u find more of these?
You can still find them on Ebay and Amazon, and maybe at a local auto parts store on the clearance shelf. The one I have is the CP2010, they also a have a white face model called the CP2012.Originally Posted by sportin83 ↑thats a nice looking sunpro. can u find more of these?
http://www.amazon.com/Sunpro-1-Perfo.../dp/B000CS98MQ
Sorry, replying to an old thread.
How is the reliability on these GlowShift gauges?
I see them pop up every time I enter "yaris" and "gauge" in Google.
How is the reliability on these GlowShift gauges?
I see them pop up every time I enter "yaris" and "gauge" in Google.
I think the general concensus is that "they look pretty cool." Personaly, I found the Tach needle response time barely acceptable--that's why I went with the Sunpro. I don't have any personal experience with any of the other Glowshift guages (water temp, oil press, etc.), but I have heard that they work just fine.Originally Posted by yarisugi ↑Sorry, replying to an old thread.
How is the reliability on these GlowShift gauges?
I see them pop up every time I enter "yaris" and "gauge" in Google.
I bought one of these in 2004, but with the white face. I was going toOriginally Posted by sanityassassinv2 ↑I recently installed a Sunpro Powerline Tach (CP2010/2012 type) and installed it on the steering wheel column. I also put in a blue LED to match my blue A/C controls. I am very happy with it, but these tachs are getting hard to find. Found mine on clearance for $20 at Pep Boys.
install it in my Geo Metro, but never did. Only used it to check the idle
settings, but temporarily hooking it up under the hood. It was great, and
I bought it mostly because it was compatible with the 3 cyl engine.
I paid $40 for it back then.
I do like that it is flat in the back, allowing you to open the driver's glovebox.
Not sure the white face would look good in the Yaris 🙁
plus my 2009 has the amber lit speedometer.
Did you mount it with sticky tape or drill through the steering column cover?
Originally Posted by Revsson ↑I bought one of these in 2004, but with the white face. I was going to
install it in my Geo Metro, but never did. Only used it to check the idle
settings, but temporarily hooking it up under the hood. It was great, and
I bought it mostly because it was compatible with the 3 cyl engine.
I paid $40 for it back then.
I do like that it is flat in the back, allowing you to open the driver's glovebox.
Not sure the white face would look good in the Yaris 🙁
plus my 2009 has the amber lit speedometer.
Did you mount it with sticky tape or drill through the steering column cover?
Drilled through the cover.
My brother and I did the install yesterday on my 2009 LB and I just wanted to note a few differences.
1. Tach wire on the OBD is tan but in the same bottom left location.
2. The dimmer wire that I used was one of the two brown wires. I chose the darker one and it works perfectly with the light switch (on with the headlights, off without).
3. I used an add-a-fuse with the #22 slot.
Thanks for the info on this thread!
1. Tach wire on the OBD is tan but in the same bottom left location.
2. The dimmer wire that I used was one of the two brown wires. I chose the darker one and it works perfectly with the light switch (on with the headlights, off without).
3. I used an add-a-fuse with the #22 slot.
Thanks for the info on this thread!
Congratulations on the install of the tach, but hey, let's see a pic of that installation ! 😛Originally Posted by XYaris ↑My brother and I did the install yesterday on my 2009 LB and I just wanted to note a few differences.
1. Tach wire on the OBD is tan but in the same bottom left location.
2. The dimmer wire that I used was one of the two brown wires. I chose the darker one and it works perfectly with the light switch (on with the headlights, off without).
3. I used an add-a-fuse with the #22 slot.
Thanks for the info on this thread!
all ive got for the moment. i was obviously psyched/suprised to see it working.
Does anybody market a really small tach? One with an analog (needle) display?
I bought this at autozone for 30 bucks...2 and 3/8". thats as small as i think would be practical. Any bigger would also be a little "boy racer" for my taste. In my online research i think i saw some watch-like tachs selling for way too much.
LOL OMG U HAVE TEH SAME TACH AS ME.Originally Posted by XYaris ↑all ive got for the moment. i was obviously psyched/suprised to see it working.
My hair isn't as curly though.
same as mine too
Originally Posted by ddongbapLOL OMG U HAVE TEH SAME TACH AS ME.
Does that interfere with the driver's glovebox at all?
i actually did not drill through the steering column cover and used a velcro strip to attach it. (kinda lame but effective) this way i can access the glove box if necessary.Originally Posted by Revsson ↑Does that interfere with the driver's glovebox at all?
definately not the same wire colors as my '09. good writeup though, it did help me get to where i needed to get to. the new tach signal wire is in its original location but is now light brown