Replies continued
CTScottUSA, CT · Feb 21, 2011#51 Originally Posted by sri ↑
Mine working fine and I hook the relay trigger to my low beam(LH) pin8 on D4. My fog light can only be turned on if I turn on the head light, which is what I want. The problem now is if I switch to high beam the fog light wont work. Is there any signal I can tap dimmer light? From the manual it stated pin9 but high beam also share same pin9.
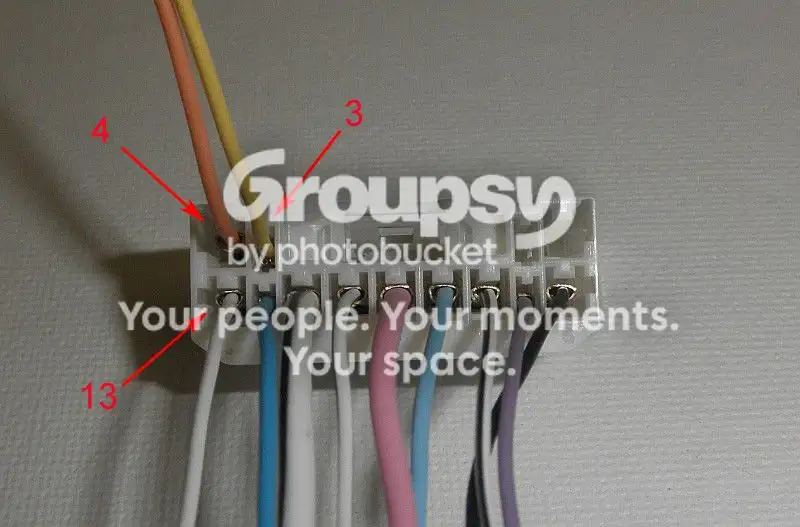
If you hook it to pin 13 they will turn on with the lows and highs, and will still turn off when the headlight switch is off.
Originally Posted by sri ↑
Seems like the wires position in reverse order. I tried to hook to last pin from right and it didn't work also. Forgot to mention, mine is sedan, J model and from Malaysia.
Picture lost · img546.imageshack.us
What year is your car? With the lack of the two wires on the top of the connector, it looks like yours was not factory wired for front fog lights.
Originally Posted by sri ↑
Car was made in 2008 and J model don't come with fog light installed.
OK. I don't have wiring diagrams for your area, so what I would do is to measure the voltage on each pin to ground with the headlight switch off and then with it in the parking light mode (one click). You are looking for a wire that measures 12V with the headlight switch off and then goes to 0V with it one click on.
how much would it cost to have it done professionally!??
auxmikeLI, New Yawk · Mar 6, 2011#55I've had my lights setup for almost 3 years and it's been real good to me thus far. I used the "Clowncar" method that works like a charm using my $14 OEM Toyota relay from Ebay.
I too could'nt get the lighted push button switch to work on my car, so I bought a simple black toggle switch from PepBoys
Also, the bulbs that come with these kits can be garbage, the gaskets on mine would'nt even allow the bulbs to fit snugly. I bought German OSRAM brand and the've lasted thus far without replacing them. Fit tight too!
djfrnkbuffalo ny · Mar 20, 2011#56hey i am having issue hooking up the wires on the inside for the fog ligth , i know here show step by step but my wires are different colors ,can some one help?
CTScottUSA, CT · Mar 20, 2011#57 Originally Posted by
djfrnk ↑ hey i am having issue hooking up the wires on the inside for the fog ligth , i know here show step by step but my wires are different colors ,can some one help?
Are your wires white and yellow?
i did this install this weekend and everything works fine except for one detail. When my headlights are on my fogs shut off, but when my headlights aren't on, my fog lights are able to turn on.
PLEASE HELP!!
spent way to much time on this.
T PexxIllinois · Apr 13, 2011#59anyone ?
1NZYaris1New Zealand · Apr 14, 2011#60 Originally Posted by
T Pexx ↑ anyone ?
switch the 2 wires on the switch 😁 around 👍
Originally Posted by
1NZYaris1 ↑ switch the 2 wires on the switch 😁 around 👍
could you be more specific please
I'm putting in a set of fogs and have the wires run the factory way thru the firewall, I have a 5 speed sedan and wonder where I can connect the wire to illuminate the switch?
This is the green wire from the switch next to the black wire correct?
EDIT: The green and white wire [for the automatics] that you tap into for the switch illumination is still wired for the 5spd!
The blue wire from the switch goes to pin 3 correct?
The last green wire from the switch goes to pin 4 or pin 13 if you want to use fogs with high beams and park lights correct?
Black is ground
PROX4x4CO · Jun 28, 2011#63 Originally Posted by
goku87 ↑ ORIGINALLY POSTED BY revnull PRE THE GREAT HACK OF '08
Survived through Google cache
This one was a pain in the ass to repost. Soooo mannnyyy picturessss!!! >.<
But at least it was saved so it could be reposted.
-----------------------------------------------------------------
First of all, I’d like to thank PK198105 for pointing me to Clowncar’s original post outlining this method of installation. It is far easier that the former method of running a wire through the firewall. In addition to the aftermarket fog light kit, you will need butt splice connectors, wire tap connectors, and the Toyota Denso fog light relay (Part# 90080-87026). The relay is very pricy from the dealer. I found one on ebay for $13 USD shipped. I have no way of knowing if this method will work on all models/years/geos of yari/vitz. If it doesn’t, see my other DIY.
Disclaimer: I'm not an electrician or an authorized Toyota installer. This is what worked for me. I am in no way responsible for you breaking, burning or otherwise destroying your car. If corrections need to be made to this guide, I will do so in my spare time. Feel free to PM me with suggestions/corrections/questions.
Note: While the stock Toyota instructions or not completely accurate for all generic installations, it was very helpful much of the wiring locations and bumper removal. Please use it as a reference.
The Toyota Guide
This is the box that arrived from an EBay seller in California. It's a respectable Taiwanese brand with a great OEM fit.
Picture lost · img212.imageshack.us
Picture lost · img340.imageshack.us
Picture lost · img260.imageshack.us
Picture lost · img266.imageshack.us
Picture lost · img266.imageshack.us
Remove the front bumper by following the Toyota factory instructions:
Picture lost · img211.imageshack.us
Layout the fog light harness:
Picture lost · img266.imageshack.us
Remove the factory inserts:
Picture lost · img340.imageshack.us
My bumper had some paint over spray that I had to peel off:
Picture lost · img341.imageshack.us
Slide the fog light assembly into the bumper slots:
Picture lost · img266.imageshack.us
Use the included screws to secure the other side of the assembly:
Picture lost · img185.imageshack.us
Plug in the passenger's side fog light:
Picture lost · img442.imageshack.us
Route the harness along the front bumper zip tying it to the factory harness along the way:
Picture lost · img259.imageshack.us
Secure the harness to the factory harness and plug in the driver's side fog light:
Picture lost · img50.imageshack.us
With a 10mm wrench, loosen the grounding bolt on the driver's side near the head light:
Picture lost · img185.imageshack.us
Attach the fog harness ground wire to the frame and retighten:
Picture lost · img259.imageshack.us
Just behind the driver’s side headlight, remove the cover to the fuse box. Route the harness from the bottom up alongside the stock harness:
Picture lost · img180.imageshack.us
Once the harness pokes through, pull all of the slack up. Don’t worry we are going to trim it to size:
Picture lost · img228.imageshack.us
The switch harness needs to be modified to function with the stock wiring. For the next step we have to cut out the red wire from relay connector. Clip the red wire close connector and pull it out:
Picture lost · img260.imageshack.us
Picture lost · img402.imageshack.us
I don’t know the “right” way to remove the white plastic connector. I just use a pair of diagonal cutters to snip off pieces until it fell off. When everything is said and done it should look like this:
Picture lost · img402.imageshack.us
Cut off the slack from the harness and use a butt splice to attach the new connector. Slide the metal end into either pin1 or pin2 of the connector shown below:
Picture lost · img252.imageshack.us
Put the cover back on the fuse box and reattach the front bumper:
Picture lost · img237.imageshack.us
OEM fit, gotta love it:
Picture lost · img182.imageshack.us
Pull down the hinged panel directly below the steering coulomb:
Picture lost · img260.imageshack.us
Remove the 2 screws that hold the panel on:
Picture lost · img260.imageshack.us
Remove the 2 screws that hold the kick plate:
Picture lost · img242.imageshack.us
Remove the screw near the steering wheel tilt lock lever:
[Picture Not Uploaded]
With the car turned on (power steering make this much easier) turn the wheel to the left and remove the screw:
[Picture Not Uploaded]
Now turn the wheel to the right remove the other screw:
[Picture Not Uploaded]
Turn off the car and pull the lower steering coulomb cover off:
[Picture Not Uploaded]
You will find the “D4” connector on the bottom left of the steering coulomb:
Picture lost · img120.imageshack.us
Pull the change cup out by pushing on the side. This will expose the fuse box:
Picture lost · img242.imageshack.us
Pull up the driver's side door rail and kick panel:
Picture lost · img153.imageshack.us
Unscrew the shift knob:
Picture lost · img237.imageshack.us
Pull up the parking brake and lift out the center switch plate. Push out the upper left blank:
Picture lost · img237.imageshack.us
Insert the new fog light switch and set the plate aside for later:
Picture lost · img266.imageshack.us
Use a 10mm socket to remove the bolt in the cup holder in the center console:
Picture lost · img266.imageshack.us
Lifting from the back of the console, remove the center console assembly exposing the factory harnesses underneath:
Picture lost · img402.imageshack.us
Now we must finish modifying the aftermarket harness. Cut the 2 black and 1 solid blue wire as well. The blue/green wire will not be used. Remove the electrical tape holding the end of the harness together. Once everything is pulled apart you should have black, solid blue and solid green wires left in the harness. Use a butt splice to reconnect the 2 black wires. (sorry I forgot to take pictures of the final modified harness):
Picture lost · img260.imageshack.us
On the switch side, pull down the harness cover to expose the internal splice of the 2 green wires. Cut the green wire closest to the black wire. You may need to elongate this wire with some scrap wire so it can reach it’s connecting point:
Picture lost · img260.imageshack.us
It should look something like this (except the black wire should still be in the harness):
Picture lost · img257.imageshack.us
Route the harness alongside the shifter:
Picture lost · img263.imageshack.us
Under the carpet and up the dash on the driver’s side.
Picture lost · img340.imageshack.us
Along the stock steering wheel harness up to the “D4” connector:
Picture lost · img248.imageshack.us
Connect the blue and green wires to pin3 (yellow) and pin4 (white) of the “D4” connector:
Picture lost · img258.imageshack.us
Run the remaining black wire to the left most wall and down to the kick panel. I coiled the slack and strapped it to the ODBII port harness in front of the fuse box.
Picture lost · img208.imageshack.us
Using a 10mm wrench, loosen the grounding bolt and attach the black ground connector:
Picture lost · img340.imageshack.us
Install the relay in the empty socket to the right of the fuse box:
[Picture Not Uploaded]
Disconnect the green/white cable from the automatic shifter assembly:
Picture lost · img263.imageshack.us
Attach the green wire (closest to the black wire) that we cut out earlier from the fog switch harness to the green wire in the factory harness:
Picture lost · img85.imageshack.us
That’s it! Now that our wiring is done we can test your new fog lights for proper operation and reinstall all of the interior panels. After reassembling the center console, plug all of the harnesses back in:
Picture lost · img263.imageshack.us
Push the switch plate back into the center console to complete the job:
Picture lost · img263.imageshack.us
Picture lost · img148.imageshack.us
We now have fully functional OEM fit fog lights:
Picture lost · img242.imageshack.us
Night shots:
Picture lost · img235.imageshack.us
Picture lost · img182.imageshack.us
Fog indicator light in the instrument cluster:
Picture lost · img338.imageshack.us
Green LEDs replaced with white:
Picture lost · img123.imageshack.us
-----------------------------------------------------------------
The following is a shortened converation later in the post regarding a fog light OEM switch LED issue that was discovered.
Awesome! thanks for the effort, will be installing mine this weekend!
Originally Posted by
CTScott ↑ Make sure you have a good connection on Pin 1 before trying to turn the fogs on, as they draw a decent amount of current.
TK's picture is just showing the connection for the switch lighting wires. You still have to make the connections to the headlight stalk connector.
Scott,
I got my headlight/foglight kit from Ebay installed everything (including the relay) but the switch that came with the foglight kit was unbelievably low quality. I bought another switch off of ebay and still waiting for it. Anyways, When i opened the D4 connector on the headlight stalk, the yellow wire that we are supposed to cut-off and connect two wires from the switch does not lead to anything apart from supply ground to the relay right? I dont know why we split that wire and connect the other wires from the switch to the D4 yellow wire that is open on the stalk side.
Can you please draw a diagram as how the switch (with led light) works related to the yellow wire (no 3 i assume?). All i know it that the switch bridges the ground to the relay.
Thanks!👍
Pin 3 and 4 go to nothing on the stalk (i.e. no pin on the stalk side). If you had an OEM stalk with the fog switch on it then it would those two pins and the fog switch would simply bridge them. Pin 3 goes to the negative side of the fog light relay and pin 4 is a headlight low beam switched ground.
Hopefully the ebay switch that you purchased is a four pin, not three pin illuminated switch, since the switching and illumination need to be separated.
PROX4x4CO · Jul 18, 2011#66 Originally Posted by
CTScott ↑ Pin 3 and 4 go to nothing on the stalk (i.e. no pin on the stalk side). If you had an OEM stalk with the fog switch on it then it would those two pins and the fog switch would simply bridge them. Pin 3 goes to the negative side of the fog light relay and pin 4 is a headlight low beam switched ground.
Hopefully the ebay switch that you purchased is a four pin, not three pin illuminated switch, since the switching and illumination need to be separated.
This is what I got from Ebay:
http://cgi.ebay.com/ebaymotors/ws/eB...=STRK:MEWNX:IT It is four pin (I hope it is the right kind) . so from what I understand is that we switch pin #3 to the ground (which powers the foglights) and pin #4 powers the LED white they have a common ground?
Thanks!
Originally Posted by
PROX4x4 ↑ This is what I got from Ebay:
http://cgi.ebay.com/ebaymotors/ws/eB...=STRK:MEWNX:IT It is four pin (I hope it is the right kind) . so from what I understand is that we switch pin #3 to the ground (which powers the foglights) and pin #4 powers the LED white they have a common ground?
Thanks!
No. Jumping 3 to 4 turns the fog lights on.
The LED needs to be connected to the illumination circuit. If you connect it to the fog light switching circuit, the LED will remain on all the time (even when the ignition is off). If you look at the attached document, which I recently put together for the MI fog light kit, it shows where to connect the LED to the connector for the lighting for the AT shift lever (the feed is present on both AT and MT cars). The green wire is + and the white is -. By using this feed for the LED, it will only light when the headlight switch is on and will dim with the other interior lights when you adjust the dimmer rheostat.
Originally Posted by
CTScott ↑ No. Jumping 3 to 4 turns the fog lights on.
The LED needs to be connected to the illumination circuit. If you connect it to the fog light switching circuit, the LED will remain on all the time (even when the ignition is off). If you look at the attached document, which I recently put together for the MI fog light kit, it shows where to connect the LED to the connector for the lighting for the AT shift lever (the feed is present on both AT and MT cars). The green wire is + and the white is -. By using this feed for the LED, it will only light when the headlight switch is on and will dim with the other interior lights when you adjust the dimmer rheostat.
Thanks! now that makes sense, I don't know why those manuals from after market foglights call for splitting pin#3 and switching the two pieces while the other end is open?.
Can i get the illumination power from under the dash? as I am planing on installing the switch where you have installed yours. 👍
Originally Posted by
PROX4x4 ↑ Thanks! now that makes sense, I don't know why those manuals from after market foglights call for splitting pin#3 and switching the two pieces while the other end is open?.
Can i get the illumination power from under the dash? as I am planing on installing the switch where you have installed yours. 👍
For the LED power, under the dash you can use the dimmer rheostat connector. The light green wire is - and the brown wire is +.
Thanks for all the great info and help, CTScott!!! I've been reading through this thread trying to decide which route I want to go, and you've saved me a bunch of questions and time.
bambam28Puerto Rico · Aug 15, 2011#71can someone tell me the part number for the OEM fog light switch? thanks!
angelo6334maryland · Mar 13, 2012#72Hi Im looking for the foglights to install on yaris. 2008 sedan 4 doors. Anyone knows where I can buy buy that kit thanks in advance
auxmikeLI, New Yawk · Mar 13, 2012#73Check with Garm from Micro Image. He sells all kinds of Yaris extras.
angelo6334maryland · Mar 14, 2012#74Thanks for the reply. I will check!!!
adeenkuala lumpur · Oct 6, 2013#75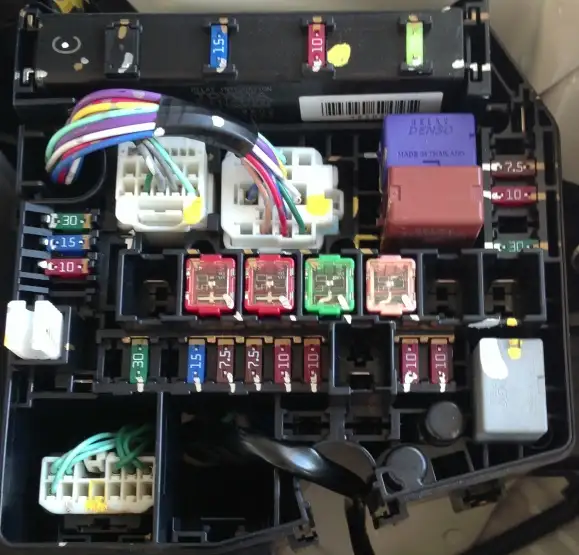
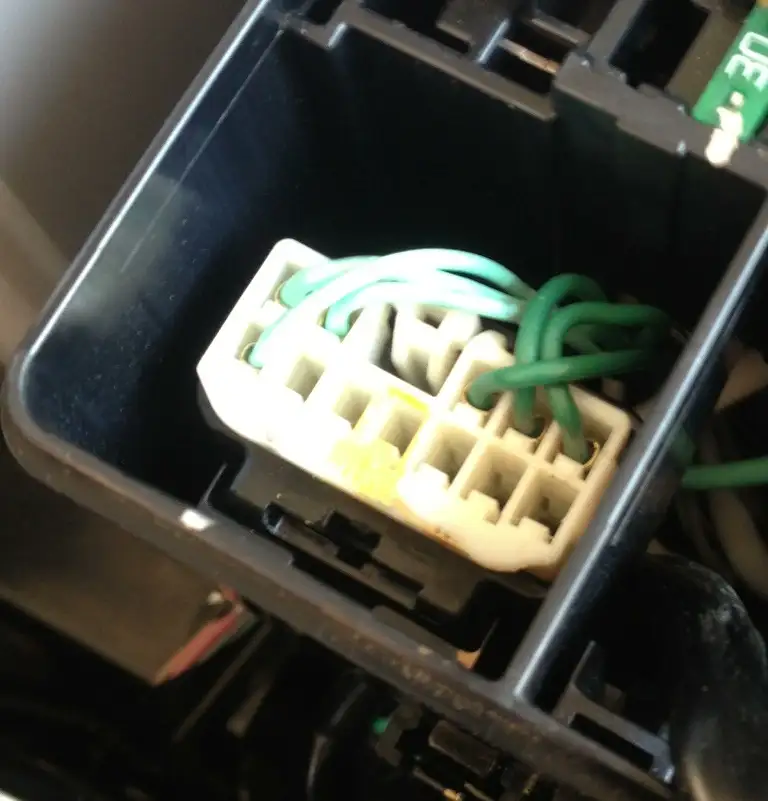
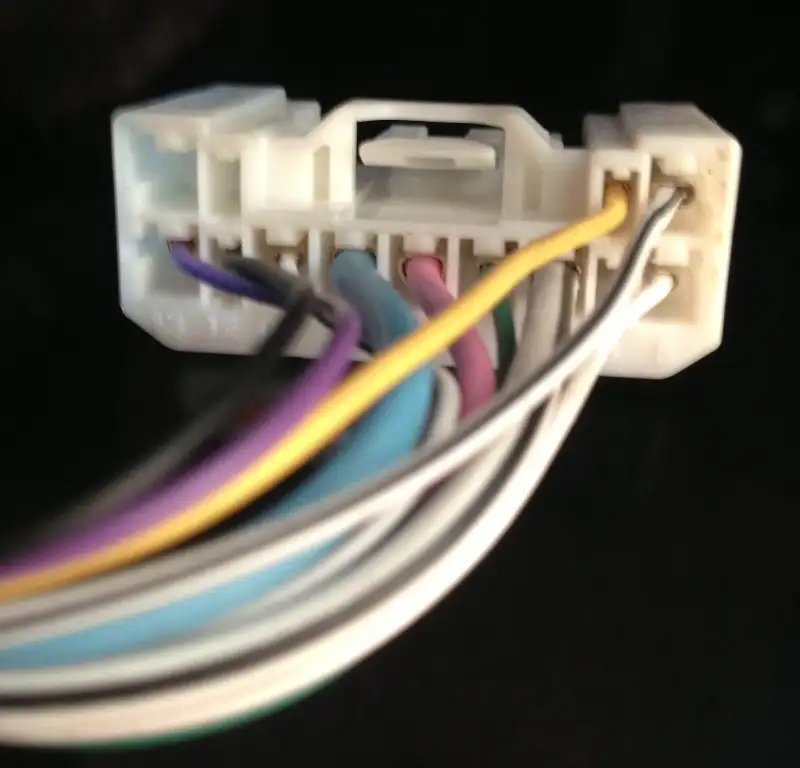
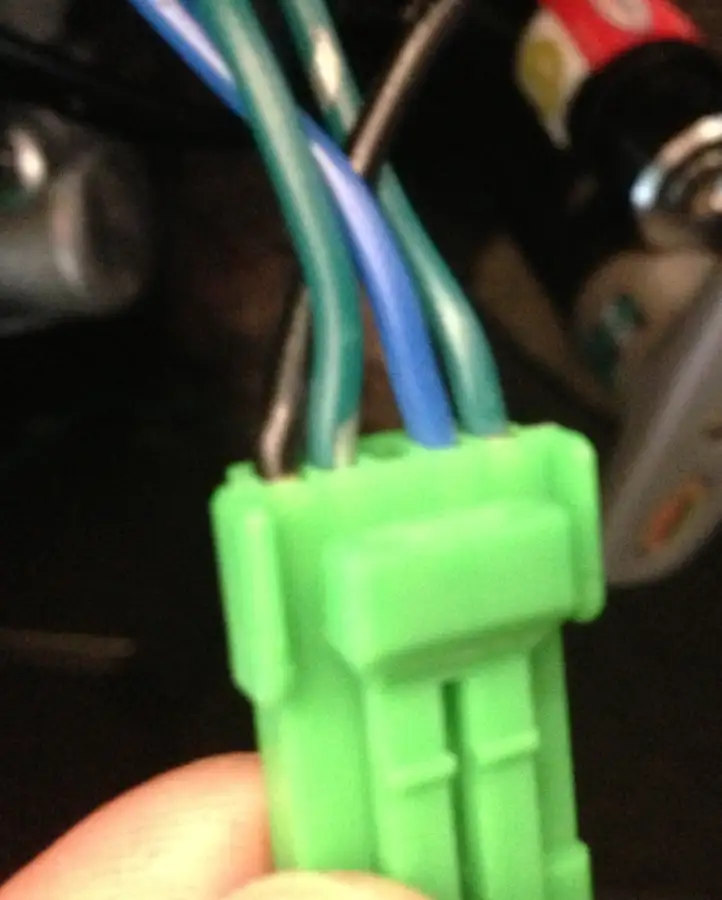
Hi Guyz....Sry for digging up an old post but I need some help here....
Need some insight on installing the Esuse Fog Lamp...
Ive put the blue and green wire to the yellow and white wire....it does trigger the relay when my parking light is also on.
then the green and black to the green wire (at the AT shifter) and to the ground...
im having trouble at the A24 connector since pin 1 & 2 have already been used... i've tried the other pins and nothing seems to work...
what am I doing wrong? since my lights arent working
Originally Posted by
adeen ↑ Hi Guyz....Sry for digging up an old post but I need some help here....
Need some insight on installing the Esuse Fog Lamp...
Ive put the blue and green wire to the yellow and white wire....it does trigger the relay when my parking light is also on.
then the green and black to the green wire (at the AT shifter) and to the ground...
im having trouble at the A24 connector since pin 1 & 2 have already been used... i've tried the other pins and nothing seems to work...
what am I doing wrong? since my lights arent working
Is your Yaris a Japanese market or European market one? If you can PM me the VIN, I can check more of the details on how fogs would get installed on your car.
mine is from the thailand factory....asian market.....it's a vios.....thanx for the quick reply
adeenkuala lumpur · Oct 6, 2013#78pm'ed u already....thnx CTscott
CTScottUSA, CT · Oct 6, 2013#79OK - Got your VIN. Your car is considered a "General" area car.
From what I see there should be another connector next to the one with the green wires that is a two row connector with 12 pins. That connector would be the one where pin 1 and 2 are the fog light pins. It may be a case where the cars which come with fog lights have that connector in the harness and those that don't do not.
adeenkuala lumpur · Oct 6, 2013#80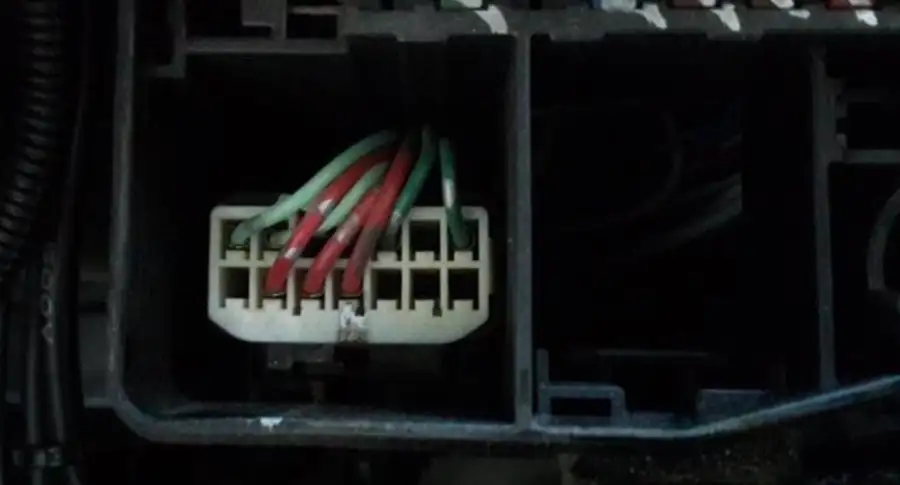
here's a car with fog lights in my area...the trd sportivo version....see the difference..?
so IYO, do u think my DIY can be salvaged?
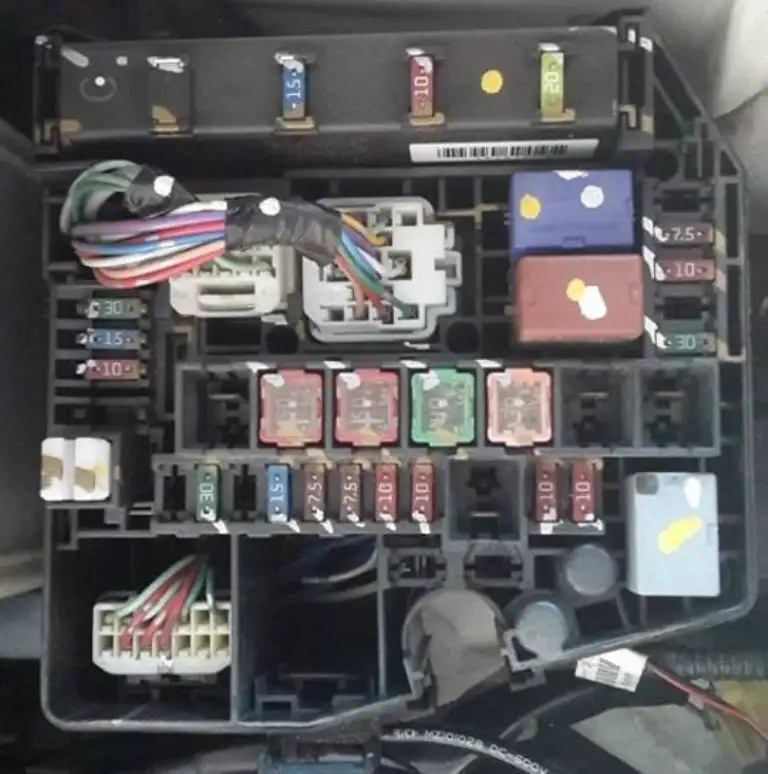
heres a full picture of the fuse block for the version with fog lights
I think you will need to run the feed for the lights through the firewall.
adeenkuala lumpur · Oct 6, 2013#83behind the relay in the cabin theres one yellow wire, two purple wires separately and two red wires in one socket...if i locate the red wire and connect the red wire from the fog light, would that suffice? i just want the fog light indicator to light up as it should
CTScottUSA, CT · Oct 6, 2013#84 Originally Posted by
adeen ↑ behind the relay in the cabin theres one yellow wire, two purple wires separately and two red wires in one socket...if i locate the red wire and connect the red wire from the fog light, would that suffice? i just want the fog light indicator to light up as it should
Using that red wire would be fine.
I actually recommend following the DIY in the link below, which I created for Micro Image instead, as the one in this thread leaves the switching and illumination circuits bridged, which results in the light on the switch being illuminated, even when the car is off.
http://microimageonline.com/forums/s...n-Instructionsok thx a bunch...
adeenkuala lumpur · Oct 6, 2013#86CTScott...what does pin 1 / pin 2 at the A24 Connector actually do? Does it trigger 12V when the fog light is on ?
CTScottUSA, CT · Oct 6, 2013#87 Originally Posted by
adeen ↑ CTScott...what does pin 1 / pin 2 at the A24 Connector actually do? Does it trigger 12V when the fog light is on ?
On the US market Yaris Pin 1 and 2 get fed 12V by the foglight relay when the switch is on.
On your car, that connector has a different designation than A24. I was thinking it was the same as the Japanese market Yaris, but seeing the three red wires in the position they are in, I now think your wiring is different than US and different than Japanese. I think you should measure the voltage on the pins the the locations of the 3 red wires with the fog light relay triggered on your car. I think you will find that either two of them (the two wires for the two front fog lights) or all three (which would also include the third wire for the rear fog light) will have 12 v on them.
i've measured the green wires on the connector which gave out 0.04v when the headlights were turned on and 0v when it was off....
i've also measured the voltage on the three pins where the red wires are, and unfortunately no voltage on them...
seems like i need to work harder to get the fogs to light up....thnx for the input CTScott..
ill try opening up the fuse block and c what's underneath...
CTScottUSA, CT · Oct 6, 2013#89 Originally Posted by
adeen ↑ i've measured the green wires on the connector which gave out 0.04v when the headlights were turned on and 0v when it was off....
i've also measured the voltage on the three pins where the red wires are, and unfortunately no voltage on them...
seems like i need to work harder to get the fogs to light up....thnx for the input CTScott..
ill try opening up the fuse block and c what's underneath...
OK. I would start from the other end (the wires leaving the fog light relay socket). The reds probably dead end at one of the junction connectors under the top of the dash.
ok....i'll get to it as soon as i've got time to spare....i'll update any progress...
adeenkuala lumpur · Oct 11, 2013#91i had my wire go through the firewall and connected it directly to the #3 pin of the foglight relay. works like a charm...thnx CTScott
For what it is worth, I threw together a video of my fog light install using the OEM light stalk. Hope I didn't leave anything out. It moves along rather fast at the beginning as I needed to keep it under 15 minutes for YouTube. Thanks go out as usual to CTScott for his in depth contributions on this mod as well as others he has come up with. Hope the link works.
https://www.youtube.com/watch?v=bilhPerqVEoBairjo, you knocked it out the park, man! Fantastic job and even the music is good here!
Thanks Mike...I never know how well received some of my videos will be. Hope it helps others out when they do thier install....thanks again.
auxmikeLI, New Yawk · Feb 3, 2014#95 Originally Posted by
bairjo ↑ Thanks Mike...I never know how well received some of my videos will be. Hope it helps others out when they do thier install....thanks again.
I priced the stalk at 95USD. Does that sound right?
Originally Posted by
auxmike ↑ I priced the stalk at 95USD. Does that sound right?
$91 is about the cheapest I have seen the OEM stalk go for. On all of mine, I used an illuminated switch that I mounted to the dash. It is the same one as well that is included in the Micro Image kit. If you want to save some money, I can ship you one for $10.
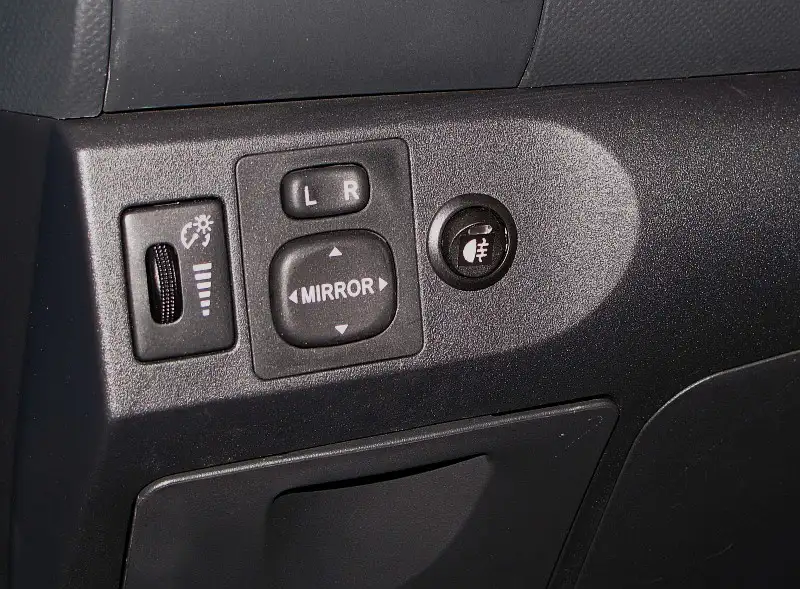
By the way, Bairjo, nice job with the video!
That's nice. Can you PM me paypal info? I'd like one..
auxmikeLI, New Yawk · Feb 3, 2014#98Also, can you tell me how I'd get it to light up? My current switch is between the seats but I can't figure out how the heck to get the light to work. The best I got was the light being constantly on ...
CTScottUSA, CT · Feb 3, 2014#99 Originally Posted by
auxmike ↑ Also, can you tell me how I'd get it to light up? My current switch is between the seats but I can't figure out how the heck to get the light to work. The best I got was the light being constantly on ...
The problem with the one that comes with the aftermarket kits is that the switching and illumination are tied together. To use the switch with the OEM wiring you have to separate the two by snipping one of the resistors off the circuit board within the switch.
The one that I use has separate wiring for switching and illumination, so you will have to connect 4 wires to hook it up. Two go to two wires on the headlight switch connector and the other two to two wires on the connector for the dimmer rheostat.
Well I was trying to upload photo copies of the directions out of the Toyota shop manual on how to properly adjust the fog lights but failed due to a "missing security token" whatever that means. Anyhow, I have not seen anything on the topic of adjustment. I'm having a little difficulty dialing one in to the proper height. Anyone care to share how you did your fog light adjustment and how did it go? By the way, my light stalk was $87 + 10 shipping. That arrangement CTScott has looks real slick....much better than the switch between the seats set-up. I had my switch between the seats on my 08 and really didn't care for it.
 Yarisworld
