Yarisworld
Disclaimer: I'm not an electrician or an authorized Toyota installer. This is what worked for me. I am in no way responsible for you breaking, burning or otherwise destroying your car. If corrections need to be made to this guide, I will do so in my spare time. Feel free to PM me with suggestions/corrections/questions.
Note: Aside from the A/C controls and automatic shifter lights, all other lights require soldering equipment and skills. If you do not own either or know someone who does, I suggest you pass on this DIY.
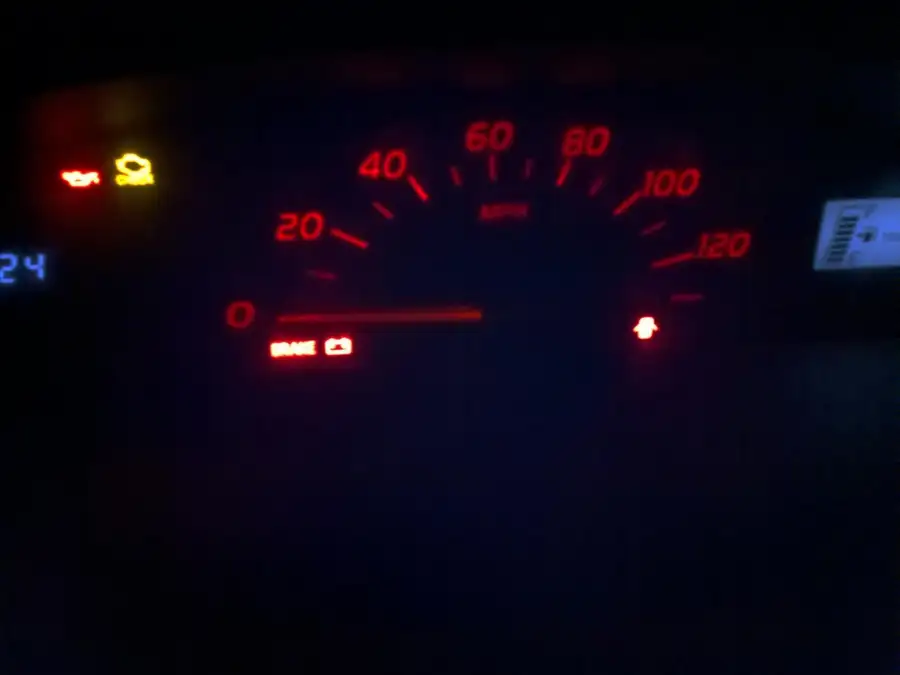
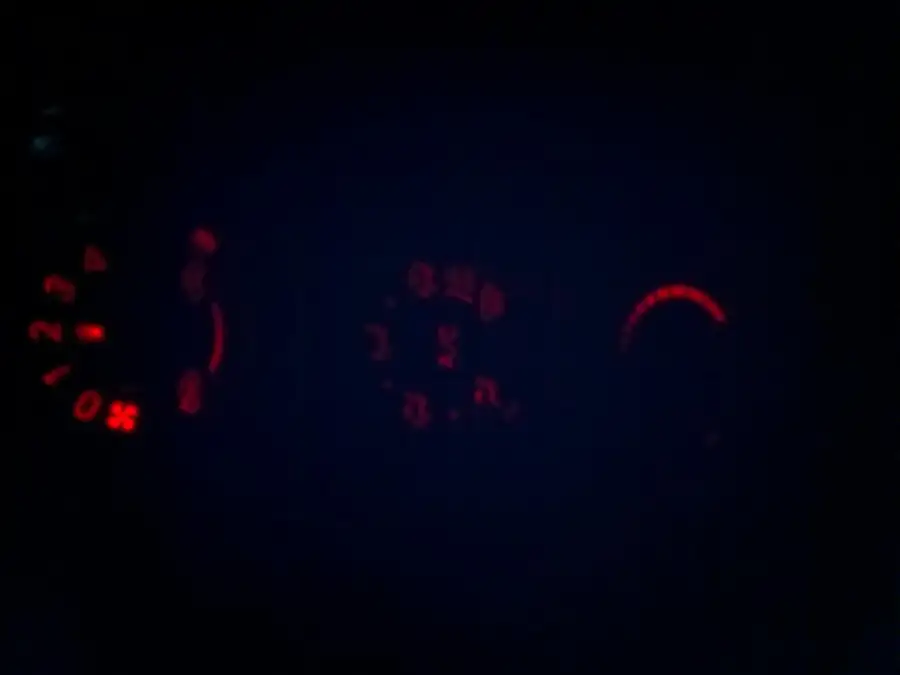
First off, much respect to vodkalush 🙌 for his original sedan DIY. This DIY is not a replacement for his DIY. It's more of a liftback specific addon. This DIY will cover changing the color of the lights in the stock radio, gauge cluster, center console switches, A/C controls, and door switches. I replaced the amber (orange) lights with white. Depending on the color you choose the part numbers will most certainly differ. I suggest you get more LEDs than you need for the job as some may get damaged during the install. I personally smoked at least 7 myself. 😁
Stuff you'll need
Top: Soldering Iron
Bottom: Cutters, tweezers, very small flathead screwdriver, de-soldering braid, solder, needle nose pliers
Unpictured: Standard size crosshead screwdriver
Picture lost · img184.imageshack.us
Parts:
http://autolumination.com/74.htm
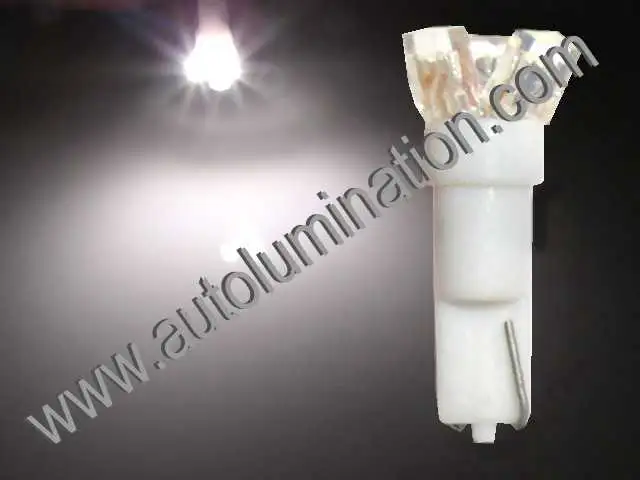
3 x Neo Wedge Based LED Bulbs (Type B): For the A/C controls
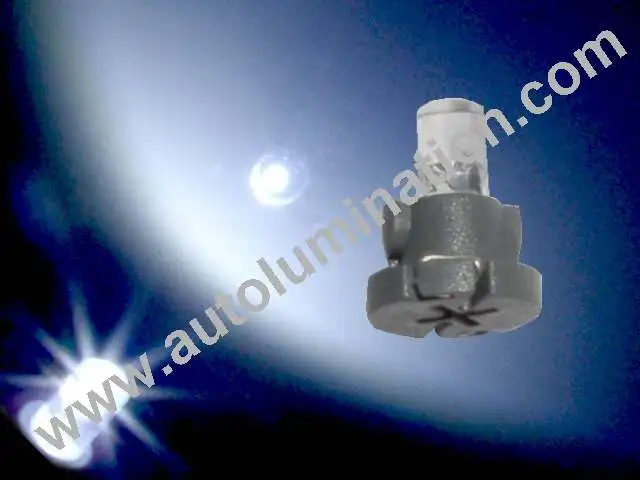
1 x Tri-Power 3 LED Bulb: For the Automatic shifter light
http://www.eled.com/product.asp?cata..._ID=E7104RWC-A
5 x E7104RWC-A - 3MM WHITE LED LAMP: For fog switch, door lock switch, drivers window switch, and A/C push button
http://www.eled.com/product.asp?cata...ID=EA3528RWC-A
15 x EA3528RWC-A - 3.5X2.8MM WHITE SMD LED: For speedo and tach gauges
http://www.eled.com/product.asp?cata...D=EPT2012RWF-A
50 x EPT2012RWF-A - 2.0X1.2MM WHITE SMD LED: For the stock radio
Picture lost · img231.imageshack.us
Dash Trim
Remove the trim pieces on both sides of the radio and A/C controls by pulling up from the bottom lip.
Picture lost · img91.imageshack.us
Continue to pull up until the trim comes completely loose.
Picture lost · img264.imageshack.us
Do the same for the other side. Remember to disconnect the wiring harness(s) to free the trim pieces from the dash.
Picture lost · img146.imageshack.us
Picture lost · img255.imageshack.us
From the bottom of the gauge trim pull forward and up.
Picture lost · img177.imageshack.us
Pull the radio trim forward. The A/C duct should come out with the trim piece.
Picture lost · img253.imageshack.us
Stock Radio
Remove the 4 screws the hold in the radio.
Picture lost · img137.imageshack.us
Pull the radio out.
Picture lost · img168.imageshack.us
Disconnect the wiring harnesses from the back of the radio to free it from the dash.
Picture lost · img502.imageshack.us
Find the tabs around the rim of the radio face and use a small flathead or butter knife to gently release them. This may take several tries as some of the tabs my snap back on after you've released them. Just be patient or you will break the tabs.
Picture lost · img184.imageshack.us
Once the front face is removed, lay it face down on a soft surface and remove the screws holding the PCB to the face.
Picture lost · img408.imageshack.us
Flip the PCB over to expose the LEDs. Pull the knobs off to expose the 8 LEDs. Again, this is not a "How-To Solder" instructional so I did not document the long and laborious process of swapping all 50 LEDs. Just take your time and note the LED polarity. You'll be fine. To test the LEDs without reassembling everything, reconnect the radio to the wiring harness, plug the PCB into the deck (you will have to hold it in place) and turn the car on. Turn the parking lights on to test all of the LEDs.
Picture lost · img168.imageshack.us
A/C Controls
Now pull the A/C controls out from the top of the assembly.
Picture lost · img519.imageshack.us
Remove the black cable assemblies (do one at a time to make sure you do not get them mixed up) to expose the bulbs. Use a small crosshead screwdriver and turn the bulb counter clockwise. Hold the A/C control assembly upside down until the bulb falls out. Insert the new LED bulb and turn clockwise to lock it in place. At this point you will need to quickly flash the parking lights one then off. Since the new LED bulb is polarized, if it's in backwards, it will blow the fuse. If the light turns on, good job. If not, remove the blub, rotate it counter clockwise 180 degrees and reinstall it. It should work after that. If none of the interior light come on after the test you have blown your fuse. Replace it and try again.
Picture lost · img101.imageshack.us
Remove the center knob assembly from the A/C control bezel. Using a flathead, gently pry the tabs on all 4 sides of the switch to remove the knob from the assembly.
Picture lost · img146.imageshack.us
Remove the bottom of the switch assembly in the same way to expose the solder points for the LED.
Picture lost · img339.imageshack.us
After you replace the LED (Taking note of the polarity of course), reassemble the switch by aligning the triangular notches in the knob gears. If these are not aligned properly, the switch WILL BREAK!
Gauge Cluster
Remove the 2 screws and wiring harnesses holding the gauge cluster in. Pull the cluster forward to remove it from the dash.
Picture lost · img240.imageshack.us
Remove the one screw and black perimeter tabs from around the front gauge cover. Once you have access to the gauge needles, pull up until they come off. It will fell like they are going to break, but if you pull straight up, you be fine.
Picture lost · img520.imageshack.us
Remove the 2 screws and white perimeter tabs from around the back of the cluster. With the back of the cluster exposed, pull up on the left hand module and set it aside. Push the 2 white tabs in the center to the side to release the cluster PCB from the rest of the housing.
Picture lost · img212.imageshack.us
Flip the PCB over to expose the LEDs. You notice there are 2 different sized LEDs in the cluster. If you would like to change other LEDs aside from the LCD, speedo, and tach you will need more of the smaller LEDs used for the radio install.
Picture lost · img511.imageshack.us
Door Lock Switch
Remove the door lock switch from the center console. Gently lift the tabs on both sides of the switch to remove the 'guts'.
Picture lost · img91.imageshack.us
Cut out the old led. Use it as a template and bend to legs of the new LED to match. Take note of the polarity and insert the new LED. Solder it in place and reassemble the switch.
Picture lost · img178.imageshack.us
ESUSE Fog Light Switch
Use a small flathead to pop the cover off of the side of the switch.
Picture lost · img528.imageshack.us
Make sure the switch is on the off position (raised). Lift the PCB out of the housing from the harness end. Remove the LEDs noting their polarity. Use the picture below to properly angle the new LEDs. This took a lot of trial and error to get right.
Picture lost · img148.imageshack.us
Driver's Door Window Switch
On the driver side door, lift the arm rest from the handle area.
Picture lost · img179.imageshack.us
Pull up until the arm rest is removed.
Picture lost · img511.imageshack.us
Pull up from the bottom of the switch assembly and remove the harness to free it from the door.
Picture lost · img260.imageshack.us
Disassemble the switch assembly my removing the retaining screws and lifting the PCB off of the harness clip fixture.
Picture lost · img86.imageshack.us
Note the polarity of the LED and remove it from the PCB. Insert the new LED and solder it in.
Picture lost · img107.imageshack.us
Picture lost · img145.imageshack.us
All Done!
Just reassemble your car and enjoy your new lights.
Before:
Picture lost · img240.imageshack.us
Picture lost · img171.imageshack.us
After:
Picture lost · img235.imageshack.us
Picture lost · img240.imageshack.us
Picture lost · img152.imageshack.us
Picture lost · img171.imageshack.us
Picture lost · img167.imageshack.us
Picture lost · img221.imageshack.us
Picture lost · img123.imageshack.us
Picture lost · img340.imageshack.us
Note: Aside from the A/C controls and automatic shifter lights, all other lights require soldering equipment and skills. If you do not own either or know someone who does, I suggest you pass on this DIY.
First off, much respect to vodkalush 🙌 for his original sedan DIY. This DIY is not a replacement for his DIY. It's more of a liftback specific addon. This DIY will cover changing the color of the lights in the stock radio, gauge cluster, center console switches, A/C controls, and door switches. I replaced the amber (orange) lights with white. Depending on the color you choose the part numbers will most certainly differ. I suggest you get more LEDs than you need for the job as some may get damaged during the install. I personally smoked at least 7 myself. 😁
Stuff you'll need
Top: Soldering Iron
Bottom: Cutters, tweezers, very small flathead screwdriver, de-soldering braid, solder, needle nose pliers
Unpictured: Standard size crosshead screwdriver
Picture lost · img184.imageshack.us
Parts:
http://autolumination.com/74.htm
3 x Neo Wedge Based LED Bulbs (Type B): For the A/C controls
1 x Tri-Power 3 LED Bulb: For the Automatic shifter light
http://www.eled.com/product.asp?cata..._ID=E7104RWC-A
5 x E7104RWC-A - 3MM WHITE LED LAMP: For fog switch, door lock switch, drivers window switch, and A/C push button
http://www.eled.com/product.asp?cata...ID=EA3528RWC-A
15 x EA3528RWC-A - 3.5X2.8MM WHITE SMD LED: For speedo and tach gauges
http://www.eled.com/product.asp?cata...D=EPT2012RWF-A
50 x EPT2012RWF-A - 2.0X1.2MM WHITE SMD LED: For the stock radio
Picture lost · img231.imageshack.us
Dash Trim
Remove the trim pieces on both sides of the radio and A/C controls by pulling up from the bottom lip.
Picture lost · img91.imageshack.us
Continue to pull up until the trim comes completely loose.
Picture lost · img264.imageshack.us
Do the same for the other side. Remember to disconnect the wiring harness(s) to free the trim pieces from the dash.
Picture lost · img146.imageshack.us
Picture lost · img255.imageshack.us
From the bottom of the gauge trim pull forward and up.
Picture lost · img177.imageshack.us
Pull the radio trim forward. The A/C duct should come out with the trim piece.
Picture lost · img253.imageshack.us
Stock Radio
Remove the 4 screws the hold in the radio.
Picture lost · img137.imageshack.us
Pull the radio out.
Picture lost · img168.imageshack.us
Disconnect the wiring harnesses from the back of the radio to free it from the dash.
Picture lost · img502.imageshack.us
Find the tabs around the rim of the radio face and use a small flathead or butter knife to gently release them. This may take several tries as some of the tabs my snap back on after you've released them. Just be patient or you will break the tabs.
Picture lost · img184.imageshack.us
Once the front face is removed, lay it face down on a soft surface and remove the screws holding the PCB to the face.
Picture lost · img408.imageshack.us
Flip the PCB over to expose the LEDs. Pull the knobs off to expose the 8 LEDs. Again, this is not a "How-To Solder" instructional so I did not document the long and laborious process of swapping all 50 LEDs. Just take your time and note the LED polarity. You'll be fine. To test the LEDs without reassembling everything, reconnect the radio to the wiring harness, plug the PCB into the deck (you will have to hold it in place) and turn the car on. Turn the parking lights on to test all of the LEDs.
Picture lost · img168.imageshack.us
A/C Controls
Now pull the A/C controls out from the top of the assembly.
Picture lost · img519.imageshack.us
Remove the black cable assemblies (do one at a time to make sure you do not get them mixed up) to expose the bulbs. Use a small crosshead screwdriver and turn the bulb counter clockwise. Hold the A/C control assembly upside down until the bulb falls out. Insert the new LED bulb and turn clockwise to lock it in place. At this point you will need to quickly flash the parking lights one then off. Since the new LED bulb is polarized, if it's in backwards, it will blow the fuse. If the light turns on, good job. If not, remove the blub, rotate it counter clockwise 180 degrees and reinstall it. It should work after that. If none of the interior light come on after the test you have blown your fuse. Replace it and try again.
Picture lost · img101.imageshack.us
Remove the center knob assembly from the A/C control bezel. Using a flathead, gently pry the tabs on all 4 sides of the switch to remove the knob from the assembly.
Picture lost · img146.imageshack.us
Remove the bottom of the switch assembly in the same way to expose the solder points for the LED.
Picture lost · img339.imageshack.us
After you replace the LED (Taking note of the polarity of course), reassemble the switch by aligning the triangular notches in the knob gears. If these are not aligned properly, the switch WILL BREAK!
Gauge Cluster
Remove the 2 screws and wiring harnesses holding the gauge cluster in. Pull the cluster forward to remove it from the dash.
Picture lost · img240.imageshack.us
Remove the one screw and black perimeter tabs from around the front gauge cover. Once you have access to the gauge needles, pull up until they come off. It will fell like they are going to break, but if you pull straight up, you be fine.
Picture lost · img520.imageshack.us
Remove the 2 screws and white perimeter tabs from around the back of the cluster. With the back of the cluster exposed, pull up on the left hand module and set it aside. Push the 2 white tabs in the center to the side to release the cluster PCB from the rest of the housing.
Picture lost · img212.imageshack.us
Flip the PCB over to expose the LEDs. You notice there are 2 different sized LEDs in the cluster. If you would like to change other LEDs aside from the LCD, speedo, and tach you will need more of the smaller LEDs used for the radio install.
Picture lost · img511.imageshack.us
Door Lock Switch
Remove the door lock switch from the center console. Gently lift the tabs on both sides of the switch to remove the 'guts'.
Picture lost · img91.imageshack.us
Cut out the old led. Use it as a template and bend to legs of the new LED to match. Take note of the polarity and insert the new LED. Solder it in place and reassemble the switch.
Picture lost · img178.imageshack.us
ESUSE Fog Light Switch
Use a small flathead to pop the cover off of the side of the switch.
Picture lost · img528.imageshack.us
Make sure the switch is on the off position (raised). Lift the PCB out of the housing from the harness end. Remove the LEDs noting their polarity. Use the picture below to properly angle the new LEDs. This took a lot of trial and error to get right.
Picture lost · img148.imageshack.us
Driver's Door Window Switch
On the driver side door, lift the arm rest from the handle area.
Picture lost · img179.imageshack.us
Pull up until the arm rest is removed.
Picture lost · img511.imageshack.us
Pull up from the bottom of the switch assembly and remove the harness to free it from the door.
Picture lost · img260.imageshack.us
Disassemble the switch assembly my removing the retaining screws and lifting the PCB off of the harness clip fixture.
Picture lost · img86.imageshack.us
Note the polarity of the LED and remove it from the PCB. Insert the new LED and solder it in.
Picture lost · img107.imageshack.us
Picture lost · img145.imageshack.us
All Done!
Just reassemble your car and enjoy your new lights.
Before:
Picture lost · img240.imageshack.us
Picture lost · img171.imageshack.us
After:
Picture lost · img235.imageshack.us
Picture lost · img240.imageshack.us
Picture lost · img152.imageshack.us
Picture lost · img171.imageshack.us
Picture lost · img167.imageshack.us
Picture lost · img221.imageshack.us
Picture lost · img123.imageshack.us
Picture lost · img340.imageshack.us