Yarisworld Archive

DIY: Replacing Stock Mirrors

30 posts · 36,741 views

redyarisOriginal postOrlando, FL · Jun 21, 2007#1
This DIY is another easy one (my specialty)...should take no more than one hour tops!

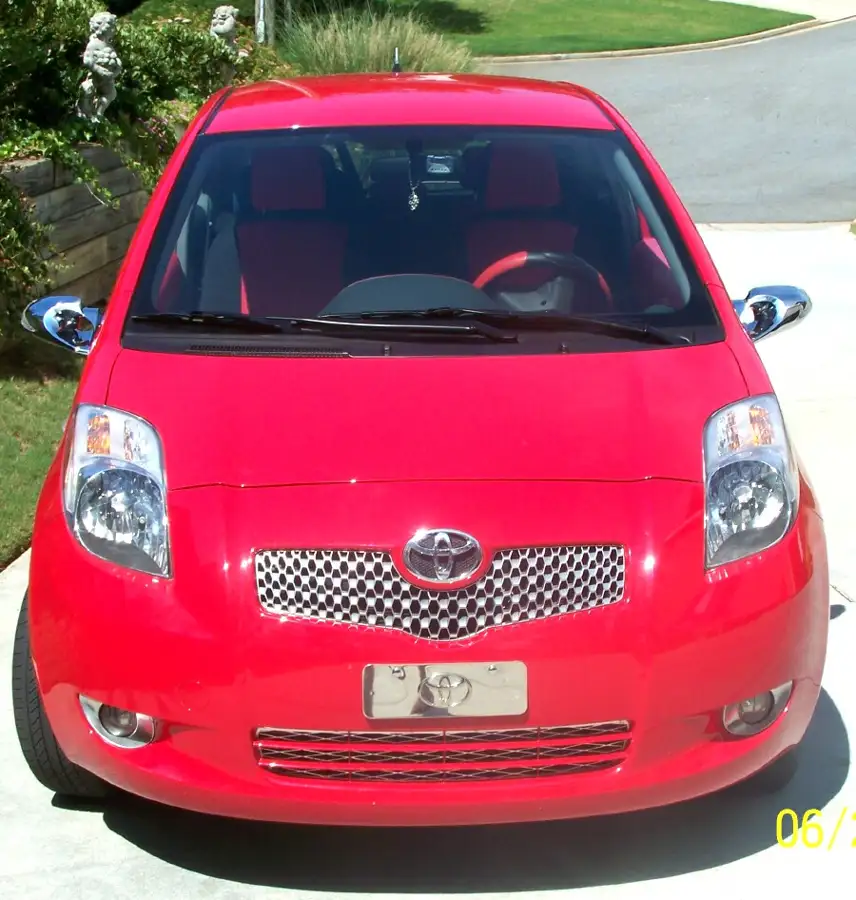
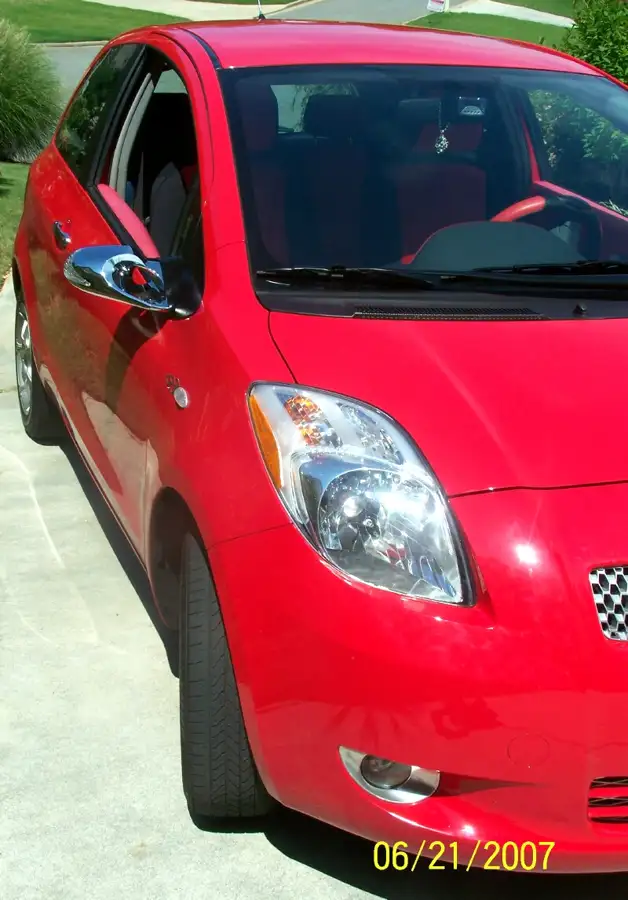
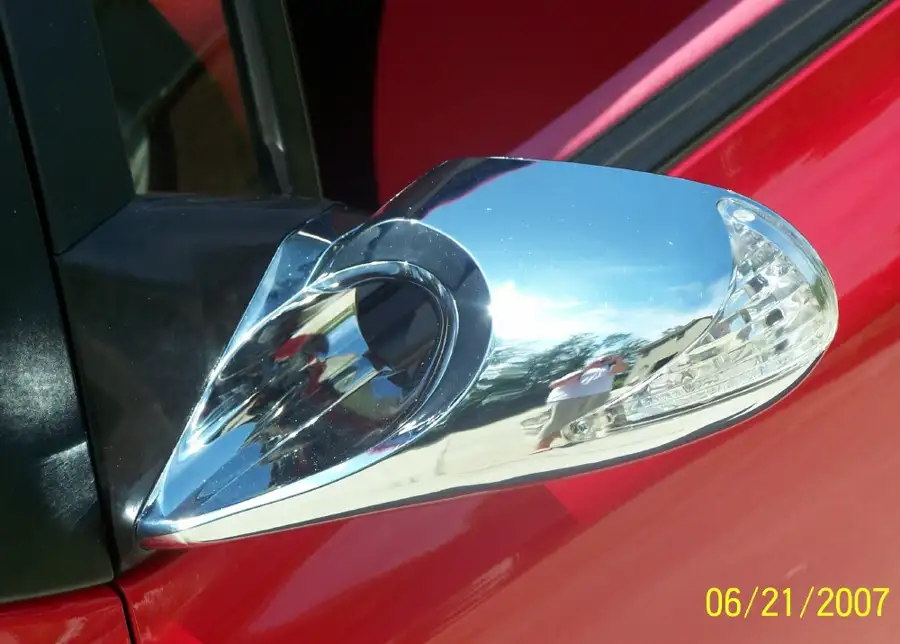
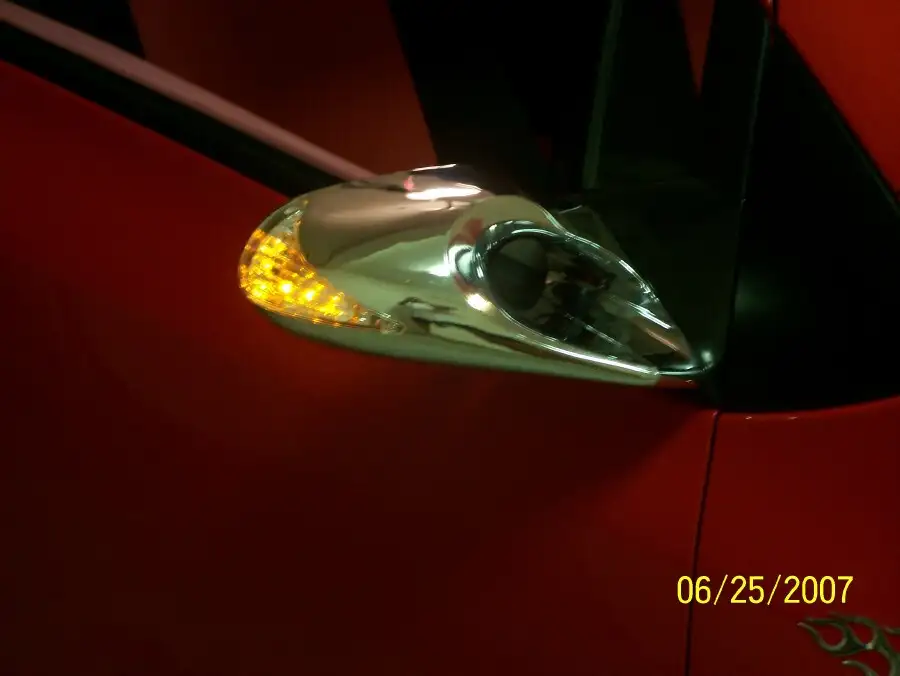
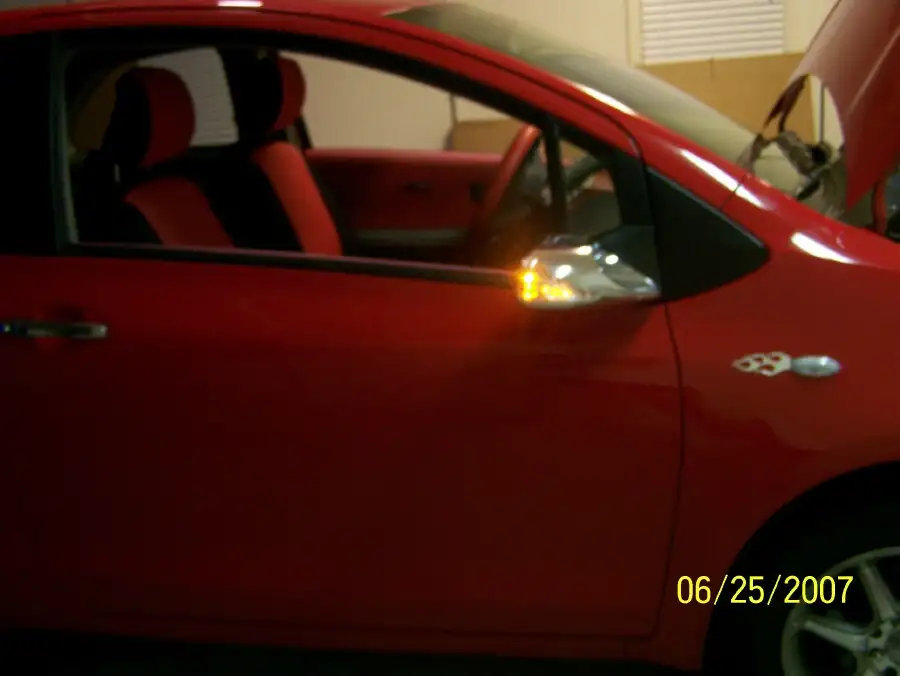
This DIY is for replacing your Yaris liftback stock mirrors. This is a great alternative if you have considered installing power mirrors or mirrors with LED turn signal indicators/parking lamps onboard. This is also an alternative to stick-on and replacement mirror covers.

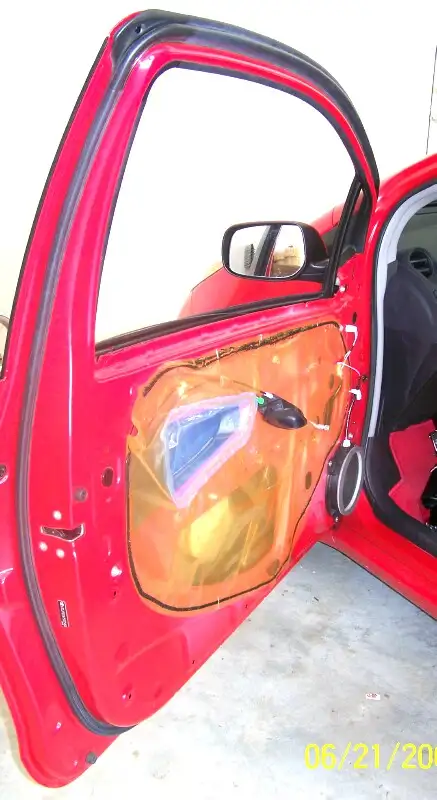
1. Remove your door panel. Refer to the following DIY for instructions on this step: 30 seconds door panel removal (Liftback)

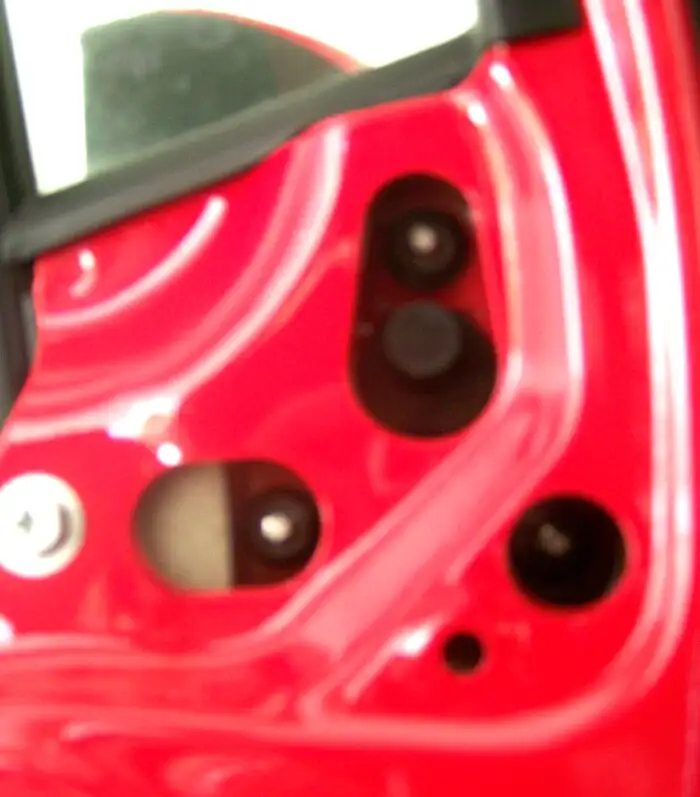
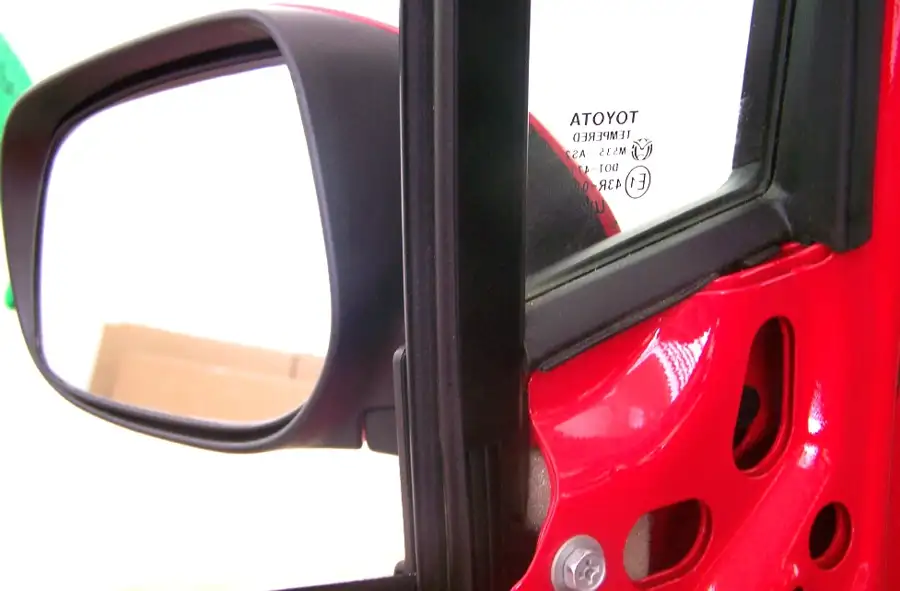
2. The mirror is attached via 3 screws with nuts hidden behind three access holes.

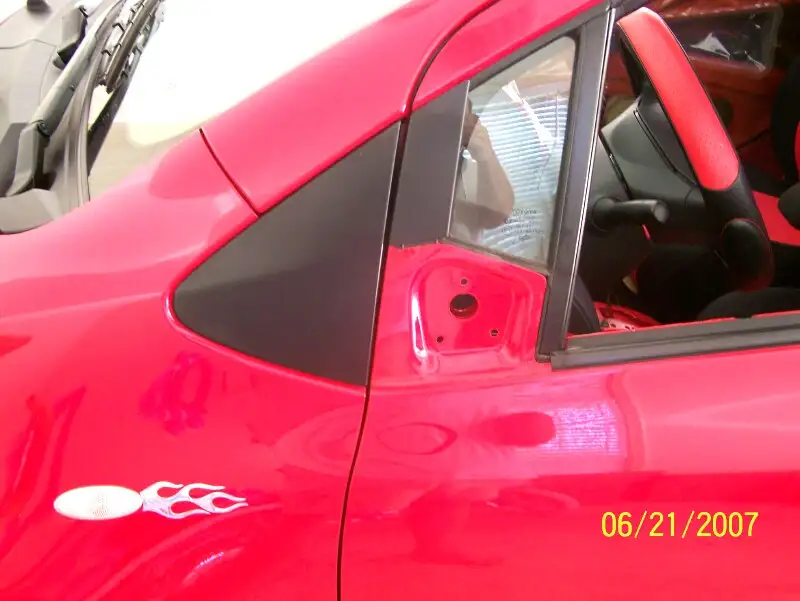
3. Using a wrench with extension remove the 3 nuts from the mirror screws. Observe the base plate that holds the mirror on the car and placement of the 3 screws. Also note from the outside of the car the 3 holes the mirror uses for the screws.

***NOTE: Unless you have tiny fingers or are ultra careful you are guaranteed to lose at least a couple of these nuts in the door (Good news is if you do lose them they are easy to retrieve with a magnetic screwdriver and small needle nose pliers).

4. Remove the factory mirror. Sell on Ebay. 👍

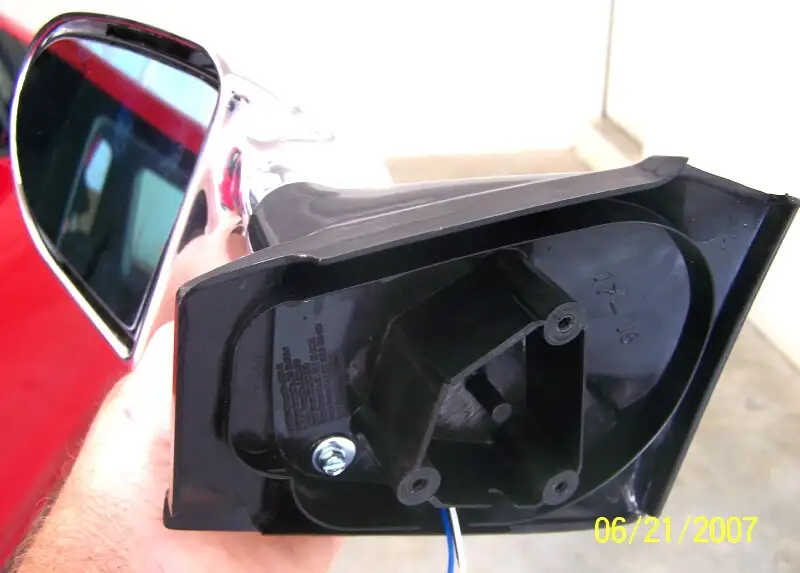
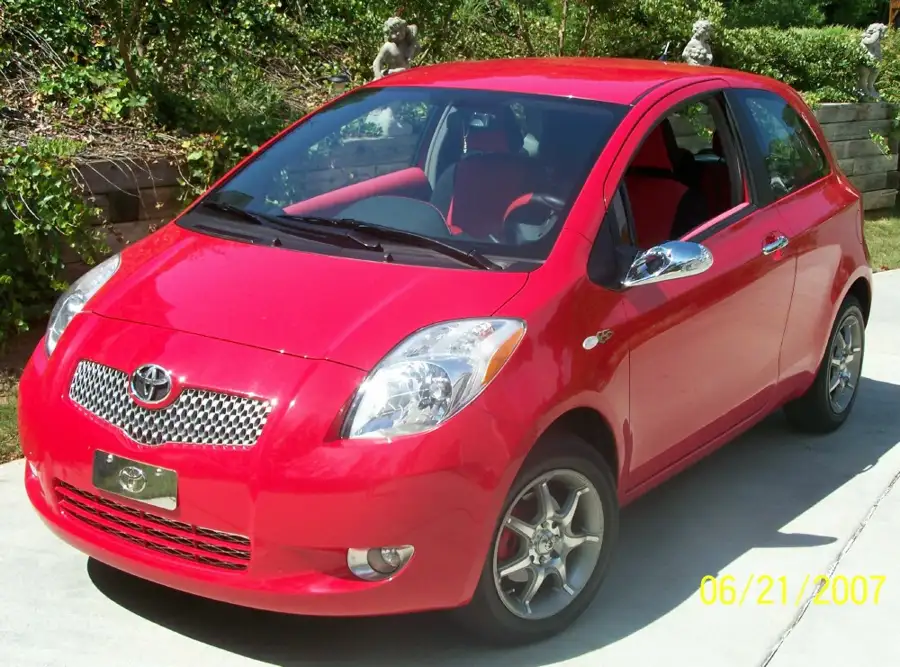
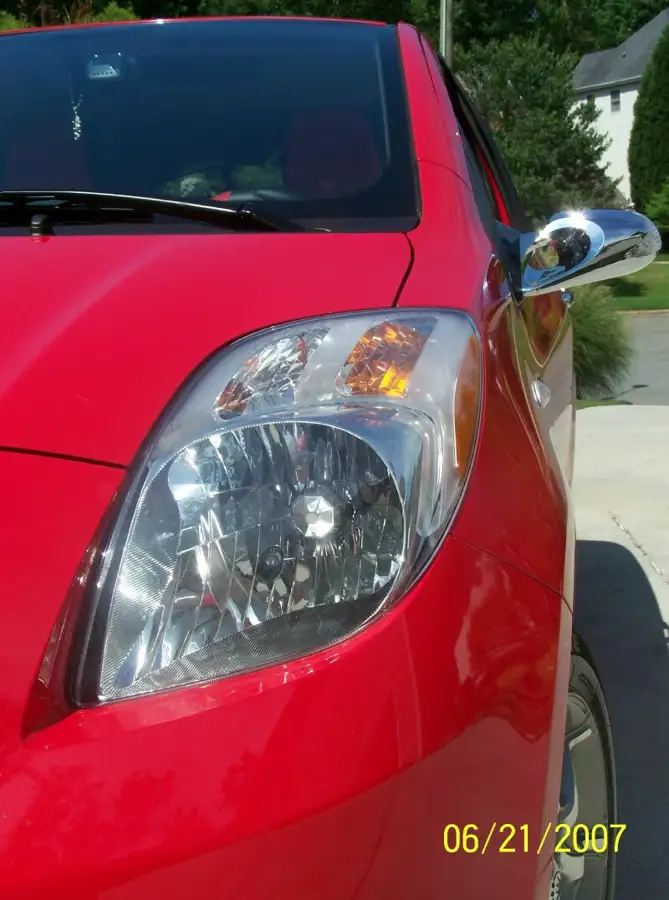
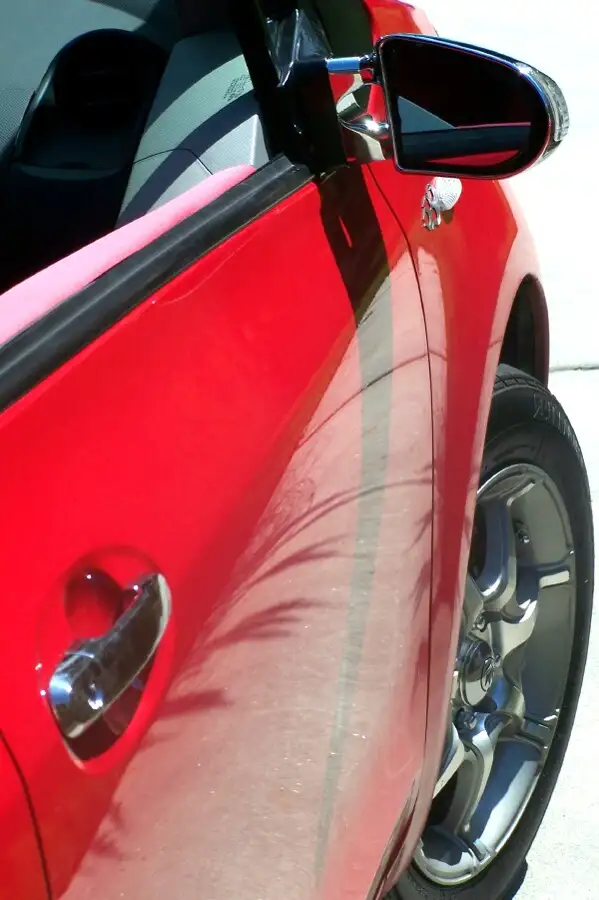
5. Install new mirror. I chose a chrome manual K6 style mirror with LED insert that illuminates in sync with the turn signals and parking lights. I
t came with 3 wires (black = ground/white = signal light/blue = parking light) The supplier had one available with a 3 hole base plate that fit the Yaris liftback perfectly. I threw away the 3 screws supplied and chose bolts instead with washers for a more secure install.

6. Reinstall the door panel wrapping the 3 LED wires under the rubber weather seal on the door to hold in place.

7. Run the 3 wires to appropriate locations (NOTE: you may need additional wire to complete this part). To access side marker turn signal light go thru the black trim piece in front of the mirror base).

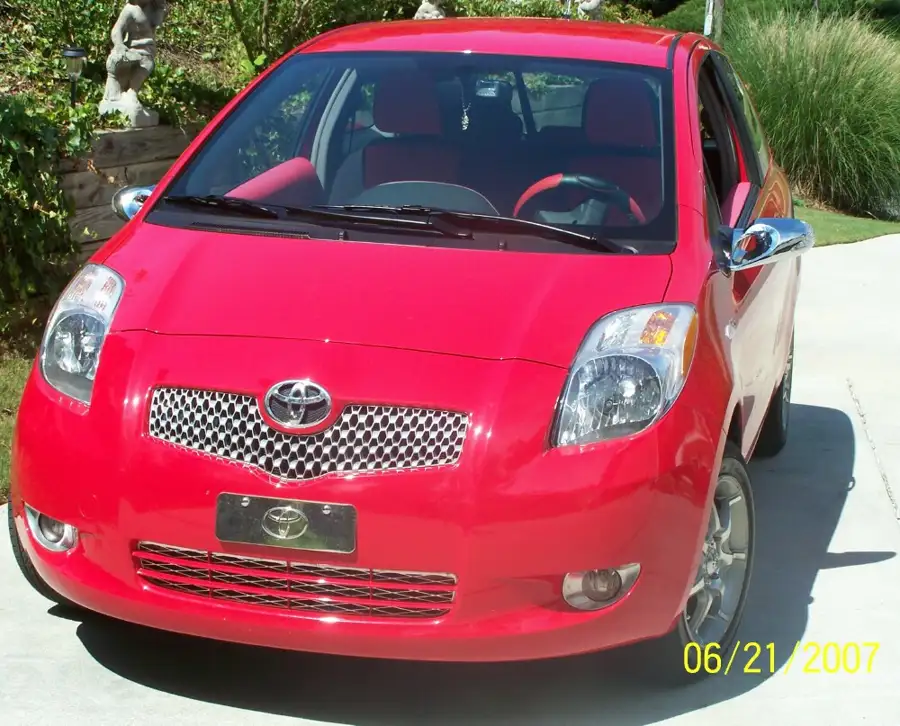
7. Enjoy your new Yaris look with the new mirrors!!!!!!!😉
mirror01.jpgmirror02.jpgmirror03.jpgmirror04b.jpgmirror06.jpgmirror07.jpgmirror08.jpgmirror09.jpg

Replies 29

redyarisThread starterOrlando, FL · Jun 21, 2007#2
Part 2 pics
mirror10.jpgmirror11.jpgmirror12.jpgmirror13.jpg
tk-421Dagobah · Jun 21, 2007#3
Wow... pretty kewl replacements... 🎉
Where did you get 'em?

Nice DIY BTW... Thanks!
redyarisThread starterOrlando, FL · Jun 21, 2007#4
Thanks tk! I got em on ebay of course from a reputable seller I highly recommend (the same one I got my chrome door handles from). Shipping was ultra fast (less than one week!!!)

'best in parts' is the sellers ID. Do a search for them.
yrsdrgnSF,CA · Jun 21, 2007#5
Very nice write up and nice pictures to go with it.
Black YarisToledo, OH · Jun 21, 2007#6
nice write up, not fond of the product, but nice DYI on the process

you are getting a lil Ricey there RedYaris
redyarisThread starterOrlando, FL · Jun 21, 2007#7
Originally Posted by Black Yaris ↑
nice write up, not fond of the product, but nice DYI on the process

you are getting a lil Racey there RedYaris
Fixed that for you BY....LOL im like the 'anti Black Yaris'...all chromey and stuff!!!! Nothing stealth here 😲
KioshiFremont, CA · Jun 21, 2007#8
Now does this apply to Yaris owners w/o power operated side mirrors? Because I have power operated side mirrors so......I want to be careful w/ that part of the wiring. I like my power adjusted side mirrors~

Because the last thing I'd want would be having something fashionable but not functional....
redyarisThread starterOrlando, FL · Jun 22, 2007#9
Originally Posted by Kioshi ↑
Now does this apply to Yaris owners w/o power operated side mirrors? Because I have power operated side mirrors so......I want to be careful w/ that part of the wiring. I like my power adjusted side mirrors~

Because the last thing I'd want would be having something fashionable but not functional....
I didn't have power mirrors and dont want them however the seller has this and other mirror models with power available. Dont know if it utilizes the existing wiring/switch though.
tk-421Dagobah · Jun 22, 2007#10
Originally Posted by redyaris ↑
Thanks tk! I got em on ebay of course from a reputable seller I highly recommend (the same one I got my chrome door handles from). Shipping was ultra fast (less than one week!!!)

'best in parts' is the sellers ID. Do a search for them.
My search for "Yaris power mirrors" yielded no results. Are your side mirrors designed for a different car model?
eTiMaGoBangkok, Thailand · Jun 22, 2007#11
woah... quick! to the bling-mobile 😁

Nice to see some more options for mirrors, anyway 🙂
redyarisThread starterOrlando, FL · Jun 22, 2007#12
Here's a link to the sellers store:

http://stores.ebay.com/Best-in-Parts

and here's a link to the exact mirror i bought: $99 power, $69 manual (+ shipping). You can order the power one online but for the manual one you have to email the seller direct. For those seeking less bling, it is available in black too.

http://cgi.ebay.com/ebaymotors/K6-Ch...3962QQtcZphoto

bestinparts is the seller. Highly reliable and good product. Tell em redyaris sent you!
redyarisThread starterOrlando, FL · Jun 25, 2007#13
Part 3 pics: wiring

The mirrors I purchased came with three wires from the LED insert

Blue: routed to parking light
White: routed to turn signal sidemarker
Black: routed to ground


Supplies: I purchased a roll of 18 gauge wire from AutoZone ($5) along with a package of quick splice connectors ($3).

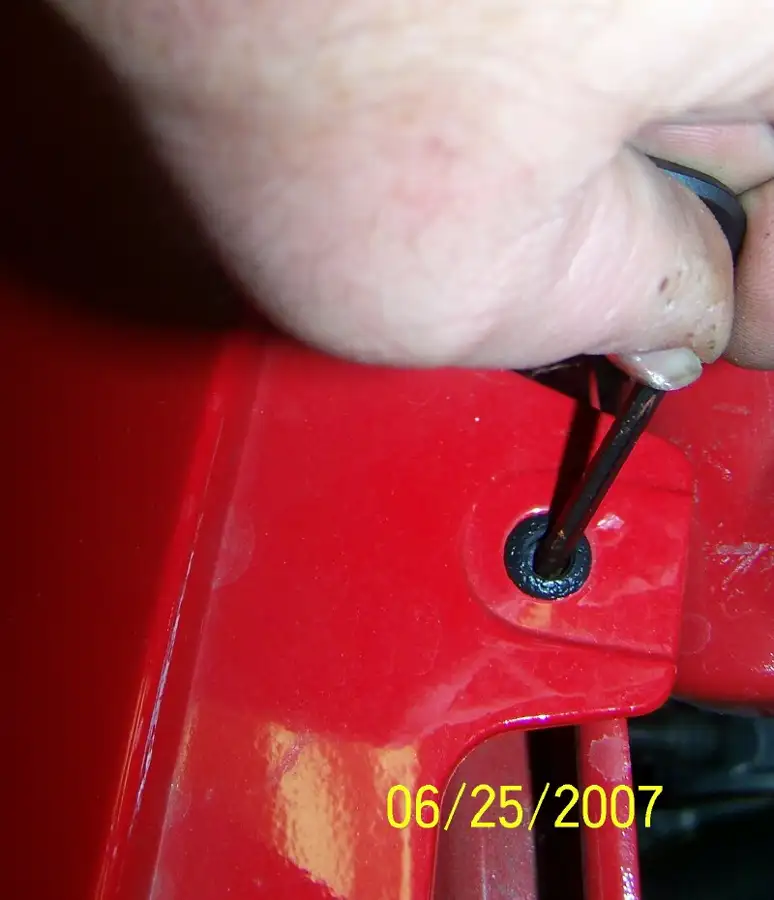
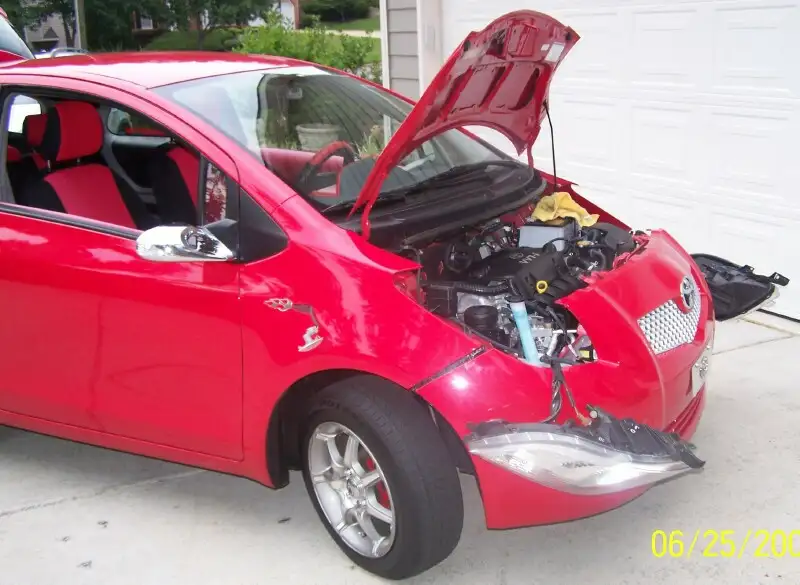
To wire the mirror LEDs you will need to remove the front bumper cover. This is easy! (My thanks to Tiksman for showing me this from the get go with this car!)....There are 6 little black plastic connectors that hold the bumper cover in place (4 under the hood and 1 in each front wheel well). To remove these connectors poke something into the connector center and then pull the connector out.

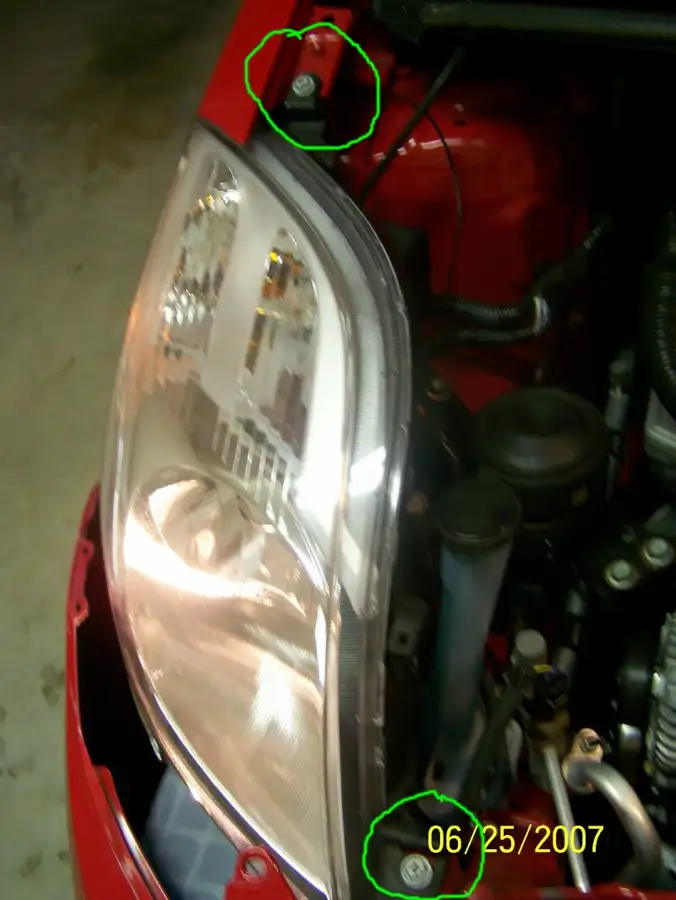
Then pull the bumper from onboard connector panels at each front quarter panel. It will separate without having to remove any screws....When you do this, the bumper cover will drop down giving you access to the headlights.

You will next need to remove both headlamp housings. To do this remove 3 screw bolts from each housing (2 of the screw bolts are visible from the top of the headlights and 1 is located on the fender side of the headlight).

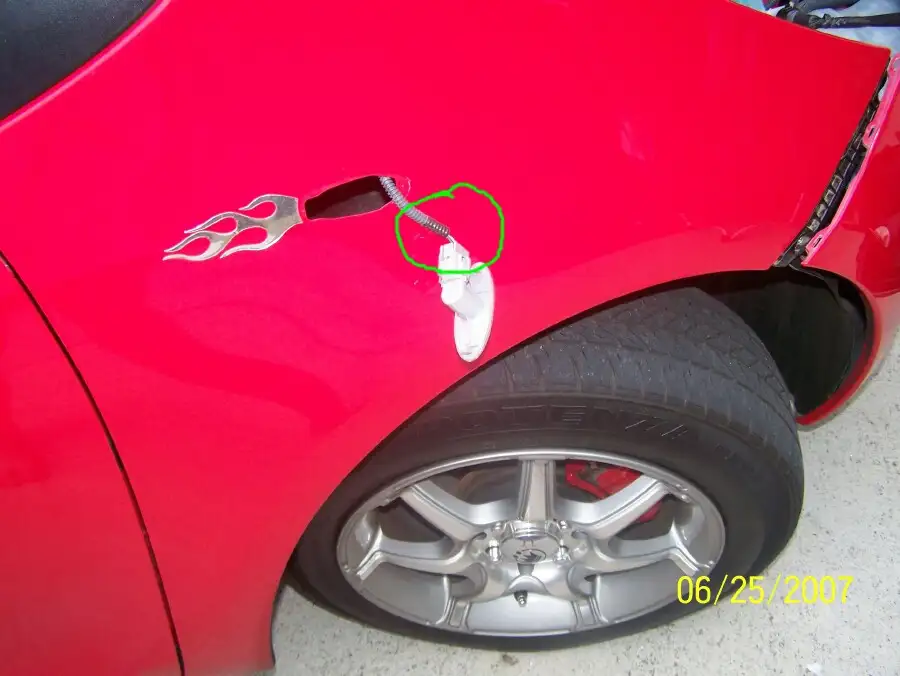
Move the headlamp housings out of the way. Now you can easily reach inside the front fender and remove the side marker lamp housings by squeezing each side and twisting it out of the fender.

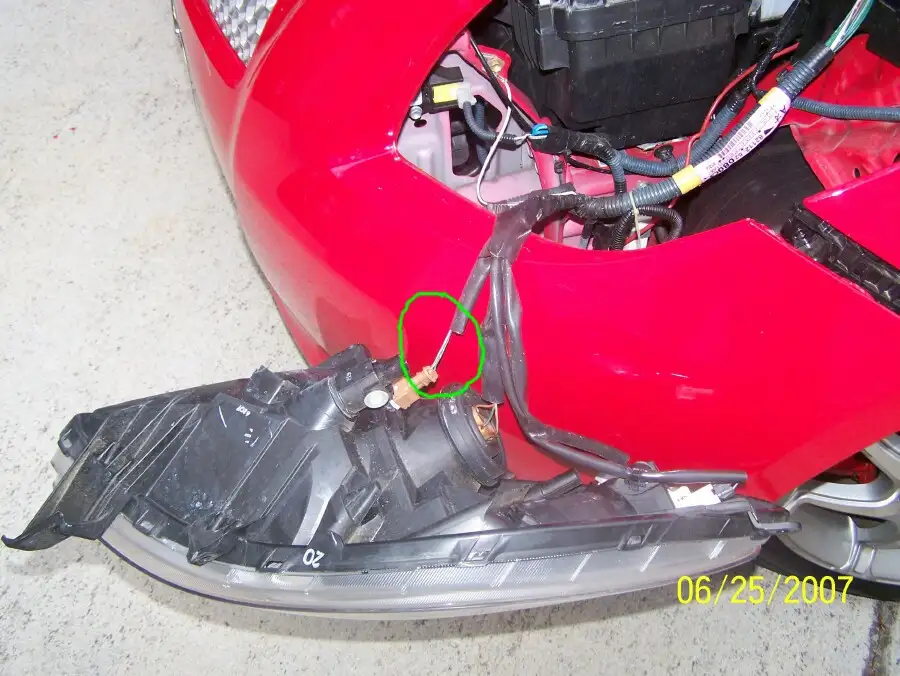
Next run your extra wire from the mirror wires into the front fenders via the black plastic trim piece immediately in front of the mirror mount. No need to remove the trim piece just insert the wire below it. Go around to the headlight area and fish the wires into the engine compartment.

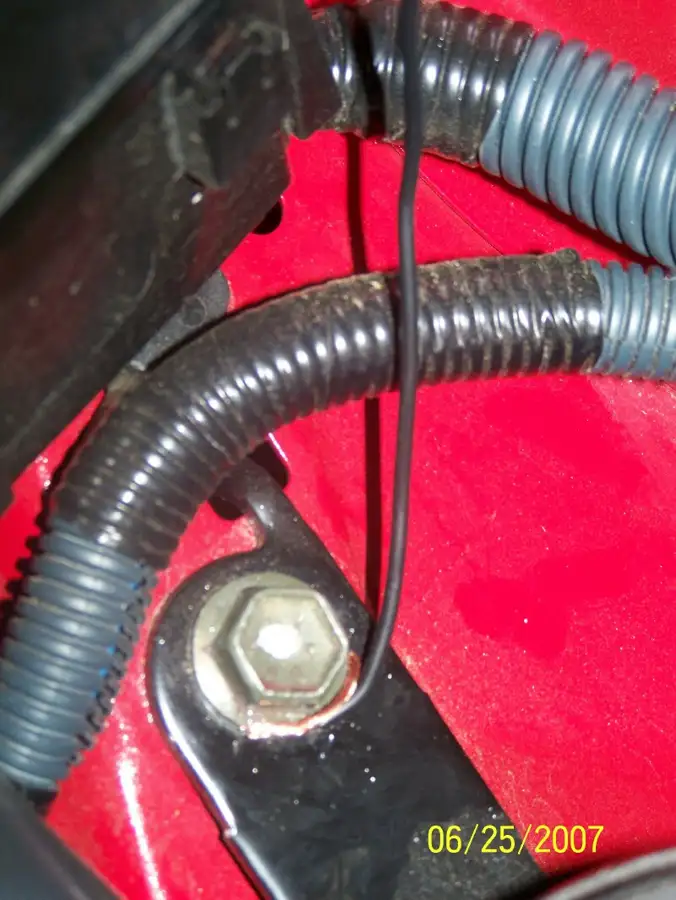
Find any suitable chassis bolt to run the black ground wire to on both sides of the car.

Using a quick splice connector, run the extra wire from the blue wire to the parking light on the back of the headlamp housing. There is a green wire and a white wire. Quick splice into the green wire and your extra wire (blue wire source).

Using another quick splice connector, run the extra wire from the white wire to the side marker turn lamp. Here also you will find a green and a white wire. Quick splice into the green wire and your extra wire (white wire source).

Make sure you wrap all exposed wires and quick splice connects with electrical tape to prevent exposure to moisture and to prevent shorts.

Test your LED mirrors at this point before you remount everything. The LED mirrors should illuminate steady with the parking lamps and also flash in sync with your side marker turn lamps.

If your LED mirrors fail to illuminate check all wires for connections, check your ground wires (I know because my right mirror did not come on, I had a loose ground wire)...

Thats it. Remount your side marker lamps, headlamp housings and mount the front bumper cover.

Enjoy the LED mirrors!
LED01.jpgLED02.jpgLED03.jpgLED04.jpgLED05.jpgLED06.jpgLED07.jpgLED08.jpg
eTiMaGoBangkok, Thailand · Jun 26, 2007#14
heh I think you've saved me a lot of time in writing up my last part of the DIY 😁 👍
KioshiFremont, CA · Jun 26, 2007#15
Originally Posted by redyaris ↑
Here's a link to the sellers store:

http://stores.ebay.com/Best-in-Parts

and here's a link to the exact mirror i bought: $99 power, $69 manual (+ shipping). You can order the power one online but for the manual one you have to email the seller direct. For those seeking less bling, it is available in black too.

http://cgi.ebay.com/ebaymotors/K6-Ch...3962QQtcZphoto

bestinparts is the seller. Highly reliable and good product. Tell em redyaris sent you!
Price sounds right for power mirrors. I'll be looking into that once I get my tints, springs, and modified tach done.

Thanks a lot redyaris, appreciate it!
redyarisThread starterOrlando, FL · Jun 26, 2007#16
Originally Posted by eTiMaGo ↑
heh I think you've saved me a lot of time in writing up my last part of the DIY 😁 👍

Nice that I do your work for you Teacher!!! 🙄

Give me some props people!!!
eTiMaGoBangkok, Thailand · Jun 27, 2007#17
Consider it homework.. though you're not even in my class??? 😁

A question, though, instead of wiring all the way to the front headlight for the parking light signal, could you not connect them to illumination wires in the cabin somewhere? For example, I have power windows, and on the driver's side, the AUTO text on the switch is illuminated whenever the headlights are on, and I was thinking to tap into that wire, and find a similar one on the passenger side. Whaddaya think?
ViolinNew Jersey · Jun 27, 2007#18
Thanks for the write up. It will make it a little easier for us that got our mirror covers through the recent Thai group buy.

I can't really picture how you routed the wires though. Did you fish them through the boot with the rest of the wires from the door and then out through the firewall or what?
redyarisThread starterOrlando, FL · Jun 27, 2007#19
Originally Posted by eTiMaGo ↑
Consider it homework.. though you're not even in my class??? 😁

A question, though, instead of wiring all the way to the front headlight for the parking light signal, could you not connect them to illumination wires in the cabin somewhere? For example, I have power windows, and on the driver's side, the AUTO text on the switch is illuminated whenever the headlights are on, and I was thinking to tap into that wire, and find a similar one on the passenger side. Whaddaya think?
etimago that might be your shortest wire route but I wouldn't want to risk blowing a fuse or taking out a switch light that would later need to be replaced. Also wouldnt want the mirror LEDs to blink when I was lowering my power window! 🤣

Im a simple man and I did what I thought was the easiest, most direct wiring (to the wire source I knew I needed). No pulling trim pieces either and routing wire in the cabin. 👍
redyarisThread starterOrlando, FL · Jun 27, 2007#20
Originally Posted by Violin ↑
Thanks for the write up. It will make it a little easier for us that got our mirror covers through the recent Thai group buy.

I can't really picture how you routed the wires though. Did you fish them through the boot with the rest of the wires from the door and then out through the firewall or what?
Sorry about that, I should have taken more detailed pics of the wire routing....

Violin I ran the 3 mirror wires (blue/white/black) from an interior access hole from the mirror mounting on the interior door panel, ran them up and under the top trim piece of the door arm rest, wrapped the wire around the corner of the door (I could have drilled an access hole but im lazy), and put the door panel back on to hold the wire. I then tucked the 3 wires under the rubber weatherstrip. I also put a couple of pieces of sticky black duct tape to hold the wires to the door to prevent pinching when opening and closing.

I connected my extension wire then to all 3 mirror wires. I ran these 3 extensions into the engine bay and side marker lamps on each side by tucking them under the big black triangular trim piece directly in front of the mirror (no need to remove it even). (If you pry it up a little from the bottom youll see the fender area and the side marker lamp).

I was able to reach my manly arm into the fender area from the front of the car to grab the extension wire and fish it to the side marker lamp and into the engine bay for connection to parking lamps and ground bolts.

Its surely NOT factory but it works....and if anyone opens my door to look at wires they are anal.😳
ViolinNew Jersey · Jun 27, 2007#21
That would be me.
Meteorite ManTaunton, Mass · Jun 28, 2007#22
There is a rubber boot towards the lower half of the forward edge of the door. It's for the speaker wires / power wires etc etc. Could you run the wires through there into the cabin?

Chuck
redyarisThread starterOrlando, FL · Jun 28, 2007#23
Originally Posted by Meteorite Man ↑
There is a rubber boot towards the lower half of the forward edge of the door. It's for the speaker wires / power wires etc etc. Could you run the wires through there into the cabin?

Chuck
Yes you could if you were anal.
ViolinNew Jersey · Jun 28, 2007#24
That would be me.
redyarisThread starterOrlando, FL · Jun 29, 2007#25
LOLOLOL Violin. Remind me never to open my doors around you.
gaffonorman · Jun 29, 2007#26
I like your Cherubs ;-).
EddAustralia · Jun 29, 2007#27
redyaris, your car looks awesome. You actually understand the concept of trim (red with chrome, not red with heaps more red). Keep up the great mods. 👍
redyarisThread starterOrlando, FL · Jun 30, 2007#28
Why thanks Edd!!! Im one of the maybe 2 people who like chrome here.
redyarisThread starterOrlando, FL · Jun 30, 2007#29
Originally Posted by gaffo ↑
I like your Cherubs ;-).
Heh heh, those are the 4 Seasons (Spring, Summer, Winter, Fall). My wife loves statuary....makes for a classy picture...something I can always use more of!
hasher22Australia Sydney · Jul 3, 2007#30
ur fender repeater isnt working now??? since u transfered that to ur mirrors??