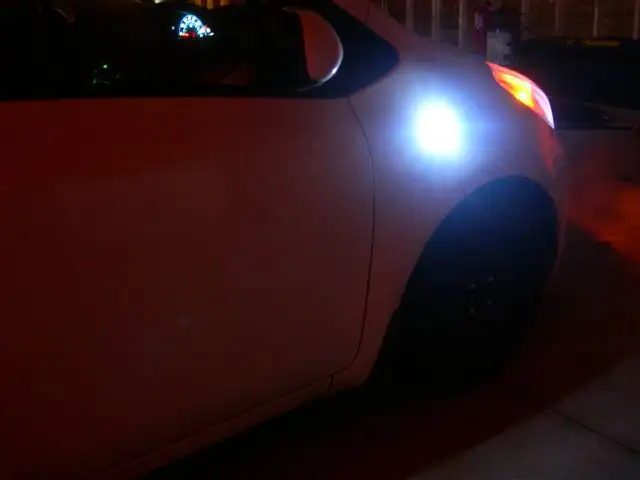
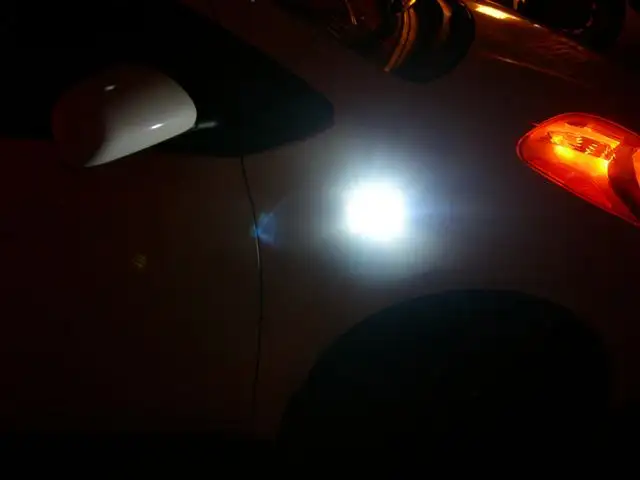
Chris07LBOriginal postNew Jersey · Mar 1, 2007#1Yes, its true.. your side markers on your Yaris Liftback are a SEALED housing.
Here's how to swap in any color bulb or LED replacement.
Step one, remove the side marker from the fender.
Grab it, and slide it foward, while pulling the rear out towards you, away from the fender. Side marker will pop right out. This step is also outlined in your owners manual.. go figure. 🙄
Attached picture not available Attached picture not available Tools needed.
New hack saw blade - used to cut housing.
Do not use a Dremel or other electric device, as you
will cut to far, and ruin your housing.
Electrical tape
or Hot Glue Gun, or both - used to seal the two halfs back together.
Sand paper - used to clean up halfs after being cut, before sealing up.
Attached picture not available Time to cut.
Cut where shown in picture.. about the middle of the housing. Start cutting slowly, as you are
only cutting through maybe 1/8" of the plastic housing.
You will know when you have cut far enough. You will feel increased resistance, as then you will be trying to cut the metal of the bulb socket.
Attached picture not available Attached picture not available Housing seperated.
Attached picture not available Rough edges from the cutting, these will be sanded a bit in the next step.
Attached picture not available Attached picture not available Sanded both halfs.
Doing this to clean it up a bit, and to give whatever glue/sealer you choose a "bite" into the plastic.
Attached picture not available Insert your replacement bulb of choice. Mine happends to be a 194 HiLEDS led. 😎
Attached picture not available This next step is
all your choice! You can attach the two halfs by lightly tacking the two together with hot glue, then once cool, tightly wrap with electrical tape.
There will be MANY different ways owners will use to seal theirs up, simple electrical tape, tightly wound a good 10 times or so is more then enough though. The two halfs become a strong connection again, and will not allow water or moisture to get inside... also the easiest route.
Attached picture not available Enjoy yet another Chris07LB DIY! 🤘
Replies 50
BokChoiSophia, WV · Mar 1, 2007#2Thank You, another job well done
jdubau55Blacksburg, VA · Mar 1, 2007#3I dont know about white but....red might be cool to go with what WILL be my white/black/red theme.....and also depends on if anything other than amber is legal in VA.
Chris07LBThread starterNew Jersey · Mar 1, 2007#4 Originally Posted by
jdubau55 ↑ I dont know about white but....red might be cool to go with what WILL be my white/black/red theme.....and also depends on if anything other than amber is legal in VA.
Flashing RED isnt in ANY state... 🙄
🙇
So just to confirm, these 194 LEDs are just the same as you used in the parking lights up front, right?
YamilRSan Diego, CA · Mar 1, 2007#6 Originally Posted by
eTiMaGo ↑ 🙇
So just to confirm, these 194 LEDs are just the same as you used in the parking lights up front, right?
and the map light and the trunk, if not mistaking
Originally Posted by
YamilR ↑ and the map light and the trunk, if not mistaking
also the rear plate lamp
How many DIY's does it take to get to the moderator-status center of a Yarisworld pop?
The world may never know.
Chris, great DIY... again. 🙇
hasher22Australia Sydney · Mar 2, 2007#9oooooooooooooooooooooooooooooooooooooooooooooooooo oooooooooooooooooooooooooooooooooooooooooooooooooo oooooooooooooooooooooooooooooooooooooooooooooooooo oooooooooooo :)
yrsdrgnSF,CA · Mar 2, 2007#10I guess I'll be working my way to swapping out the lights after i get another set of HiLEDs bulbs. Thanks a lot Chris for finding yet another way to modify the Yaris.👍
TrancosRtS Florida · Mar 2, 2007#11Chris:
We are not worthy (ALA Wayne's World style)
uncleyarisToronto · Mar 2, 2007#12you da MAN!!
eijikikimaruSo. CaL · Mar 2, 2007#13Thanks a lot Chris!
ViolinNew Jersey · Mar 2, 2007#14Very nice.
I would recommend JB Weld or some other two part epoxy instead of hot glue.
Red or blue would be illegal in any state because that's reserved for the Man.
jdubau55Blacksburg, VA · Mar 2, 2007#15Man, the Man takes all the good colors.
Chris07LBThread starterNew Jersey · Mar 2, 2007#16Glad you guys are happy with the DIY..
Im a little more then unhappy, as today I noticed the TRD exhaust tip that Violin was nice enough to give me, was missing... 🙁
ViolinNew Jersey · Mar 2, 2007#17I know nothing!
(That sucks)
Chris07LBThread starterNew Jersey · Mar 2, 2007#18 Originally Posted by
YamilR ↑ and the map light and the trunk, if not mistaking
Correct, except for the trunk.. Liftbacks need a festoon LED replacement.
Originally Posted by
Violin ↑ I know nothing!
(That sucks)
Guess it just gives me a reason to get a new exhaust i guess.
Originally Posted by
Chris07LB ↑ Flashing RED isnt in ANY state... 🙄
is the white sidemarker legal in NJ? what is the reason you switch to orange?
ps. Thanks for such great DIY.
I have to ask, now that you have the new bulbs in, how do you like the look? They are so bright in the photos that it's hard to tell what they really look like.
hasher22Australia Sydney · Mar 3, 2007#22make a videooooooooo :)
Chris07LBThread starterNew Jersey · Mar 4, 2007#23 Originally Posted by
Galavoxx ↑ I have to ask, now that you have the new bulbs in, how do you like the look? They are so bright in the photos that it's hard to tell what they really look like.
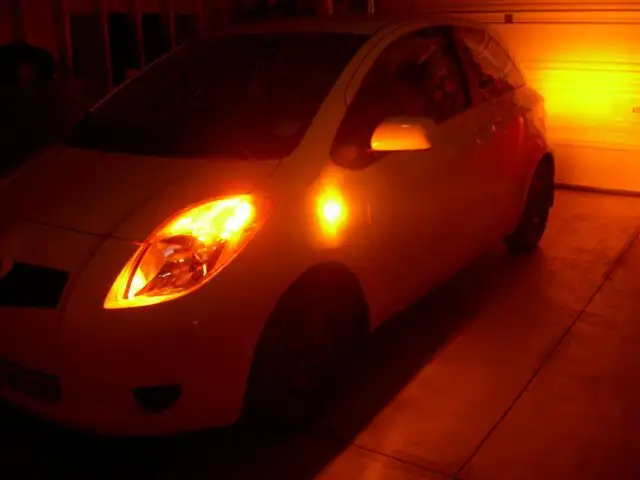
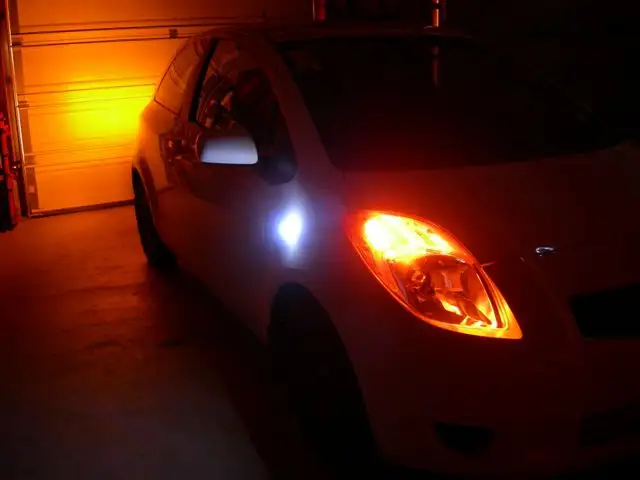
Didnt... only because everything else, as seen in the pic's, is amber/orange... I dont plan on changing so these are being replaced with HiLEDS 194 amber led's. 🙂
Cool. I think I would rather stick with the amber rather than go white, which is part of why I asked. Amber LEDs would look nice and bright. 👍 I might give this a try. Thanks for the great write-up.
yrsdrgnSF,CA · Mar 14, 2007#25Chris07LBThread starterNew Jersey · Mar 15, 2007#26Glad to see someone actually used the DIY after all the fuss of people wanting one.
yrsdrgnSF,CA · Mar 15, 2007#27Course man, I've been wanting to do this ever since you posted it. I just had to wait for the LEDs to get in thats all.
absenterHouston, TX · Mar 23, 2007#28So....just to clarify cause I'm an idiot sometimes. Or maybe it's the pain killers ,but 2825 and 194 are the same, correct?
ROCKLAND TOYOTAROCKLAND COUNTY NY · Mar 24, 2007#29got my new side markers today and did the DIY with no problem. i used clear 194's to go with my front clear signals. only fucked up thing is i scratched my fender taking out the old light....
Chris07LBThread starterNew Jersey · Mar 24, 2007#30Gotta be careful, that shits so easy to bend and scratch. Thats why I added the direction it slides out of the fender, as some have mentioned they screwed something up while figuring out how it supposed to go.
ROCKLAND TOYOTAROCKLAND COUNTY NY · Mar 24, 2007#31i probably should have looked at your whole DIY but live and learn.
the_bossMontreal Qc · Jul 23, 2007#32stupid question....why we cannot take the bulb out without having to cut the plastic🤷 that mean when the bulb is blown, you have to buy a full side marker 😕
thanks
brickhardmeatInner City, Dallas · Jul 23, 2007#33 Originally Posted by
the_boss ↑ stupid question....why we cannot take the bulb out without having to cut the plastic🤷 that mean when the bulb is blown, you have to buy a full side marker 😕
thanks
no, the housing is meant to be replaced everytime the bulb goes
debating on doing this and using my rice ass blue LED's for this..... any comments?
brickhardmeatInner City, Dallas · Jul 23, 2007#35 Originally Posted by
Black Yaris ↑ debating on doing this and using my rice ass blue LED's for this..... any comments?
honestly I think it will look like shit and you -will- get pulled over, if you are going to do it go white which is still asking for it but it would look cool, but then again if you do that make them all match front, rear and side
you people are just asking for trouble...from the man
brickhardmeatInner City, Dallas · Jul 23, 2007#37"you people"
what's that suppose to mean??😕 😆
AlphaFoxSpringfield, Mass · Jul 23, 2007#38people who do the mod of course.
brickhardmeatInner City, Dallas · Jul 23, 2007#39 Originally Posted by
AlphaFox ↑ people who do the mod of course.
I'm messing with you.
I am not sure that white side turn signals are illegal, I know in texas the front turns can flash white and the actual side marker has to light up amber but his is a turn signal, the rear in texas has to be amber or red
I know blue anywhere would be asking for it but white may be ok😕
Stay the course please. Back on topic.
brickhardmeatInner City, Dallas · Jul 23, 2007#41 Originally Posted by
Chris07LB ↑ Stay the course please. Back on topic.
jeez mod....we're talking about color options for side turn signal replacement that you did the diy on, sorreeeeeeeeee
I'm soooo outa here.
Go cry elsewhere then. I said a simple statment. Love ya brick. lol
njyarisNORTHERN NEW JERSEY · Jul 23, 2007#43nicely done .. very nice .. does anyone know how to make the side markers constant then blink only when using the turn signal? citilights
Meteorite ManTaunton, Mass · Jul 23, 2007#44There is a thread on that already. I don't know if anyone HAS actually done it but there was talk of relays that needed to stay open, etc etc.
Search and ye shall find....or someone will pull it up. Maybe me.

Constant power, always on, sidemarker lights w/ switch... ( 1 2)
Hmmmm.Didn't work like I thought it would. Type in Side Marker Lights in the search and it's the only one there.
Chuck
Bump 4 n00bies
mikenacaratoBrentwood, TN · Aug 13, 2009#46ive got a spare set of signals! ill be doing this soon.
MovetoyouUnited States · Jul 18, 2011#47No need for a Resistor?
ROCKLANDTOYOTAROCKLAND TOYOTA/SCION · Jul 18, 2011#48 Originally Posted by
Movetoyou ↑ No need for a Resistor?
none here!!
bust open witH hacksaw
take out old bulb
install new 194 bulb( i got from camry visor lights which are 8 watts)
tape up both pieces with electrical tape
re-install
enjoy.....
Very nice Chris, this is literally a hack job
07liftbackBay Area · Feb 1, 2015#50 Originally Posted by crankyhobo ↑
I failed a "Warrant of fitness" because the paint on the bulbs of these side indicators had worn off, and they must be amber here.
I replaced my bulbs by taking off the clear plastic cover, changing the bulb and gluing the cover back on.
To break off the cover i got some wire cutters and whacked the back edge where the cover meets the frame, carefully, all the way around. It took about four complete rounds of the rim with increasing vigor and then i was able to break the cover off with my hands.
This may have only worked because they are at least a few years old and the glue was starting to get brittle.
The bulbs were a standard amber 'wedge' bulb that i was able to buy from a local auto parts store for $5
You will want to use a clear glue or it will look nasty on the clear plastic cover.
IMGUR ALBUM (6 PHOTOS)
http://imgur.com/a/e9kMG
Really good info! I was wondering about taking off the cover rather than hacking open the housing with a hacksaw. This method seems a bit easier 👍
 Yarisworld