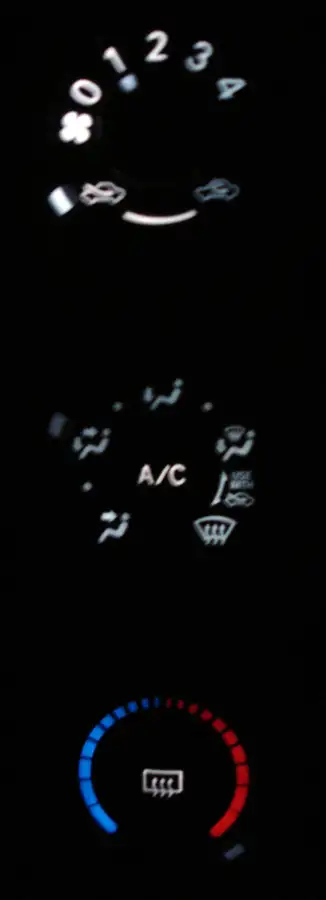
hasher22Original postAustralia Sydney · Oct 19, 2006#1Vodka something, said it would be helpful if it was here, since its lost in the other topic. Have fun changing the lights people....
---------- TUTORIAL ----------
Use this tutorial to change stocked bulbs or replace condom
Items Used
>Needle
>Pen
Items Baught
>Led Blue Bulbs
Picture lost · img227.imageshack.us >Red 5mm Condoms
Information you might need to know.
>This is a QUICK tutorial and some pictures may be missing and some information i might have missed. But i will do my best to cover everything >If you want to change the colour and DONT want to change the bulb buy condoms!!
>If you want to change the colour and WANT to change the bulb buy bulbs. Plz dont msg me or ask me about bulb sizes cuz i really dont know!! :)
>You dont have to change the colour to red or blue. It can be whatever colour u want.
>If you fuck the process up and you took this tutorial, DONT BLAME ME USE THIS TUTORIAL AT YOUR OWN RISK. >Have fun :P
Step One : Choose what colour you want to change for your knobs.
Step Two : Go to your local major supplier and ask for that colour condom or light bulb.
Note : To be safe with buying the coloured bulbs best choose my brand. (Pic above) becuz thats the brand i used and it works perfectly. I dont know what other brand or size that will replace the stocked bulbs. Step Three : Its time to take apart the CENTER CONSOLE (If you wanna call it that) Start by taking off the side pieces.
Picture lost · img142.imageshack.us Step Four : Take off top silver thingy
Picture lost · img227.imageshack.us Step Five : Now take off the center silver thingy
Picture lost · img291.imageshack.us Step Six : You will now see the back of the center piece with all the knobs and crap. Anyway you can start with whatever knob you feel like. I started from the top, since thats the easiest one.
Picture lost · img227.imageshack.us Once the white thing is taken off. You will see a circular shape with a line through it and 2 holes. That is the bulb.
Step Seven : Now its time to take out the bulb. I used a pen to get it out, i believe i didnt harm the bulb with a pen when taking it out. Anyway use a pen and stick it in one of the little holes and
TURN IT ANTI CLOCKWISE it should pop out.
Picture lost · img227.imageshack.us Step Eight : This is what the stocked bulb looks like!!!
Picture lost · img.photobucket.com Sorry Violin i got lazy
FOR PEOPLE WHO WANT TO CHANGE THE CONDOM!!!!
Step Nine : Get your baught coloured condom and replace it!! THATS IT!!
Step Ten : Put your new coloured bulb into the hole and lock it in with your pen. Clockwise.
THATS YOUR TOP ONE DONE :)
Step Eleven : Now its time to change the other 2.
FOLLOW STEP SIX AND UP Remove white thing, you will see the bulb, take it out, replace condom and place it back in.
FOR PEOPLE WHO WANT TO CHANGE THE BULB!!
Step Nine : Ok now u got the stocked bulb in your hand. Its time to STRIP IT APART!! :) :) :) :)
Now using a needle take apart the wiring that is connected to the "housing" if thats what u wanna call it. Its too hard to use your nails. Ive tried.
Picture lost · img227.imageshack.us It will look something like this after its all apart.
Picture lost · img291.imageshack.us Step Ten : Now its time to strip of the BAUGHT Coloured bulb. Its the same deal. But you can use your nails to pul apart the baught bulb.
Picture lost · img227.imageshack.us Step Eleven : Ok all done? Time to combine the
STOCKED BASE WITH THE BAUGHT BULB!!! Its the same deal but in reverse. You will have to pattern the wires as the stocked wires.
Picture lost · img133.imageshack.us It will look something like this!! There you have it, your replaced bulb!
Picture lost · img180.imageshack.us Step Twelve : Time to put it in!!! Lock it in clockwise with your pen and there you go!! THATS IT! Put everthing back together and now you have nice sexy new coloured lights.
Picture lost · img180.imageshack.us BTW i couldnt be fucked changing the middle one so i left it red. I think it looks good Blue Red Blue. :)
Thanks for reading or checkin out my tutorial. Boy that was a bitch to write!! But i gotta give back sumfin to the community.
Replies 86
hasher22Thread starterAustralia Sydney · Oct 19, 2006#2---------- MY HEADLIGHTS ----------
Phase 1 (Stocked) Picture lost · img221.imageshack.us Phase 2 (Added black) Picture lost · img218.imageshack.us Phase 3 (Added RED!) Picture lost · img218.imageshack.us Plz tell me if you think its hot or not!!.....personally i love it!! (Not becuz its done by me, cuz the colours looks soooo good.....lol)
---------- TUTORIAL ----------
Items i used
- Phillips screw driver (the + head one)
- Black "Power Plus Spray Brush" Spray Paint 150g
(you might want to get a bigger size if your are painting the majority of the headlights)
- Maskin tape
1- Start by opening your hood (DUH)
2- You will see these little black pivet thingy's....you need to take all of them out. To get them out push the little circle in the middle of the black things and push them up. to get them back in again do the opposite.
Picture lost · img207.imageshack.us Picture lost · img95.imageshack.us 3- There will be some on the side of the bumper next to the wheels so u can get them out too.
4-Next thing up - look under the car, there will be screws there. Take them out with a PHILLIPS screwdriver.
5 - Now your ready to take off the bumper. (As for me i didnt take it off, i just pulled it off half way, while half of it was still attached to the car) To take off the bumper you need to put a bit of pulling force. 1st of all PULL each side of the bumper with a bit of force (dont worry i wont snap or bend the bumper)
Picture lost · img95.imageshack.us 6- now its time to remove the lights.........first of all there are 3 screws that are holding the lights in place. Get them out!!!
Picture lost · img95.imageshack.us Picture lost · img95.imageshack.us Picture lost · img207.imageshack.us 7-Now take off the head lights and of course the wires are connected to it.
Picture lost · img95.imageshack.us 8-Now thats done, do it to the other one!!! when both headlights are off, shut the hood, lock up ur car and get those things into your OVEN!...lol
(SORRY NO PICS FOR THIS SECTION!!)
9-Ok put your headlights into the oven and set it to 250 - 300 Degrees (I put mine on 250. 250 is enough). Leave it in there for about 5 mins!! DONT LEAVE IT FOR 5 MINS STRAIGHT!!! KEEP CHECKING IT SO IT DOESNT MELT!!
10- The gooey REALLY STICKY glue should all be LOOSENED up, so take it out of the oven and GET A BUTTER KNIFE and try to seperate it with the butter knife!!! (if your doin it with ur hands it will be harder, i suggest get a butter knife and stick it between the black and the clear plastic and bend the knife upwards so it will pop out!!)
11 - once its sperated it will look like this (thats just the gooey glue)
Picture lost · img207.imageshack.us 12- Now get the parts you wanna SPRAY paint. go outside and spray IT! if you are paintin it black, have about 3-5 coats on. AND REMEMBER NOT TO SPRAY TOO CLOSE, becuz there will be dry drip marks on it. you dont want that. it doesnt matter if there are unfinished patches in your 1st - 2nd coat. the 3rd - 5th coat will cover it all up! and it will look great! With every coat leave it in the sun to dry for about 10 mins then go to ur 2nd coat and so on.
Oh yea you might wanna cover the spaces u dont want to spray black, red, blue whatever colour with good masking tape.
12 - once everything is painted and your happy PUT IT ALL BACK TOGETHER :)
Picture lost · img95.imageshack.us (ive just painted the top bit....thats all i wanted done...)
13- now go back to ur car, put in the headlights, attach the bumper, and put in the little black plastic thingys and the screws back in.
THERE U GO!! WALLA!! you now have sexy black head lights....
Picture lost · img246.imageshack.usvery nice 👍
edit:
I noticed a resister on the LED bulbs that you bought.. did you leave that on? and if so did you notice on the packaging if it told you what resistance?
hasher22Thread starterAustralia Sydney · Oct 19, 2006#4--------- TUTORIAL FOR TAKING OFF DOOR PANELS ---------
NOTE : Sorry people i have pics to the tutorial but i cant be F***ED uploadin it.
Well this is a simple version of it. If you know a little bit about cars then this simple tutorial will be NP..
>Pull out the 3 grey long strips on the door
>If you have power windows, on the DRIVERS side the switches for the power windows will have 3 screws that will be attached to the grey plastic thing. Take them out
>So the 3 grey plastic things should all be deattached.
>Next there will be 3 black screws attached to the door panel.....take them out, one is in the middle and i forgot where the others are. But there are 3!
>time to pull it off! Pull the bottom part of the panel, and it will pop out. (Only the bottom half will pop out)
>Next is to PULL UP the door panel and the whole thing should come out.
Hope that helps
---------- TUTORIAL FOR REPLACING 6.5" INCH SPEAKERS. LB & SEDAN ---------
Items Used :
>Drill
>1/4 Bolt Screws
>Screw Driver
>Scissors
>Electrial Tape THE PROPER WAY
Step 1 : take out the wire plug thats connected to the stocked one...
Picture lost · img96.imageshack.us Step 2 : Get a DRILL and DRILL OUT the rivets that is rivetted on....(the silver things) theres 3
Picture lost · img99.imageshack.us Step 3 : get the "SAT6" bracket/spacer and attach ur 6.5" speaker onto it. Dont know where to get the brakets from? Thats easy. From EBAY!
Picture lost · img96.imageshack.us Step 4 : Once your new speakers are in the Sat6 speaker brackets, its time to connect the wire. Remeber Neg with Neg, Pos with Pos. Use the scissors the strip the wire and connect it.
This chart will help you if you dont know the neg and pos wires.
Left Front Speaker = Pink (+), Purple (-)
Right Front Speaker = Gray (+), Yellow (-)
***Small Plug***
Left Rear Speaker = Black (+), Yellow (-)
Right Rear Speaker = Red (+), White (-) Step 5 : Time to screw on your new speakers. Use the 1/4 Bolt Screws to tightly place it in its place.
There you go. Done.
THE LAZY WAY
Step 1 > take out plug which is connected to the stocked speakers
Step 2 > LEAVE THE STOCKED BRACKET/SPACER in the door BUT RIP OUT the speaker (the middle part dont damage the stocked spacer)
Picture lost · img99.imageshack.us Step 3 : mount your new speakers on the spacer on the door, connect the wires, and screw in your speakers with screws to the stocked spacer.
Originally Posted by vodkalush
very nice 👍
edit:
I noticed a resister on the LED bulbs that you bought.. did you leave that on? and if so did you notice on the packaging if it told you what resistance?
Sorry didnt notice........... :s
Great work dude!
ECHOKnight2000Minnesota, US of A! · Oct 19, 2006#8Nice work hasher22. I like the different light set up in the first tutorial with the HVAC dials, looks fancy!😛 👍
KittPanama City, Panama · Oct 19, 2006#9in the step #10, there is a resister, can you take a closer picture of it or tell me what colors do the resistor has, or if you know what value is the resistor can you tell me?
paultyler_82USA · Oct 19, 2006#10If you use any type of LED bulb in that retrofit, they should already have a resistor on them, just leave it on when you put it in the neo-wedge. If you want to use your own LED that you just have sitting around, You'll need to figure out the forward voltage of the LED (should be listed on package or spec sheet) and then calculate the proper resistor to drop from 12 volts to the forward voltage of the LED.
For extra help, use this nifty calculator:
http://ourworld.compuserve.com/homep...Bowden/led.htm and for this application fill 1 in "Total LEDs" and 12 in "Total Voltage" then fill in the "LED Voltage" and "LED Current" (in milliamps) from the package or spec sheet then hit the button to find out your needed resistor. NOTE! This is for bare LEDs only, all #74 type LED bulbs should already have the proper type resistor on them.
I just made my own Blue LED bulbs for the little sedge bulbs in the headlights... pics will come soon.... I still have not gotten around to doing hashers headlight mod... maybe on my next day off. :)
hasher22Thread starterAustralia Sydney · Oct 20, 2006#12 Originally Posted by Kitt
in the step #10, there is a resister, can you take a closer picture of it or tell me what colors do the resistor has, or if you know what value is the resistor can you tell me?
Ill take a pic when i drop me bro off to work.
Thanks peeeepole, i wouldnt have done these mods with this site. Well i woulda eventually but you know what i mean :)
Originally Posted by bigsky2
Nice stuff hasher.
Why not include a little blurb about SPACERS for the speakers for those truly DIY at heart people?!
I did? Get the Sat6 Spacer from ebay....lol thats all isnt it? :P
I think hes refering to how to make your own spacer; vrs buying one.. I'll link up to a couple of different threads... 1 sec.
Edit:
Hatchback Speaker template (from - bigsky2) -
Direct link to post :
Link to a thread or page that is not in the archive Thread Link:
Link to a thread or page that is not in the archive Make own spacer (by me) -
Direct Link to post:
DIY 07 Sedan Rear Speaker install Thread Link:
DIY 07 Sedan Rear Speaker installOk... First issue.
I tried changing in some LEDs (With resistors already on them) last night. Turned on the car, and I must've had the LED in wrong, cause I think I've popped the Fuse. Now none of the lights work (I only put in 1 led), and the Dimming control doesnt work.
Before I go pulling around, does anyone have any ideas what may have happened?
hasher22Thread starterAustralia Sydney · Oct 20, 2006#16I HIGHLY doubt that u popped a fuse.
Insert the lightblub, and turn on your lights. If it doesnt light up push the light bulb in so the wires of the bulb acually connects to the gold metal bit and see if that works.
2nd thing, what i had to do is the position of the lightbulb. With the LED bulbs theres a thick wire and a thin wire yes? Well lets just say i had the thick wire end on the right when i inserted in the hole, but it didnt light up. So i turned it around so the thick wire was on da right, and it lit up. (well that happen with me anyway)
Hope that helped you out a bit.
AykaRochester, NY · Oct 20, 2006#17I'll play around with it some more. Too bad its raining like mad here >.<
Maybe I got the wrong type of LED too...
hasher22Thread starterAustralia Sydney · Oct 20, 2006#18shweeet ;)
Keep us updated...
AykaRochester, NY · Oct 20, 2006#19Just concerned me that nothing is lighting up, and the dimmer switch doesnt work anymore >.<, I guess its just that "Oh SHIT did I break my Brand new/First new car?!?"
vodkalushRochester, NY · Oct 20, 2006#20I've blown prob like 5-6 fuses... I'm a dumba$$ and dont always double check stuff 🙄 .
But just pull the fuses out one by one (or check the fuse cover and take a guess as to what one might be blown and check it). Its simple enough, that way you can determine if you need to re-do the led or if you fried the controller....
good luck.
AykaRochester, NY · Oct 20, 2006#21fried the controller?... why does that not sound like somthing I want?
vodkalushRochester, NY · Oct 20, 2006#22cause its prob like a 2-4 day wait and most likely $70-100
AykaRochester, NY · Oct 20, 2006#23what are the conditions under which these bulbs should light? Key is in the ON Position, and Headlights are Activated? I dont have to actually start the car right?
Im gonna end up doing some playing around after work, so I just want to make sure everything goes nice.
vodkalushRochester, NY · Oct 20, 2006#24no you dont need to have the car on for the knob lights to come on.. unless the HB is different from the sedan.
fred812pa · Oct 20, 2006#25Remember Guys these Are Light Emitting Diodes, L.E.D. Therefore they have polarity You must check to see that the positive leads are installed to the positive terminal on each bulb. Other wise it will be in foward bias and draw all kinds of current, blowing fuses and dragging down dimmer circuits. Using a test light to metal ground you should be able to detemine which pc pads are the hot ones. I VOM would be best to check polarity. Diodes draw very little current in one direction and alot the other direction.
Fred
hasher22Thread starterAustralia Sydney · Oct 20, 2006#26 Originally Posted by Kitt
in the step #10, there is a resister, can you take a closer picture of it or tell me what colors do the resistor has, or if you know what value is the resistor can you tell me?
Picture lost · img95.imageshack.us430 Ω +/-5%, just what I tought... Thanks buddy!!!!
Black YarisToledo, OH · Oct 25, 2006#28so I did this mod today with bare LED's and resistors... and I used a damn 330Ω resistor... and my LEDs are dim as fuck.... so I am going to have to pull it all apart again and use a 220Ω or somethin.. BTW I am using a 5V 30mA LED
Damn it... just went to a 220Ω resistor, and not much better results.... wonderin if the damn thing can take a full 12 volts?
AykaRochester, NY · Oct 26, 2006#29Could be worth a Try, Like I said, the 2 Fuses you'll run trouble into are the Panel 1 and the... ahh crap, its the 7.5 right next to it.
Either way. I got my LEDs from AutoIllumination, they look GREAT! Thanks Violin for the heads up!
KittPanama City, Panama · Oct 26, 2006#30 Originally Posted by Black Yaris
so I did this mod today with bare LED's and resistors... and I used a damn 330Ω resistor... and my LEDs are dim as fuck.... so I am going to have to pull it all apart again and use a 220Ω or somethin.. BTW I am using a 5V 30mA LED
Damn it... just went to a 220Ω resistor, and not much better results.... wonderin if the damn thing can take a full 12 volts?
Nope, if you put 12v on them you will burn them, i used a 620Ω and it worked fine, i have the LEDs on the A/C control panel and it looks great, they may not glow as the original incandescent bulbs because they shine in several directions and the LEDs only to the front, i'll post some pics ina few minutes...
with a 330Ω resistor it barely lit the LED when I jumped it to the battery.... got about 2X brighter with the 220Ω... The formula to find out what you need is (Source V-desired V)/mA=Ω basicly take the diference in source voltage and desired voltage and divide it by the current draw from the LED (this is posted on the package) to get the proper impedence of the resistor... so I went (12V-5V)/.03A=233.3333Ω now you are suposed to go to the next highest impedence which was 330Ω (next highest I could find).... no good.... so I read the LED box better.. it says it can take up to 6 volts... so I plugged that in...... came up with 200Ω... next one up was 220Ω.... again I say WTF?
KittPanama City, Panama · Oct 26, 2006#32i went ahead and used the website that paultyler_82 recomended me
http://ourworld.compuserve.com/homep...Bowden/led.htm and that's the value it gave me (620Ω), which worked fine with my LEDs, it is not too bright as posted in the picture below because it has like a transparent plastic inside the panel which spreads the light, but the LED's glow to the front only, i purchased my LED's in a electronics shop (50 cents each) it uses only two but if you connect the LEDs without mounting them in the panel they are way much brighter, maybe i'll add some more. Below is the LED that i am using too
Picture lost · www.yarisworld.com Picture lost · i63.photobucket.comHas anyone just tried stripping the color condom off? The dash is illuminated in a bright white, so I thought maybe the knobs would look cool if they sort of matched it. I might go do this right now...
vodkalushRochester, NY · Nov 14, 2006#34 Originally Posted by grimez
Has anyone just tried stripping the color condom off? The dash is illuminated in a bright white, so I thought maybe the knobs would look cool if they sort of matched it. I might go do this right now...
thats how I have mine... but with the condoms off its a yellow color, not white. So I ordered some bright white LEDs to replace all the green/yellow stock bulbs
What kind of LED's did you order? I have done a lot of work with LED's before, so I can't wait to get started on this lil project.
vodkalushRochester, NY · Nov 14, 2006#36well I was gonna go with the full DIY and get some leds from radioshack and resistors... but its much easier and cheaper (as single super bright LEDs white or blue where about $5 a piece) so I got mine from*
http://autolumination.com/74.htm (from a link in either this thread or a diff one... cant remember and dont care to look 🙂 ) they where "Neo - Wedge Instrument Panel Bulbs" leds.
I got 3 spare light bulbs if anyone wants them, the ones i used in my tutorial. Though u only have to pay for shipping....
It would prob. be cheaper to buy the bulbs urself... :)
eTiMaGoBangkok, Thailand · Nov 15, 2006#38Well I just got myself some little red condoms yesterday, time to go yank out those console panels 😉
eTiMaGoBangkok, Thailand · Nov 15, 2006#39Done!
Thanks Hasher22, the pen was certainly a very useful tool for this 😉
Also, word of advice, don't do any car mods in the middle of a hot, sunny day, I'm drenched with sweat now 😁
hasher22Thread starterAustralia Sydney · Nov 15, 2006#40YAY!!! PICS!!!????
eTiMaGoBangkok, Thailand · Nov 15, 2006#41ta-daah!
Picture lost · www.ifrance.com
grimezAmes, Iowa · Nov 15, 2006#42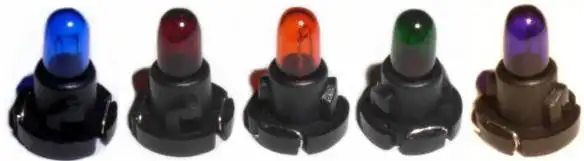
Would these be a direct drop in? If not, which neo wedge bulbs should i order from that auto-illumination site?
yup those will work
grimezAmes, Iowa · Nov 15, 2006#44I ordered one of these for the shifter.
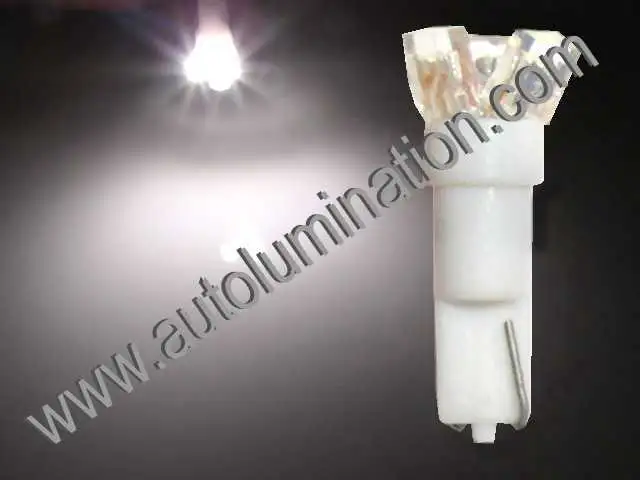
And 3 of these for the knobs.
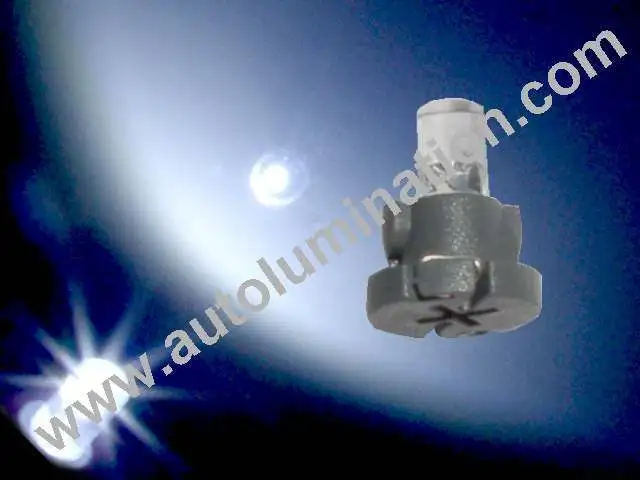
This all work out okay?
Originally Posted by grimez
Would these be a direct drop in? If not, which neo wedge bulbs should i order from that auto-illumination site?
they won't be very bright at all though
i did the interior on my last car using them little colored lights and eventually switched to LED because the colored bulbs were to dim
Ya, i saw that I had linked to those bulbs, so i switched, and ordered the LEDs. I hope they will work out.
eTiMaGoBangkok, Thailand · Nov 15, 2006#47LEDs would certainly give a much brighter result, but I'm pretty happy with the way it turned out on mine :)
grimezAmes, Iowa · Nov 23, 2006#48After receiving my LED's a while ago, I just now got around to installing them. I was worried that I was going to have to remove the bulbs and swap them into the existing black plastic pieces... but the ones I ordered required none of that at all. The process actually went a lot smoother than I expected.
I did run into one problem however... I wanted to change the bulb in the shifter of my Automatic, but I couldn't find a way to get that small piece of plastic on the top off. I removed the cover to manually release the shifter, but that got me nowhere. Can anyone guide me to changing this bulb?
Here is a pic I took of the knobs after installation. Sorry for the quality, but its a phone cam in the dark.
its a beotch to remove that center piece... there are 4 snap points that hold it down (us a flathead to release the hold points) then lift and go either forward or backward with the newly loose and lift; taking it out is actaully easy, its putting it backin thats a bitch... but you really just do that opisite of what you did to remove it 🙂
hope this helps
edit: White Power!!
grimezAmes, Iowa · Nov 24, 2006#50Are you talking about the small center piece with the P-R-N-D-3-2-L letters on it? Are the hold points straight down the sides? Is there any way to remove them without gouging the crap outta the plastic?
 Yarisworld