
Yarisworld Archive

DIY Change Your Interior Light Grey Panels to Black

65 posts · 80,738 views · page 1 of 2

KCALB SIRAYOriginal postVirginia · Apr 10, 2009#1
To continue my "No Cost" to "Low Cost" of DIY's, I'd like to share one for changing the interior light grey panels of the standard Yaris to black. These panels are located on the doors, visors, rear quarter panel area, etc. The Sport Edition comes with black panels already in place, and can put a huge dent in your wallet if you buy the pieces from the dealer. Here is a low cost way to change the color to black and only takes about 20 minutes to complete after you have removed the items from your car. The best part is, there is no paint involved and no vinyl to screw up. Here's how it works.

I had this idea stuffed so far down my memory lane, they changed the lane to a highway and sold my house. When I was teenager, I use to build RC cars and race them. When I would buy parts that were made of plastic, they usually came in white only. In order to make the parts last without painting them, we dyed the parts using RIT fabric dye. This dye can be found at any grocery store, usually in the household cleaner sections.

Now onto how it works. This DIY was put together based on the knowledge I had for RC cars only. The material used for those parts was usually a nylon type, but dying the parts would work the same way. I chose to do a small part just for your viewing pleasure. Large scale parts such as the panels in the rear of the car will be discussed and you will be instructed on how to tackle these after the DIY.

Items you need to gather before starting:

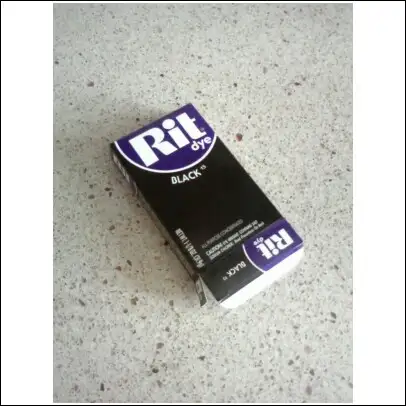
~ 1 package of RIT Fabric Dye -Black
~ Part/parts to be dyed
~ 1 old pot to dye part/parts in
~ Plastic spoon or old spoon
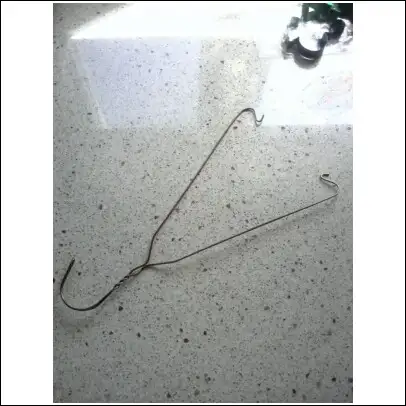
~ 1 old pair of tongs or do like I did and use a hanger I had leftover from the drycleaner
~ Paper towels
~ The "A-OK" to move forward from your wife/girlfriend/husband/boyfriend/mother/father and the list could go on for days. Just make sure your don't ruin the good stuff in the process


Step one -- Remove the part/parts you intend to dye:

I chose to dye a small part for the DIY so that it was easier to work with and show how easy it is. The visor cover was a great small part for this job
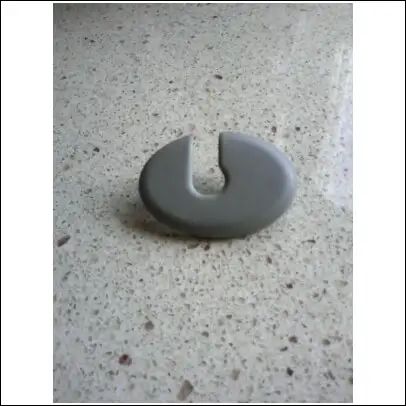


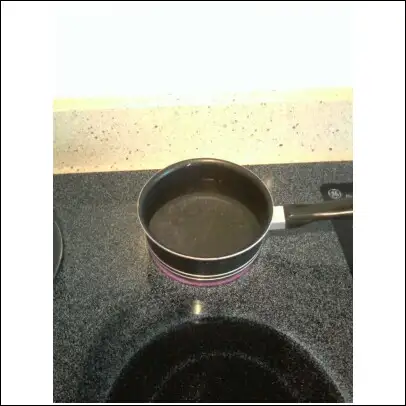
Step two -- Chose a old pot that you won't get in trouble for using to dye your parts. I chose to use a 2 quart pot that I had laying in the back of the cabinet and will never use again unless Charles is coming over for dinner 😆

Step three -- Now that you have everything ready to go, you need to fill your pot with water and bring it to a boil. Make sure not to overfill the pot as we do not want the pot to boil over.


Step four -- After you have brought the water to a boil, empty the contents of the package into the boiling water. You may need to lower the heat, but still to a boil in order not to boil over. I only used about a 1/4 of the package, which is plenty enough for these two parts. It would last about 50 parts in the long run, so a package can go a long way. Use your plastic spoon or old spoon to stir in the powder.
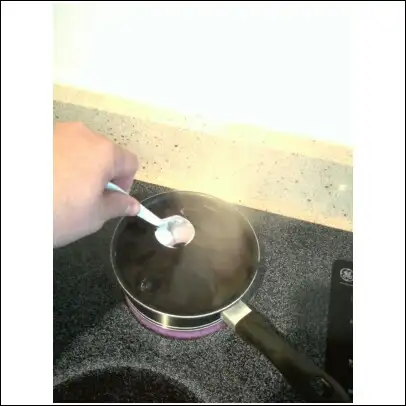


Step five -- Place the items in the boiling water. Use your tongs or homemade tongs like the ones below to place them in the water and to check them during the process. The longer you allow them to boil, the darker the color will become. Check on them after 2 minutes to see how the color is coming along. You may not notice it right away, but after about 10 minutes in the boiling water, the part/parts have pretty much turned the desired black we are looking for, close enough to match with the rest of the interior trim.


Step six -- Remove your parts from the boiling water and place on a paper towel. Turn off the boiling water and proceed to run your parts under cold water. Without going into details of how and why this should be done, here is the Cliff Notes version.....Molecules -- heating something makes them expand and cooling them makes them contract. It's better for the plastic and the dye, lol.

Step seven -- Your part/parts have undergone the nip/tuck of all DIY's at a low cost, and looks awesome.
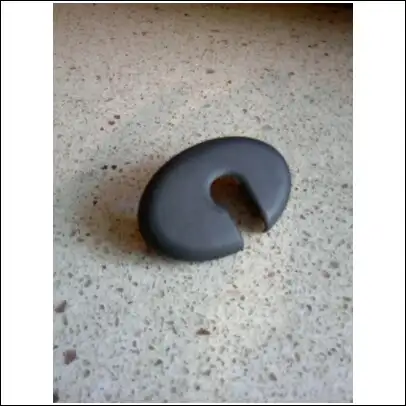


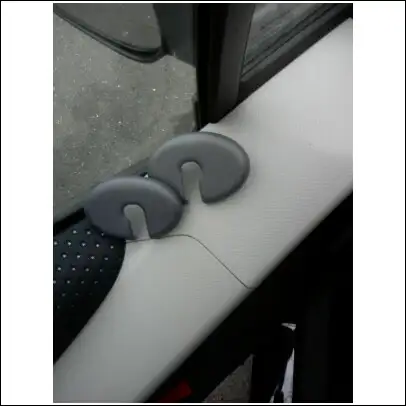
Step eight -- Take your newly dyed part/parts back out to your car and see the dramatic difference you've been able to create with just a few bucks, rather that spending hundreds and hundreds of dollars to buy new interior pieces. This photo shows you just how well the dye takes to the plastic.


Well, there you go! Now, how do you tackle the larger pieces you might ask? First I might mention that if you are going to proceed with this DIY, you want all your pieces to be consistant in color from the same batch of dye. For all my pieces, I am using a large burner from my home brewing station to boil water in an Aluminum trash Can. The trash can and burner are within a very small budget. My burner cost me about 25 bucks and runs on Propane. Used ones could go for less, but the point is it's cheap, you just have to look for them on the internet and classifieds. get about 6 boxes of Dye and follow the DIY above. The longer you boil them, the better the color, but at the same time, you do not want to warp your pieces, so constant checking and turning is a must. You need to do this in a well lite area outside and make sure no children are around. If you've ever deep fried a turkey, the same precautions apply here. Safety first! In about 10 to 20 minutes, you have a complete new color matched interior. You may choose to do other colors from RIT as well, just remember that it might not turn out the exact color you want in the end so test a small part such as the one above in the DIY to make sure the part is to your liking. Good luck and please be safe in doing any of this.
Replies 64

KCALB SIRAYThread starterVirginia · Apr 10, 2009#2
It will not run or bleed as it is perm. It's pretty much the same way as if it were done at the factory, just instead of adding the dye during the manufacturing process, I've added it after. Still, will not come off as it is now part of the plastic.
eTiMaGoBangkok, Thailand · Apr 10, 2009#3
some good ol' home cooking lessons with Mike 👍

Seriously, this is good stuff, the same technique had been used in the world of customizing computers (way back before they came in black or colored cases) and is way more durable than paint, because like a tattoo, the dye is absorbed into the plastic.
RainSoCal · Apr 11, 2009#4
Can you use other colors?
eTiMaGoBangkok, Thailand · Apr 11, 2009#5
yes you could but remember the color will blend in with the original gray of the part, so any other colors may look kinda dull/dark
frownonfunRGV, Texas · Apr 11, 2009#6
gosh this write up is quite interesting.
Kaotic LazagnaCentral Valley, CA · Apr 12, 2009#7
Originally Posted by eTiMaGo ↑
some good ol' home cooking lessons with Mike 👍
LOL.

Nice job Mike.
Pitt YarisPittsburgh · Apr 12, 2009#8
That's pretty awesome.
KCALB SIRAYThread starterVirginia · Apr 12, 2009#9
Originally Posted by Rain ↑
Can you use other colors?
Yep, you can but... I'd suggest you test a small part like the cover I did. Thomas is right, the color will be blended with the light grey color to be the new color so this will have to be taken into account. Next weekend I will hopefully have time to do everything else. (closes eyes and mental pictures pop up) I can see it now, not too far into the future, Yaris meets with people standing around what looks to be a big vat of chili, lol, everyone dipping there panels into the boiling water😆
RainSoCal · Apr 12, 2009#10
^ Somehow, I am disturbed by that picture lol
Don't do it in IA :P
KCALB SIRAYThread starterVirginia · Apr 12, 2009#11
which one, the big pot? lol
kimonaHuntington Bch, CA · Apr 21, 2009#12
As I read through your DIY, I kept thinking that the boiling water may actually change the shape of a plastic part.
KCALB SIRAYThread starterVirginia · Apr 21, 2009#13
Originally Posted by KCALB SIRAY ↑
Well, there you go! Now, how do you tackle the larger pieces you might ask? First I might mention that if you are going to proceed with this DIY, you want all your pieces to be consistant in color from the same batch of dye. For all my pieces, I am using a large burner from my home brewing station to boil water in an Aluminum trash Can. The trash can and burner are within a very small budget. My burner cost me about 25 bucks and runs on Propane. Used ones could go for less, but the point is it's cheap, you just have to look for them on the internet and classifieds. get about 6 boxes of Dye and follow the DIY above. The longer you boil them, the better the color, but at the same time, you do not want to warp your pieces, so constant checking and turning is a must. You need to do this in a well lite area outside and make sure no children are around. If you've ever deep fried a turkey, the same precautions apply here. Safety first! In about 10 to 20 minutes, you have a complete new color matched interior. You may choose to do other colors from RIT as well, just remember that it might not turn out the exact color you want in the end so test a small part such as the one above in the DIY to make sure the part is to your liking. Good luck and please be safe in doing any of this.

That's why I said you have to stir and keep an eye on it. Most are ABS and will withstand the heat. You'd have to leave it the water for quit a long time for it to deform the shape. It only takes a few minutes for the color to change so no worries.
CTScottUSA, CT · Apr 21, 2009#14
That's wild! I never realized that RIT would work on plastics. Their website even says that it will.

As far as overdying goes, they even have a chart that says what colors you can achieve when dying objects of specific colors. Grey for example can yield Dark Green, Dark Brown, Navy Blue, or Black:

http://www.ritdye.com/Questions.50.lasso


When you do your full run, can you throw in a scrap piece of white or beige ABS? I'd like to see a cross section after dying to see how far the dye penetrates.
rningonfumesSoCal · Apr 21, 2009#15
This is one helluva diy, I vote for a definite Sticky as it has so many applications.
KCALB SIRAYThread starterVirginia · Apr 21, 2009#16
No problem. Thanks for the input and link to the site
KCALB SIRAYThread starterVirginia · Apr 21, 2009#17
Originally Posted by rningonfumes ↑
This is one helluva diy, I vote for a definite Sticky as it has so many applications.
Thanks for the vote 👍
wiirenetnear Chicago, IL · Apr 21, 2009#18
This is awesome, "I can see it now, not too far into the future, Yaris meets with people standing around what looks to be a big vat of chili, lol, everyone dipping there panels into the boiling water"
please come to chicago to do this lmao..
Pitt YarisPittsburgh · Apr 21, 2009#19
What if you didn't have a pot big enough to submerge the whole piece in the pot? Would it streak or be darker in one spot than the other if you submerged half at once, then turned around and the other half?
KCALB SIRAYThread starterVirginia · Apr 21, 2009#20
Originally Posted by Pitt Yaris ↑
What if you didn't have a pot big enough to submerge the whole piece in the pot? Would it streak or be darker in one spot than the other if you submerged half at once, then turned around and the other half?
Yes, that would happen. Best way is an aluminum trash can or if you have a pot big enough from when you use to work at a greasy spoon and borrowed one😉 for that special soup😉 for the party😉
Pitt YarisPittsburgh · Apr 21, 2009#21
I looked at the chart/suggestions on their website about coloring. I wanna dye the outside border tan, but not sure if or how it'd work given the fact it's gray.
KCALB SIRAYThread starterVirginia · Apr 21, 2009#22
That's why I chose to do a small part that would not cost much to replace. Just do as I did and pull the visor cover off and start try it. A few bucks used or from the dealer I'm sure. Would love to see other colors done since we know it works for turning them black.
PatrickJohnsonMurfreesboro, TN · Jul 20, 2009#23
hmm, i definitely want to try this. couple questions:

would the burner of a turkey fryer be enough to heat a large aluminum trash can or watering trough to boiling?

what about the trim in the back interior around the sides? surely no pot is big enough...
TamagoOff Grid · Jul 20, 2009#24
very good diy. should there be any note as to prep of the plastic before dipping in the dye? (clean with alcohol to remove grease, etc)
PatrickJohnsonMurfreesboro, TN · Jul 20, 2009#25
I'm thinking the boiling hot water would take care of that...
TamagoOff Grid · Jul 20, 2009#26
Originally Posted by PatrickJohnson ↑
I'm thinking the boiling hot water would take care of that...
🤷 then the boiling hot water now has grease/dirt in it?
PatrickJohnsonMurfreesboro, TN · Jul 20, 2009#27
Originally Posted by Tamago ↑
🤷 then the boiling hot water now has grease/dirt in it?
touche. :)
supmetSouthern California · Jul 20, 2009#28
I kind of agree, any dirt/debris will loosen up in the boiling water and float to the top or sink to the bottom, dye will set, and you'll be left with dirty dye, but a successfully dyed piece.

But its never a bad idea to prep a piece you are dying/coloring/painting/whatevering. I'd imagine a good cleaning and alcohol prep could open pores and allow more dye to be absorbed resulting in a longer lasting dye job.
TamagoOff Grid · Jul 20, 2009#29
Originally Posted by supmet ↑
resulting in a longer lasting blowjob.
amen to that!
KCALB SIRAYThread starterVirginia · Jul 21, 2009#30
Originally Posted by PatrickJohnson ↑
hmm, i definitely want to try this. couple questions:

would the burner of a turkey fryer be enough to heat a large aluminum trash can or watering trough to boiling?

what about the trim in the back interior around the sides? surely no pot is big enough...
it will bring it to a boil. I fired up the home brew burner I have and it heated the can up pretty well. even if it does not get to a full boil, the heated water at any higher temp should do the trick
Originally Posted by Tamago ↑
very good diy. should there be any note as to prep of the plastic before dipping in the dye? (clean with alcohol to remove grease, etc)
Thanks. Yes. Treat it as if you were to paint any surface by making sure debri and grease are clear from the item.

Originally Posted by supmet ↑
I kind of agree, any dirt/debris will loosen up in the boiling water and float to the top or sink to the bottom, dye will set, and you'll be left with dirty dye, but a successfully dyed piece.

But its never a bad idea to prep a piece you are dying/coloring/painting/whatevering. I'd imagine a good cleaning and alcohol prep could open pores and allow more dye to be absorbed resulting in a longer lasting dye job.
You said it 👍


!!UPDATE!!
So far no problems fading with the two pieces in the DIY. I've left them out in the sun on my dashboard since then and no turning of colors. I wanted to double check before I moved forward with the entire trim set.
Sodium DuckWestern Mass. · Jul 21, 2009#31
Subscribed. Post up pics of your "kitchen" if you ever get a chance. Looking foward to seeing the end result.

What's going to be your trick for getting the headliner to be black, eh?
PatrickJohnsonMurfreesboro, TN · Jul 21, 2009#32
with a big enough vat, you could dye the headliner :)

but I will probably pull it out and use fabric paint to paint it black.
KCALB SIRAYThread starterVirginia · Jul 21, 2009#33
Originally Posted by Sodium Duck ↑
Subscribed. Post up pics of your "kitchen" if you ever get a chance. Looking foward to seeing the end result.

What's going to be your trick for getting the headliner to be black, eh?
That's going to be the tricky part lol. - looked into the fabric paint as Patrick just mentioned but I don't want it to come our stiff.
I assume the headliner is backed by cardboard and preformed plastic in some areas so soaking it would probably not be good for itm
Probably recovering is still the cheapest option right now. It doesn't have to be the suade style like most have done. Just black fabric
On sale at the AC Moore or fabric store should do fine
Sodium DuckWestern Mass. · Jul 21, 2009#34
Yea, some of that headliner spray on glue stuff, and some fleece/whatever would probably be easiest.
Sodium DuckWestern Mass. · Aug 8, 2009#35
Any updates?
KCALB SIRAYThread starterVirginia · Aug 9, 2009#36
Originally Posted by Sodium Duck ↑
Any updates?
None yet. Haven't had time during the weekends since the meet in Nashville. Hopefully in the next few weeks though.
RYSIRAYMelbourne Vic. Au. · Sep 25, 2009#37
Just joined YarisWorld and came aross this most interesting thread.Re - using colours other than black , if one were to dye a grey bit of plastic red and let it cool and then dye it red again ,do you think that the colour would deepen ?
KCALB SIRAYThread starterVirginia · Sep 28, 2009#38
yes, also the amount of dye you use and the amount of time you leave it to turn in the dye, the deeper the color. I tested two parts, both for different length of time and the color was deeper in the longer dyed piece.
GideonSunnyvale, CA · Oct 10, 2009#39
Just wanted to thank KCALB SIRAY for the awesome DIY!

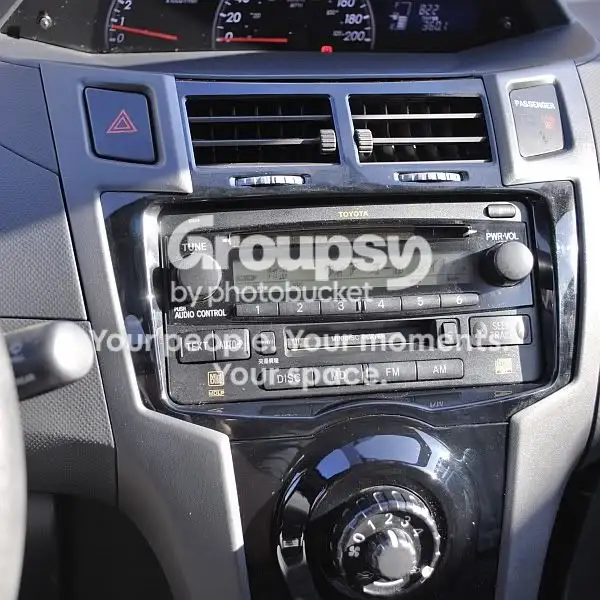
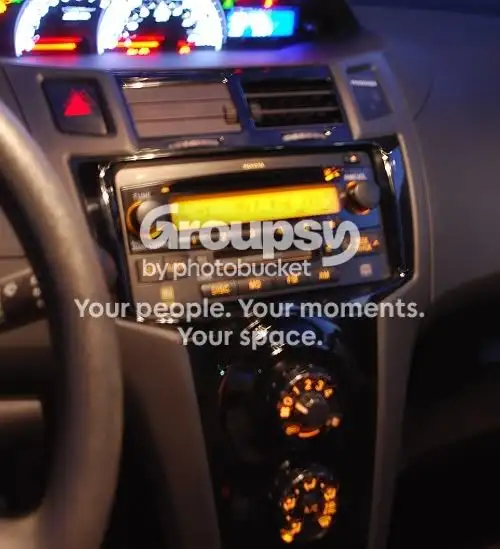
I needed to color my vent pieces black to match my RS interior pieces I was installing and didn't feel like going the rattlecan route.


(Sorry for the crappy picture, the sun was in an annoying spot)

It looks perfect to me, the picture makes the vents look lighter than what they are, but they are a nice flat black.

One thing I noticed is that the bottom vent angling "wheels" do not dye very well. They're not as light as they look in the picture, but they're not nearly as dark as the vents and this is after leaving them in the dye twice for about a half hour.
advocatelocation · Oct 10, 2009#40
Wow James the head unit is in Japanese haha that's crazy. BTW the new trim looks really good and the AC vents don't look too bad but they are fully open so it's hard to see just how they came out.
GideonSunnyvale, CA · Oct 10, 2009#41
Oh whoops, yeah I should've closed one vent to show it off a bit better. 😆

It got too dark to take a good picture, and using the flash makes the color look off, so this is the best to show the color although it's blurry as hell:


Oh and the stereo is in English, it was just displaying the title of a minidisc I had in, and it happened to have a Japanese title. (An import of Moby's 18 from Japan if you were at all curious. ;P)
KioshiFremont, CA · Oct 10, 2009#42
wow you didnt waste any time....Love the amber lights on the headunit and climate controls :D
Now you just need the amber cluster to go w/ it all ;)

The wheels for the vent adjustment looks fine to me in color comparison..maybe because of the pic. I still like it better than our light gray ones...
Are the JDM ones as dark as the gloss black or were they always lighter? Can't remember....

BTW, did you ever figure out what that button w/ all the kanji was for? lol
GideonSunnyvale, CA · Oct 10, 2009#43
Originally Posted by Kioshi ↑
wow you didnt waste any time....Love the amber lights on the headunit and climate controls :D
Now you just need the amber cluster to go w/ it all ;)
Ughhhhh, don't remind me. 😢 😆

The RS shows them as flat black, and not as dark, but still pretty dark. I think this is a good solution until I can find one, lol.

Oh, and the button immediately turns the radio on and tunes it to an AM station and it displays "TRAFFIC" on the screen, so I assume it's for traffic updates! 😁
KioshiFremont, CA · Oct 10, 2009#44
Originally Posted by Gideon ↑
Ughhhhh, don't remind me. 😢 😆

The RS shows them as flat black, and not as dark, but still pretty dark. I think this is a good solution until I can find one, lol.

Oh, and the button immediately turns the radio on and tunes it to an AM station and it displays "TRAFFIC" on the screen, so I assume it's for traffic updates! 😁
I'm sure you can find 'another' one....soon you'll be the JDM whore of this place😆

Traffic updates on a stock headunit 😲
KCALB SIRAYThread starterVirginia · Oct 13, 2009#45
Originally Posted by Gideon ↑
Just wanted to thank KCALB SIRAY for the awesome DIY!

I needed to color my vent pieces black to match my RS interior pieces I was installing and didn't feel like going the rattlecan route.


It looks perfect to me, the picture makes the vents look lighter than what they are, but they are a nice flat black.

One thing I noticed is that the bottom vent angling "wheels" do not dye very well. They're not as light as they look in the picture, but they're not nearly as dark as the vents and this is after leaving them in the dye twice for about a half hour.
Looks great 🎉
AltitudeColorado · Oct 13, 2009#46
I dyed my center vent too and while it looked great for a while , the dye has faded a bit and they look like a very dark purple now. Think I'm going to just paint them this time.

Just an FYI to those considering this.
127.0.0.1NE · Oct 13, 2009#47
plastic from the factory-extremely resistant to UV
RIT dye...no resistance to UV

be warned....some time in the sun, 2 years later, what will it look like ?
will the Yaris resale go up or down ?
GideonSunnyvale, CA · Oct 13, 2009#48
Or will the owner just purchase new vents from a wrecked Yaris for dirt cheap a few years from now? 😆
KCALB SIRAYThread starterVirginia · Oct 13, 2009#49
so far no problems on the pieces I dyed.
KCALB SIRAYThread starterVirginia · Oct 13, 2009#50
303 Aerospace Protectant spray on would cure this problem if your having any. works great on boats and worked great on my Jeep soft top so should work in this application.