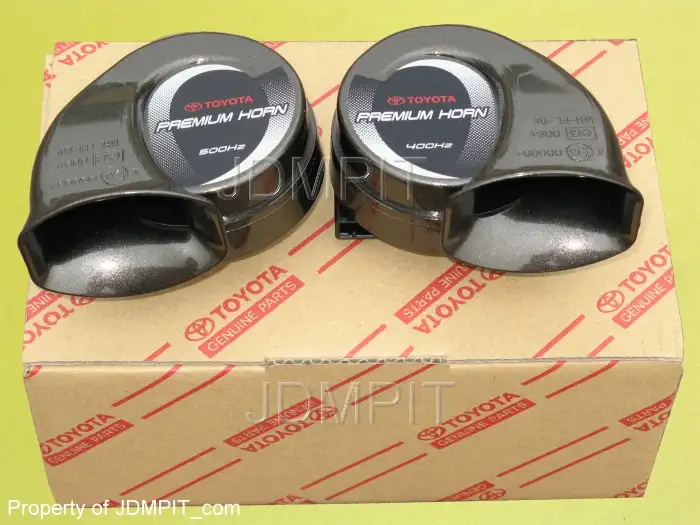
Meteorite_MartyOriginal postWaterloo, Ontario, Canada · Mar 30, 2009#1I am installing the Toyota Premium Horn kit tonight. These can be seen and heard at:
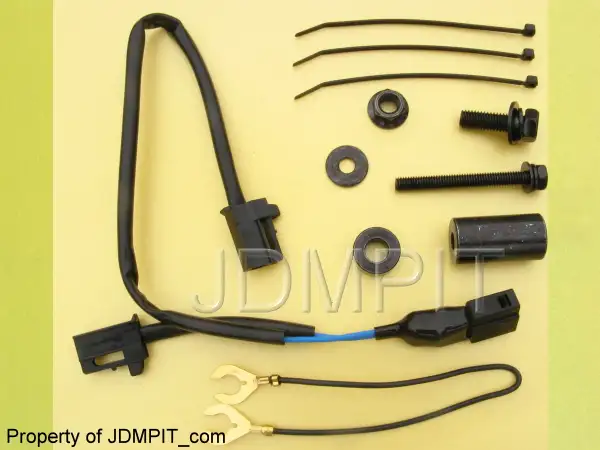
http://toyota.jp/dop/recommend/premiumhorn/index.html I am going to use the Toyota horn splitter cable, to preserve the existing wiring and to make everything plug-and-play.
I will post pictures of installation later. I will try to take some pictures as I go along, in case anyone is interested in doing this on their own.
Replies 77
1NZYaris1New Zealand · Mar 30, 2009#2🙄 Hmmm looks very nice ,🤤 and very pricey too boot i bet.
cyberfroggTX · Mar 30, 2009#3nice! lol These would be useful.. I want some! everyone makes fun of my squaky horn.. xD thats how my car got its name- Fluffy... lol
SMALLNUMBERSHawthorne CA! · Mar 30, 2009#4ooooh, i want one too... i miss my other car's horn. 🙁
these would be fresh too...
Picture lost · www.publicdomainpictures.net
🤤
marcustoronto, canada · Mar 30, 2009#5i wish i can put loud horn..but i cant even remember when the last time i used them..
Meteorite_MartyThread starterWaterloo, Ontario, Canada · Mar 30, 2009#6I found the stock horn very wimpy. Not that I need to sound macho, but I at least want to be heard for safety. I have beeen cut off several times by people that weren't paying attention and didn't hear my horn. Safety first!
PHXDEMONPhoenix, AZ · Mar 30, 2009#7Nice. How much were those?
YarisSedanCalifornia - Bay Area · Mar 30, 2009#8Do you know the part number for the splitter cable. I was thinking of doing the same thing.
Meteorite_MartyThread starterWaterloo, Ontario, Canada · Mar 30, 2009#9Not sure what the part number is, since the instructions are all in Japanese. It says 08522-52010. I don't think that is just for the wire splitter.
Meteorite_MartyThread starterWaterloo, Ontario, Canada · Mar 30, 2009#10 Originally Posted by
PHXDEMON ↑ Nice. How much were those?
You guys in the USA can get them for around $70 from Sigma Automotive, then add shipping and taxes. This price DOES NOT include the cable splitter, which you will need.
http://www.sigmaautomotive.com/horns/horns.php I paid around $120 US, with shipping and the cable splitter included. The cable splitter alone is $22 US.
I got both from JDMPit on ebay.
Installed tonight. HUUUUUUUUUGE difference. The horn is so loud and clear. I didn't have to upgrade the 10Amp to anything higher either. Held the horn for short intervals, and lengthy intervals of around 10 or more seconds.
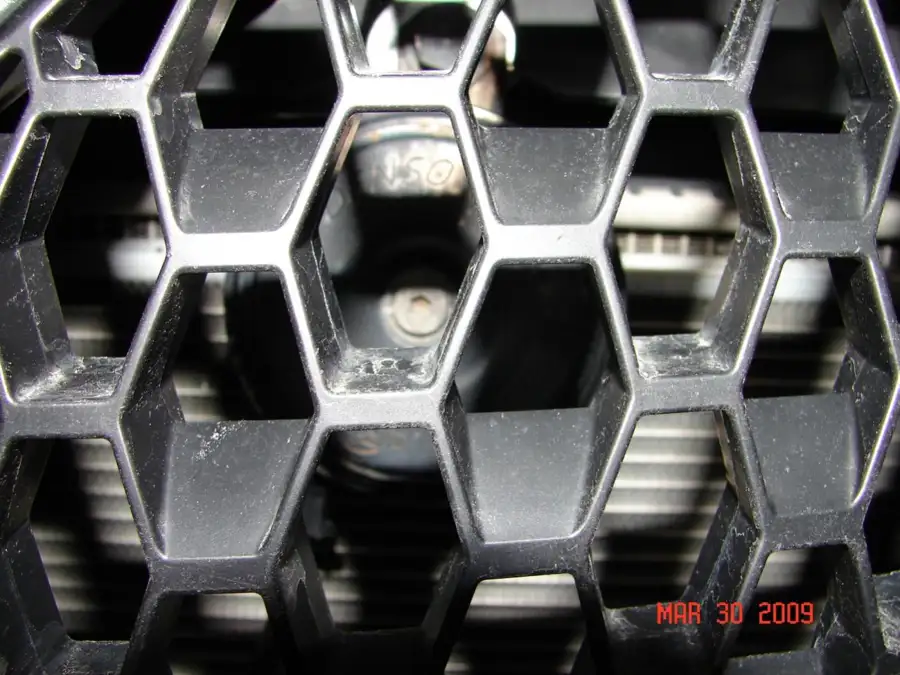
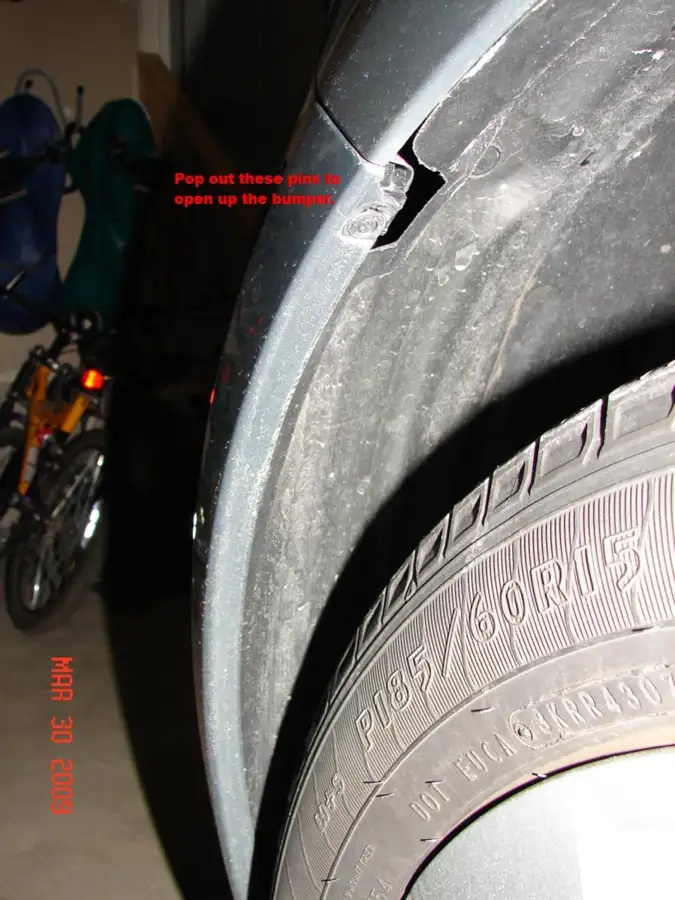
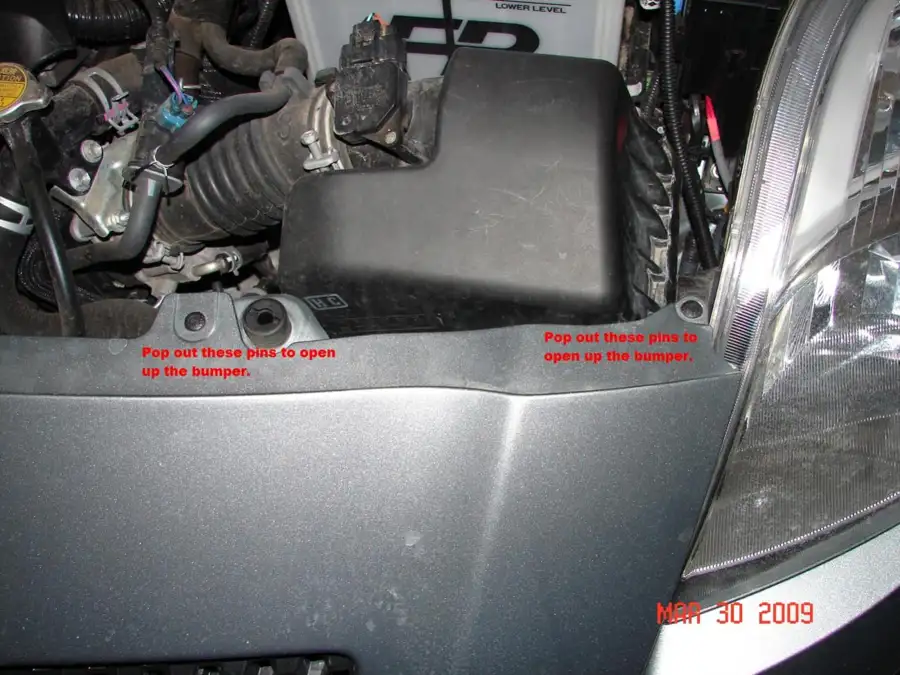
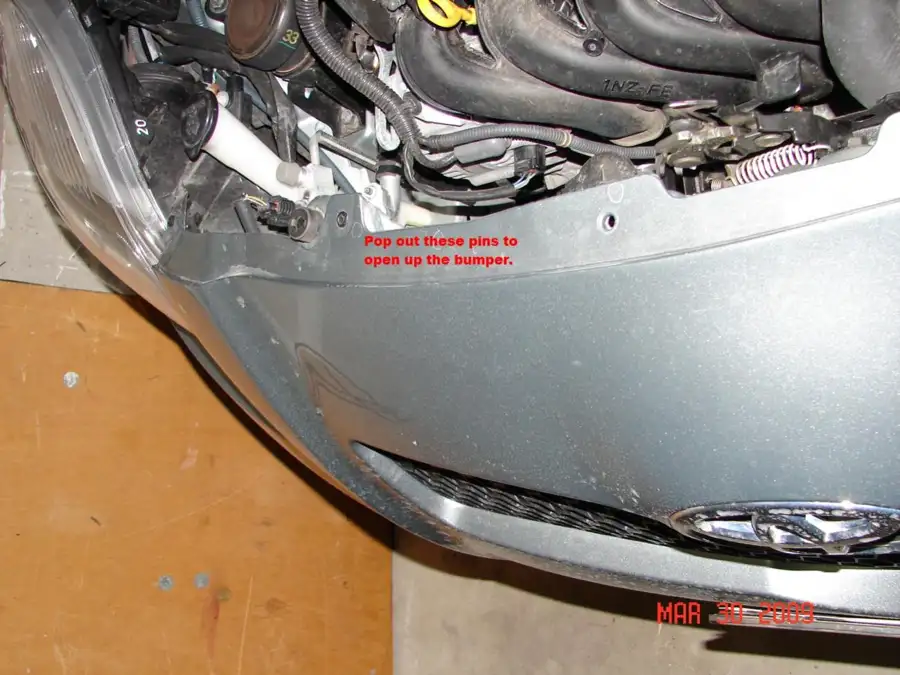
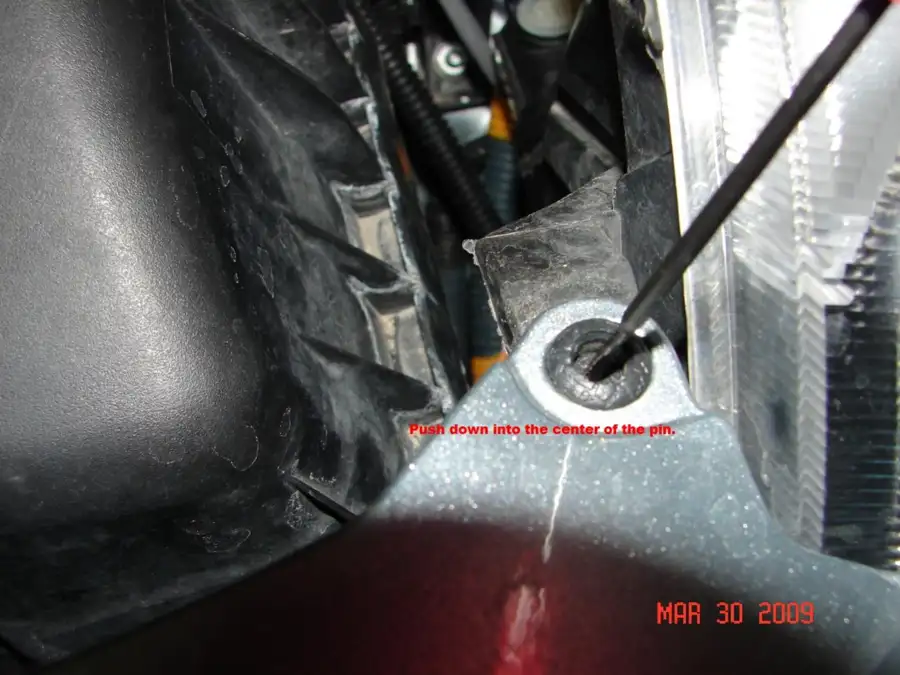
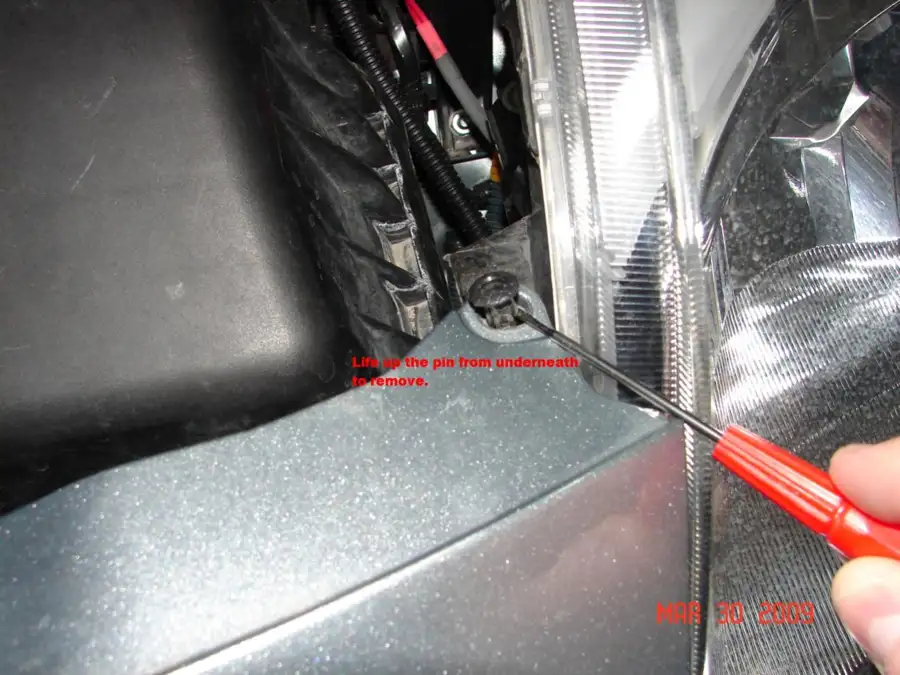
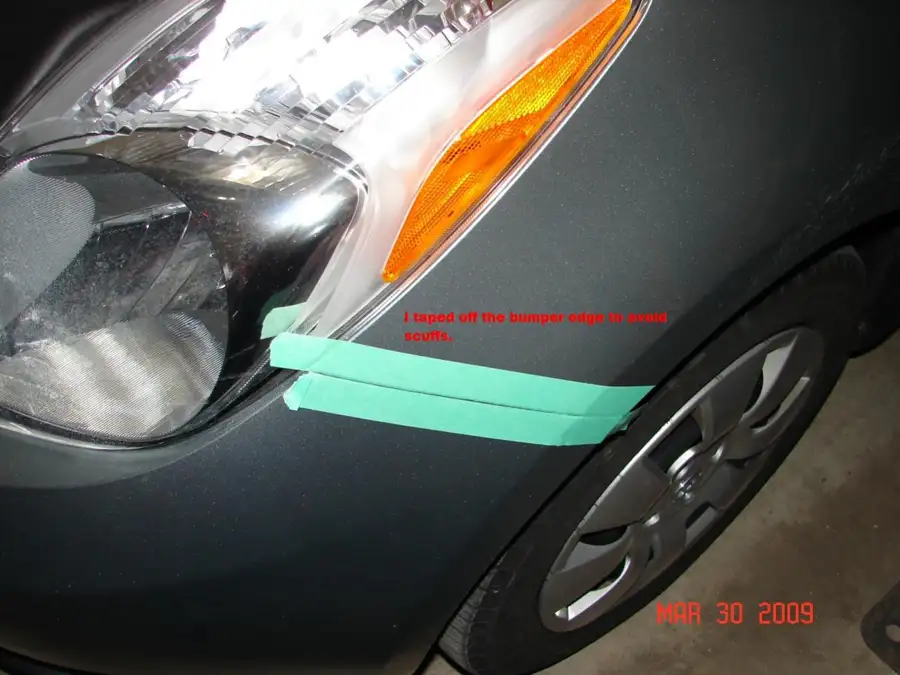
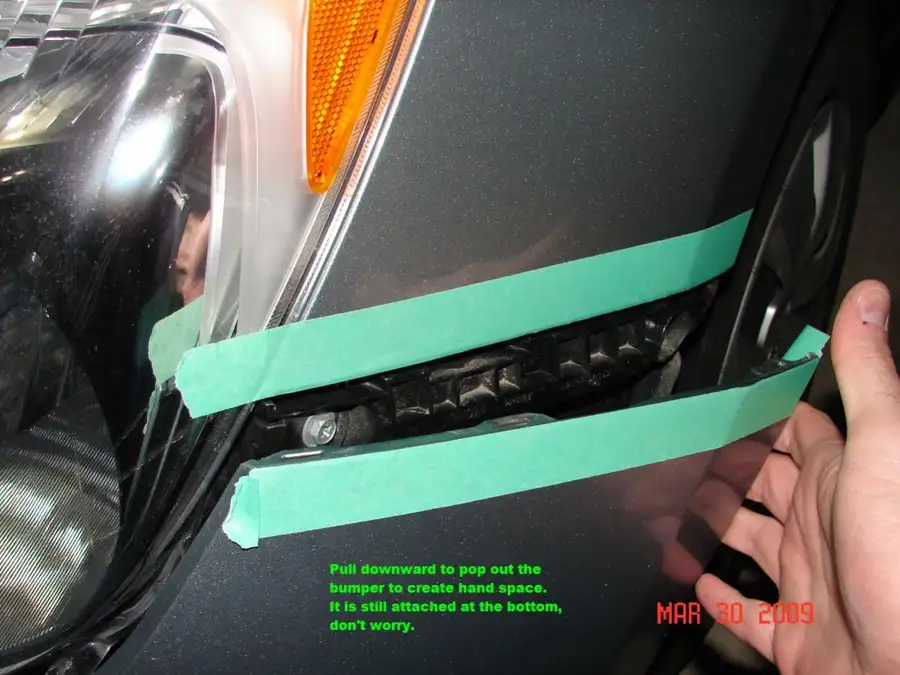
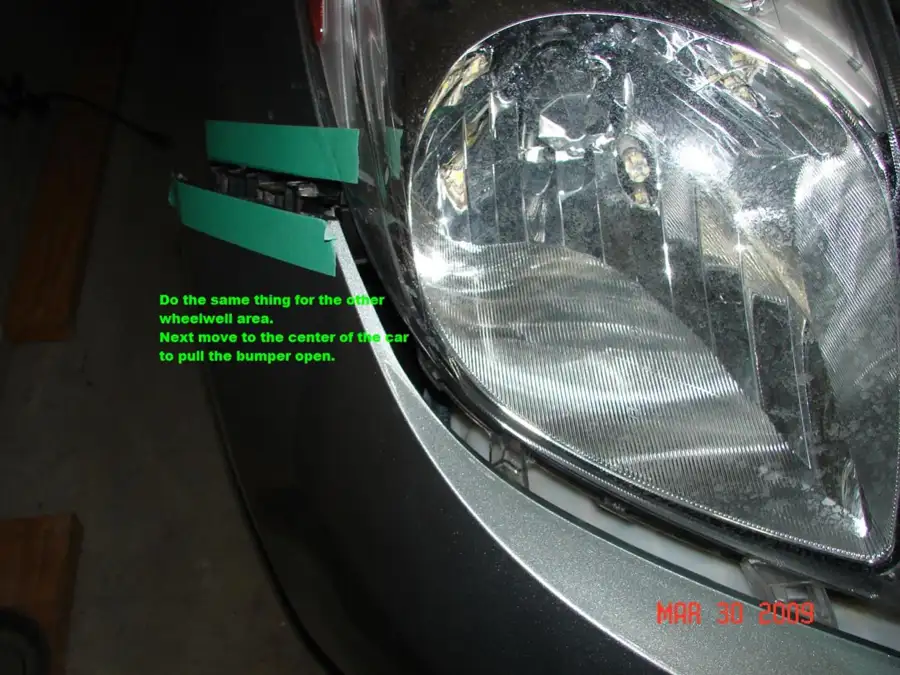
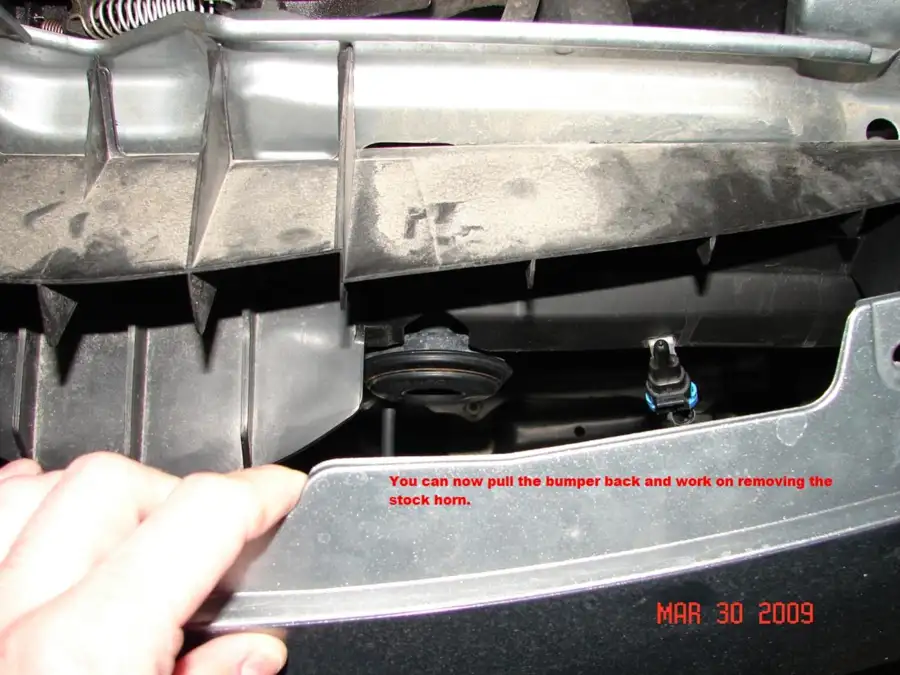
Installation is straight forward, plug-and-play. Its a bit tricky, because I did not remove the bumper and therefore was quite cramped for my hand space. It is very possible to get it done, just a bit awkward to hold the tools and your lighting while keeping the bumper pryed open. It can be done, just wear some rubber gloves and a long sleeve shirt or you will have sliced hands for sure!
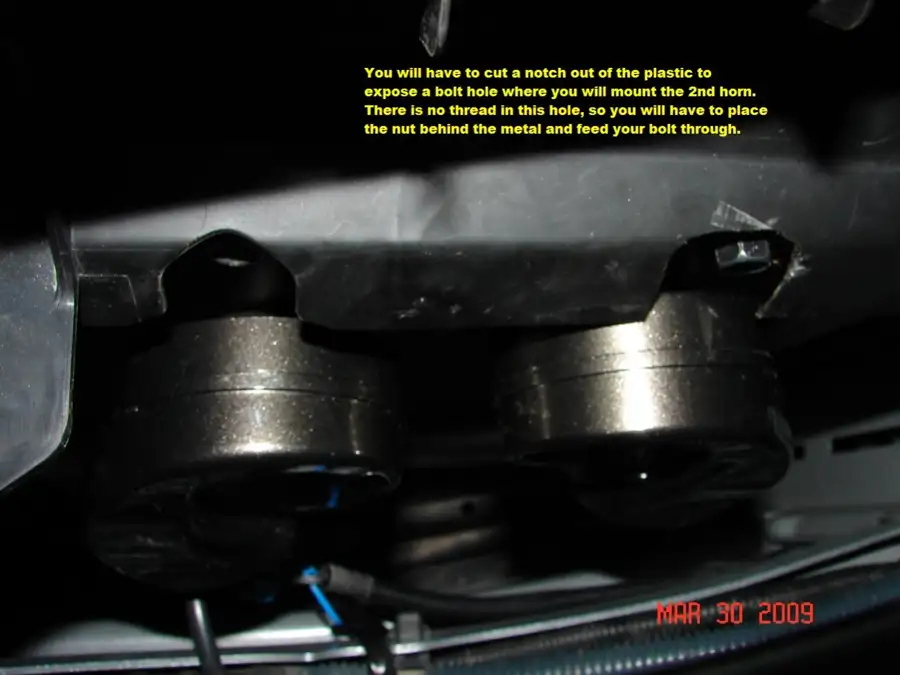
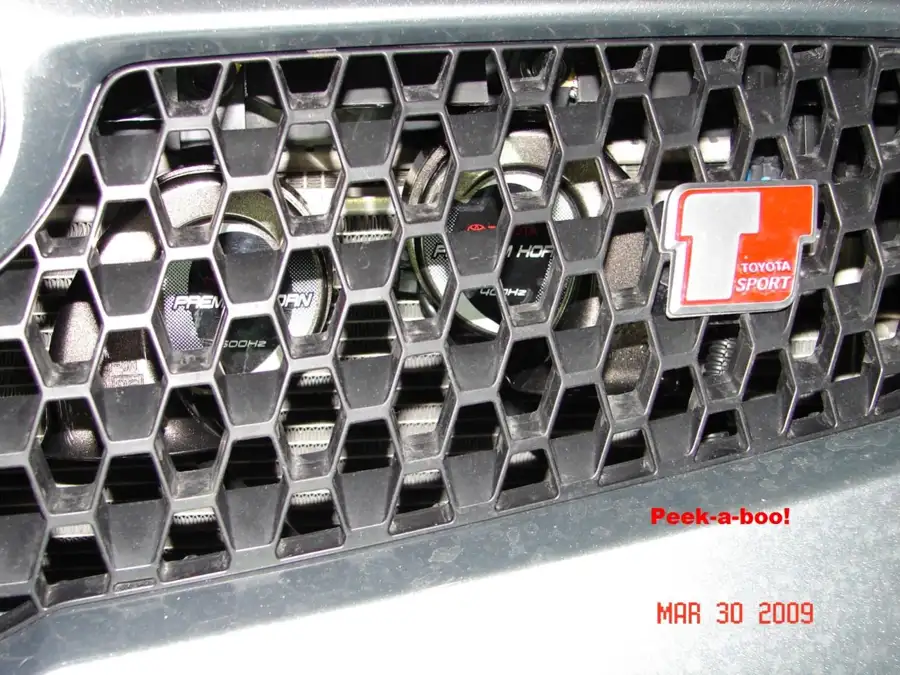
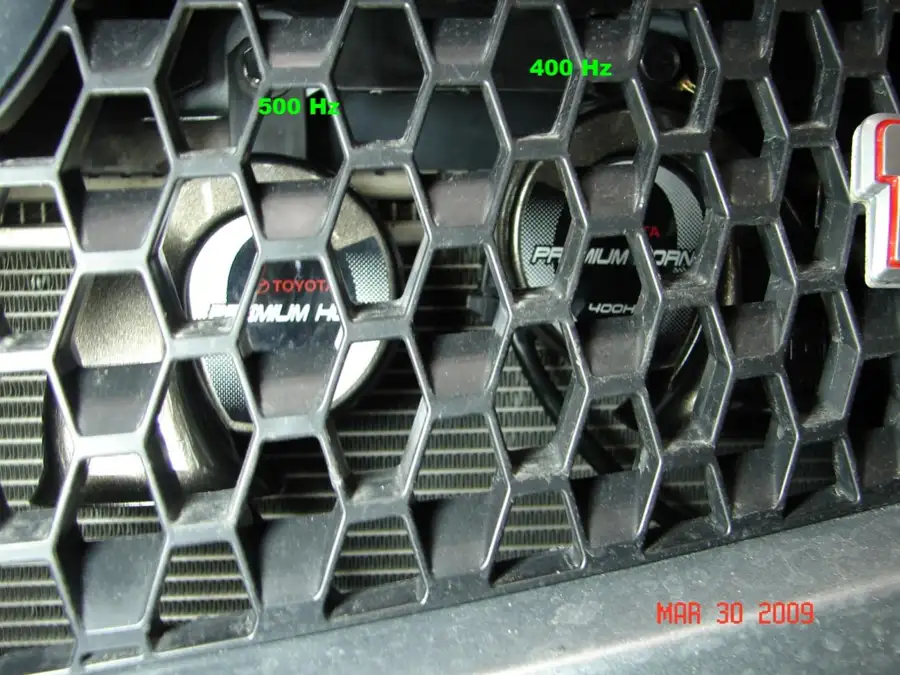
Here are my pictures, a mini DIY, if you will. Pictures are labelled with notes. I didn't go into the intimate details such as unhooking the negative battery teminal, removing the stock horn, unplugging the stock wiring, and mounting the new pair, as I expect anyone can turn a ratchet. The wiring is simple, and can be followed easily by the pictures in the supplied instructions (the text is in Japanese).
For the wiring, basically you mount the 2 horns to the chassis with bolts. Then run a single grounding wire between the pair and attach each end of the ground wire to the bolt points of the chassis. Tighten each bolt.
Next you install the splitter to your factory feed. All plug-and-play ends. Simple. Reattach your battery and test. Put the bumper back on, and you are good to go!
Here is the rest of the pictures. Hope this helps! Horn sounds awesome. Definitely an improvement.
Nice DIY instructions.
JrillaFargo, ND · Aug 13, 2009#15I know this is an old thread, but I just read it and wanted to install these the first day I bought my Yaris. I was 10 minutes down the interstate from the dealer when some guy drifted right into me, no signal, and I could hardly hear the horn myself (And no, the music was not loud).
I looked around online and eBay for these at a reduced price since I am slightly strapped for cash right now after buying a new car, and then I had the idea of pulling the horn off a newer Toyota at the salvage yard. I luckily found a 2005 Camry XLE with what appears to be the same horn shown here except all black plastic. I just got them today so I haven't installed them yet, but for $5 including the harness, I can't complain as long as they work. The vehicle was damaged in the rear and on the drivers side, so there shouldn't be anything wrong with them.
I primarily wanted to post this to help out anyone else who wasn't excited about the $75-$100 cost to get a reasonable horn. I can't believe that harness was $22, I mean it is just 2 connectors and 2 wires.
Thanks a lot for the pictures and the effort posting this DIY. Very helpful.
RedRideMiddletown, NY · Aug 15, 2009#16I just orderd the horns from eBay with all the proper hadware/splittercable etc.
Yeah, pricy but, it it helps avoid an accident (or worse) it's worth every penny.
As it is, I find that poeople just do not hear the stock horn. I can barely hear it myself.
Thanks for the DIY Marty! 🙂
Meteorite_MartyThread starterWaterloo, Ontario, Canada · Aug 15, 2009#17No problem for the DIY. Let me know if you have any other questions as you go along. My horns are still working great, no rust or anything at the bolt locations. Scares the heck out of animals on/near the road, which I can hardly say the same for the stock horn. The new horn gets people's attention, that is for sure!
Meteorite_MartyThread starterWaterloo, Ontario, Canada · Aug 15, 2009#18 Originally Posted by
Jrilla ↑ I know this is an old thread, but I just read it and wanted to install these the first day I bought my Yaris. I was 10 minutes down the interstate from the dealer when some guy drifted right into me, no signal, and I could hardly hear the horn myself (And no, the music was not loud).
I looked around online and eBay for these at a reduced price since I am slightly strapped for cash right now after buying a new car, and then I had the idea of pulling the horn off a newer Toyota at the salvage yard. I luckily found a 2005 Camry XLE with what appears to be the same horn shown here except all black plastic. I just got them today so I haven't installed them yet, but for $5 including the harness, I can't complain as long as they work. The vehicle was damaged in the rear and on the drivers side, so there shouldn't be anything wrong with them.
I primarily wanted to post this to help out anyone else who wasn't excited about the $75-$100 cost to get a reasonable horn. I can't believe that harness was $22, I mean it is just 2 connectors and 2 wires.
Thanks a lot for the pictures and the effort posting this DIY. Very helpful.
Nice idea. I was actually going to do the same, and get mine from a guy selling them used on eBay. His horns were off a Tundra, and were the same 400 and 500 Hz types. All black just like what you decribed. He was selling for $20, but unfortunately would not ship to Canada.
I got the new horns installed and couldn't be happier. I have only had this car less than 2 weeks and have already needed to use my horn three times. I had to get these, and for only $10 with the harness, I couldn't pass it up. It was such an easy install too.
Nice idea. I was actually going to do the same, and get mine from a guy selling them used on eBay. His horns were off a Tundra, and were the same 400 and 500 Hz types. All black just like what you decribed. He was selling for $20, but unfortunately would not ship to Canada.
Marty, if I run across another set I will let you know.
just bought a set off ebay. Marty, any issues w/your original fuse or do you think I should change it out to higher rating?
RedRideMiddletown, NY · Mar 30, 2010#21I also got (and installed) a set from eBay last summer.
I haven't had a problem with the stock fuse.
Yaris4everAustralia · Mar 30, 2010#22That's awesome but im hopeless at doing stuff like that 😢
RedRideMiddletown, NY · Mar 30, 2010#23 Originally Posted by
Yaris4ever ↑ That's awesome but im hopeless at doing stuff like that 😢
It's basically all just P&P and you really can't go wrong. 🙂 Perhaps you have a friend who can help you if needed?
It's definately a worth while saftey mod. Just the other day It helped avoid an accidernt as unlike the wimpy stock horn, the premium horns demand attention.
Originally Posted by
guyver408 ↑ just bought a set off ebay. Marty, any issues w/your original fuse or do you think I should change it out to higher rating?
No problems with fuse. Still use the horn.... everyday. Loud as ever.
Just completed the installation & my horns sound great - just like my dad's old police cruiser!!
Thanks much Marty for the link & photo instructions - made it much easier for a non hands on guy. Part that took the longest was taking off & putting on the bumper - thanks for the tip of not having to remove the bottom mounting bolts.
Had a funny rough start after reattaching the battery - seemed just the first time. Not sure if it had to do w/the battery disconnected. Running fine for now.
JerkrattFair Lawn, NJ · Apr 10, 2010#26nemelekArizona · Apr 10, 2010#27Great horn! I had once put an air horn in a Dodge truck. It involved a compressor and tank. It got people's attention when I honked.
Yaris0609Tucson, AZ · Apr 10, 2010#28I installed the premium horns today, and just a few things I noticed...
you don't have to cut the panel if you remove it first. Takes about 2 minutes if the clips are stubborn.
don't follow the instructions. the bumper will not go back in, the horns are too large for the spots they show on the instructions.
Goddamn these things are loud!!!
guyver408CA · Apr 11, 2010#29hmmm... bumper clipped on fine & horns fit on my install.
I'm so thankful that I installed this morning since later in the afternoon someone almost backed into me because they were not paying attention. The loud horn sure got their attention - wimpy horn would have resulted in sure crash.
BilliamUSA · Apr 11, 2010#30 Originally Posted by
Meteorite_Marty ↑ I am installing the Toyota Premium Horn kit tonight. These can be seen and heard at:
http://toyota.jp/dop/recommend/premiumhorn/index.html I am going to use the Toyota horn splitter cable, to preserve the existing wiring and to make everything plug-and-play.
I will post pictures of installation later. I will try to take some pictures as I go along, in case anyone is interested in doing this on their own.
Excellent install. 👍
I took a cheaper route and added a 2nd horn to my stock horn. Picked up a Fiamm low-tone Highway Blaster for less than $20. It, along with the stock horn, have a kinda late model VW sound to them. It sounds good...and is much louder.
BTW, I took the bumper completely off. And a few inches to the left of the stock horn's theaded hole (more toward the middle) is another unused threaded hole (at least in my car). I was able to just thread in a stainless steel bolt....no need for a backing nut or trimming that plastic shield.
Originally Posted by
guyver408 ↑ hmmm... bumper clipped on fine & horns fit on my install.
I'm so thankful that I installed this morning since later in the afternoon someone almost backed into me because they were not paying attention. The loud horn sure got their attention - wimpy horn would have resulted in sure crash.
Exactly!
The stock horn is actually a safety hazard IMO.
The install is fine. I wouldn't have posted a DIY if the install did not succeed. The pictures speak from themselves, as well as other people doing the same thing as I did; the horns fit without any problem. I even have room to spare where I placed them, and the horns are tightly attached to the chassis.
Originally Posted by
Yaris0609 ↑ I installed the premium horns today, and just a few things I noticed...
you don't have to cut the panel if you remove it first. Takes about 2 minutes if the clips are stubborn.
don't follow the instructions. the bumper will not go back in, the horns are too large for the spots they show on the instructions.
Goddamn these things are loud!!!
how can I install a steam whisle?
nemelekArizona · Apr 14, 2010#35It involved installing a compressor and tank.
Yaris0609Tucson, AZ · Apr 14, 2010#36 Originally Posted by
Meteorite_Marty ↑ The install is fine. I wouldn't have posted a DIY if the install did not succeed. The pictures speak from themselves, as well as other people doing the same thing as I did; the horns fit without any problem. I even have room to spare where I placed them, and the horns are tightly attached to the chassis.
Your DIY is perfect. I know there are some people like me who would not do this mod because you trimmed the panel. I didn't want to trim, so I looked at another way around it. If you follow the instructions the horns come with to a "T", the bumper will not go on, the horns stick out too far.
If you place them like you did, it works perfectly.
There is a threaded hole to the left of the stock location, which is the location for a support piece with the hood latch on the sedan (I believe). you can use the supplied bolts and spacers, however they stick out too far, and the underside of the black piece would need to be trimmed out a little. I am sure though, you could follow the instructions the kit came with to a "T" if you have a sedan.
I am not knocking on this DIY, its the reason I bought this kit.
No worries. More than one way to install it I am sure.
If it mounts, and makes a noise, you're doing something right, whichever way you've accomplished it! ;)
xtremesniperCanada · Jul 26, 2010#38Forgive me for the thread bump, but I figured it would be better than starting a new one about the same thing...
I was recently in discussions with my dealer to upgrade my horn to something a little... better. I came across these ones a while back and I liked the sound based on the Toyota Japan website. Turns out they are a Japan only accessory in "official" terms, so the dealer themselves can't order them in as parts. However, they offered to install it for me if I can get it myself and bring it to them.
I live near Toronto. Any ideas on where I can buy this from? Preferably a physical store, but if not then at least a respectable and trustworthy online site that ships to Canada without charging an arm and a leg.
Any suggestions?
Iggy888Etobicoke, ON Canada · Jul 27, 2010#39 Originally Posted by
xtremesniper ↑ I live near Toronto. Any ideas on where I can buy this from? Preferably a physical store, but if not then at least a respectable and trustworthy online site that ships to Canada without charging an arm and a leg.
Any suggestions?
You could purchase the horn kit from
www.jdmpit.com Their price for the Toyota Premium Horn (w/ Splitter Cables) is $113 USD and includes shipping via USPS to Canada. Going via USPS is good since you don't get burned by courier brokerage fees. I would say they are trustworthy vendors. I am from Toronto too and purchased a shifter from them in April. It arrived within a few weeks with no problems.
If the price works for you then the only down-side is that at the moment, this horn is out of stock so you might have to wait.
Originally Posted by
Iggy888 ↑ You could purchase the horn kit from
www.jdmpit.com Their price for the Toyota Premium Horn (w/ Splitter Cables) is $113 USD and includes shipping via USPS to Canada. Going via USPS is good since you don't get burned by courier brokerage fees. I would say they are trustworthy vendors. I am from Toronto too and purchased a shifter from them in April. It arrived within a few weeks with no problems.
If the price works for you then the only down-side is that at the moment, this horn is out of stock so you might have to wait.
I am in Waterloo, Ontario, and got my horn from JDMPIT as well.
Thanks for doing this write up, Marty. I just ordered a set from JDMPit. I'm really looking forward to replacing my "Road Runner" horn.
xtremesniperCanada · Jul 30, 2010#42Thanks, I'll take a look. As of right now I was offered a Sienna horn as a replacement. I'm going to go in to see how it sounds. It's going to be much cheaper (free) if I end up liking it.
kacWest/Central Illinois · Jul 30, 2010#43 Originally Posted by
Wildcat ↑ Thanks for doing this write up, Marty. I just ordered a set from JDMPit. I'm really looking forward to replacing my "Road Runner" horn.
+1 ordered mine today.
Glad to help! :)
kacWest/Central Illinois · Aug 13, 2010#45I followed this to the T (without the splitter thing...) Works great, and sounds great!
WildcatIowa · Aug 13, 2010#46 Originally Posted by
kac ↑ I followed this to the T (without the splitter thing...) Works great, and sounds great!
I just got my kit from JDMPit. Which mounting holes did you use? There seems to be different ways of mounting them. The instructions that came with it show to mount one horn on the hood latch bracket. Now I admit my Japanese is rusty so I'm not sure if these instructions are applicable for the Yaris...
Did you just remove the top part of the bumper or take the whole thing off to install?
I just removed the retainer clips from the top of the bumper and pulled the bumper back enough to work on it.
As far as mounting the horns, yeah, it can be a bit confusing and you have to be a bit inventive.
Personally, I made a simple bracket to mount both horns on it, then mounted the bracket using the stock hole.
kacWest/Central Illinois · Aug 13, 2010#48I also just removed the push pin clip things and pulled the bumper back, then I cut the black plastic thing to reveal that hole that is few inches to the right of where the current horn is installed and installed the 2nd horn right there (just like the guy who made this thread).
Rock and Roll.
WildcatIowa · Aug 15, 2010#49Just finished my install. As others have done, I also removed the plastic cover instead of cutting into it.
I also used the second smaller threaded hole just to the left of the stock horn. I reused the stock bolt and bolt included in the kit. Since that was too long the only modification I had to do was to cut it shorter with my Dremel. Very quick install.
I also used a short piece of scrap wood, about 6 inches, to wedge between the bumper and the radiator. Love the new horns.
RevssonSoutheast Wisconsin · Aug 15, 2010#50What does removing the plastic do...or maybe I should ask what the plastic does in the first place?
 Yarisworld